NOTA! Seguir estes passos assegura que tanto a tapeçaria
como os xadores ISOFIX do automóvel não se mancham
ou danicam. Nódoas e pequenas danicações poderão
impedir uma correta operação.
!
NOTE! Following these steps will not only ensure that the
vehicle’s upholstery is protected but also that the ISOFIX
connectors are neither stained nor damaged. Damage and
stains could obstruct smooth operation.
!
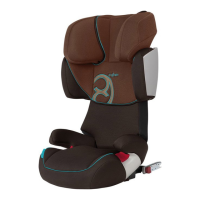
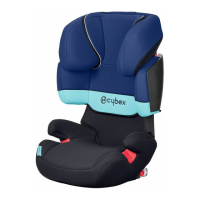
• Coloque a cadeira de segurança no assento apropriado do
automóvel.
• Assegure-se de que o encosto da cadeira (a) encosta recto e
perfeitamente ao encosto do assento do automóvel. Isto para
que a criança nunca viaje, de maneira alguma, numa posição
horizontal.
• Ao usar os xadores ISOFIX (i) no automóvel, faça o favor
de vericar que o encosto da cadeira Solution Q2-x está
perfeitamente alinhada e em contacto com o assento do carro.
Esta posição pode ser ajustada através da patilha (v) localizada
debaixo da cadeira auto.
• Em caso de que o encosto de cabeça do automóvel interra
na instalação, de-lhe a volta ou retire-o completamente
(excepção: veja a secção “A MELHOR POSIÇÃO DENTRO
DO AUTOMÓVEL”). O encosto da cadeira (a) ajusta-se a
praticamente a qualquer inclinação do automóvel.
• Place the child safety seat on the appropriate seat in the car.
• Please ensure that the backrest (a) of the child safety seat rests
at against the backrest of the car seat so that the child seat is
under no circumstances in a lying position.
• When using the ISOFIX anchorage points (i) in the car, please
ensure that the backrest of the CYBEX Solution Q2-x is
perfectly aligned and in full contact with the back of the car seat.
The position can be adjusted using the handle (v) located on
the bottom of the child seat.
• Should the headrest of the vehicle seat interfere, please pull it
out completely, turn it around or take it off entirely (exceptional
case, refer to the section “THE BEST POSITION IN THE CAR”).
The backrest (a) optimally adjusts to almost any inclination of
the car seat.
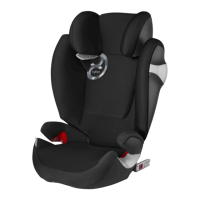
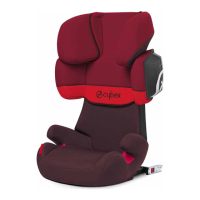
• Solte os xadores ISOFIX (w) em ambos os lados
pressionando e puxando para trás os botões vermelhos (y).
• Puxe a cadeira para fora das guias ISOFIX (u).
• Rode os xadores ISOFIX 180°.
• Puxe a patilha (v) localizada debaixo da cadeira infantil e ao
mesmo tempo puxe os xadores ISOFIX (w) para fora tanto
como lhe seja possível.
• Release the ISOFIX connectors (w) on both sides by pushing
and pulling back the red release buttons (y).
• Pull the seat out of the ISOFIX guides (u).
• Rotate the ISOFIX connectors 180°.
• Pull the handle (v) located at the bottom of the child car seat
and push the ISOFIX connectors (w) as far as possible.
COMO SOLTAR OS FIXADORES ISOFIX RELEASING THE ISOFIX CONNECTORS
COMO COLOCAR A CADEIRA INFANTIL NO AUTOMÓVEL PLACING THE CHILD SEAT IN THE CAR