
P
Patrick CarrollAug 14, 2025
Why is Cyrus i9-XR remote not working?
- Ddarrell69Aug 14, 2025
If your Cyrus Amplifier remote is not working, check the batteries.
Why is Cyrus i9-XR remote not working?
If your Cyrus Amplifier remote is not working, check the batteries.
What to do if Cyrus i9-XR Amplifier output is overloaded?
If your Cyrus Amplifier output is overloaded, it's likely due to a short-circuit at the loudspeaker terminals. Turn off the amplifier and inspect the speaker wiring for any short circuits, both at the amplifier's rear panel and the speaker terminals themselves.
Why does my Cyrus i9-XR Amplifier overheat?
If your Cyrus Amplifier overheats, it will automatically switch off until it cools down. To prevent this, improve ventilation around the amplifier. If the issue persists, the impedance rating of your speakers may be too low.
Why is my Cyrus i9-XR not turning on?
If your Cyrus Amplifier is not working, ensure it is not in Standby mode. The standby indicator should be WHITE when the unit is active.
What to do if source is not working on Cyrus i9-XR Amplifier?
If your Cyrus Amplifier is not playing sound, verify that the connected source is working correctly. For example, if using a CD player, ensure it is playing and not paused.
Why does Cyrus Amplifier sound distorted?
If the sound from your Cyrus Amplifier is distorted, ensure the sample rate from the source is within the amplifier's specifications and that the program is encoded as two-channel stereo.
Why did my Cyrus i9-XR Amplifier automatically turn off?
To save energy, the Cyrus Amplifier will automatically enter Standby mode if no music plays for 20 minutes.
How to calibrate touchpads on Cyrus i9-XR Amplifier?
If the touchpads on your Cyrus Amplifier are not responding, manually operate the Standby touchpad from the front panel to calibrate them. Calibration is advisable after disconnecting the unit from the mains.
How to change sensitivity of touchpads on Cyrus i9-XR Amplifier?
If the touchpads on your Cyrus Amplifier are not sensitive enough, adjust their sensitivity in the setup menu.
Covers warnings, instructions, cleaning, water, heat, ventilation, object entry, accessories, attachments, and moving the product.
Details power sources, overloading, cord protection, lightning protection, battery safety, polarized connectors, and mains plug access.
Details connecting the AC cord, voltage requirements, and notes on user-replaceable fuses.
Explains when to seek service, replacement parts, and safety checks by qualified personnel.
Advises contacting authorized Cyrus service centers and finding details on the website.
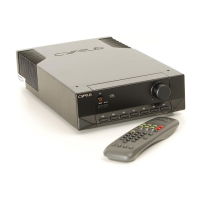
Congratulates the user on their Cyrus Hi-fi product and encourages registration.
Lists included accessories and advises on choosing a ventilated location for the amplifier.
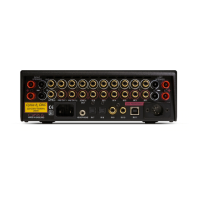
Illustrates and labels all connection ports on the rear panel of the amplifier.
Advises disconnecting mains power before making or breaking audio connections to prevent damage.
Details connecting stereo analogue sources like CD/DVD players, tuners, TVs, and recorders.
Explains connecting turntables with moving-magnet cartridges to the PHONO/MM input and ground terminal.
Covers connecting digital audio sources via optical/coaxial and USB audio input for computer audio.
Guides on fitting compatible plugs and connecting speaker cables ensuring correct polarity.
Explains how to interpret directional arrows on speaker cables for correct signal flow.
Explains how to use dual speaker connections for bi-wirable speakers with dual bi-wire cables.
Details using the pre-amplifier output with additional power amplifiers for upgraded sound systems.
Warns to remove bridging links from speaker terminals and ensure bi-wire connections for bi-amped systems.
Explains using the fixed output for recording or connecting to a second amplifier.
Guides on connecting headphones to the 3.5mm stereo jack socket and using the PHONES control.
Details connecting Cyrus and non-Cyrus surround sound decoders for shared front speakers.
Explains unified system control by connecting components via MC-BUS sockets.
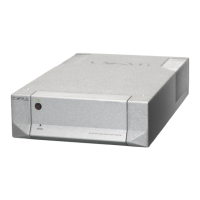
Describes the PSU-XR's function, connection, and benefits for sonic performance.
Instructs on connecting the amplifier to the AC mains supply via the power inlet and cable.
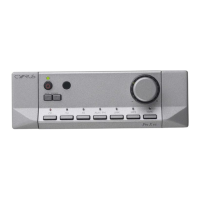
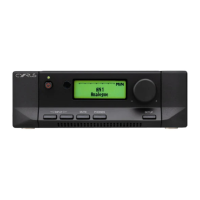
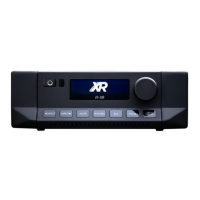
Identifies and explains the functions of the touchpads on the front panel.
Details how to turn the unit on/off via standby and the auto-standby feature.
Guides on selecting audio inputs using the touchpads and the display.
Explains special settings for AV inputs when used with surround decoders, locking volume.
Instructions for playing DSD audio files from a computer using specialized software.
Covers setting speaker and headphone volume, safe levels after standby, and adjusting channel balance.
Details muting the audio and switching to headphone output, with a hearing safety warning.
Explains choosing digital filter alignments for subtle sound changes and notes on analogue inputs.
Guides on playing back recordings, making recordings via Fixed Out, and using a second amplifier.
Introduces the iR14 remote, its capabilities for controlling Cyrus components, and programmability.
Explains the backlight feature and provides instructions for fitting AAA batteries.
Details how to send commands to Cyrus amplifiers, CD players, and streamers.
Explains how to set the remote to amplifier mode and lists specific amplifier commands, noting XR series compatibility.
Provides a detailed list of numbered remote control buttons and their functions for amplifier control.
Explains setting the remote to CD player mode and lists commands, noting XR series compatibility.
Lists specific remote control commands for operating a Cyrus CD player, including phase selection.
Explains setting the remote to Audio Streamer mode and lists available commands.
Lists specific remote control commands for operating a Cyrus Audio Streamer, including cursor and playback controls.
Details controlling the Phono Signature using the remote, operating similarly to front panel controls.
Lists specific remote control commands for the Phono Signature, including standby, display, and filter options.
Explains how to program the remote to learn commands from other devices like TVs and satellite receivers.
Provides steps for preparing the remote and environment before starting the command learning process.
Guides on verifying if commands were learned successfully and notes on re-programming.
Offers advice on resolving problems encountered during the learning process, such as battery issues or compatibility.
Explains how to use the remote to send learned commands to TV or Satellite receivers.
Introduces setup menus for customisation and outlines available setup options.
Provides step-by-step instructions for navigating setup menus using both the front panel and the remote control.
Covers default input, headphone modes, balance, standby sensitivity, and DAC filter settings.
Details configuring inputs, including source type, naming, volume offset, and max volume limits.
Explains settings for display polarity, contrast, and brightness.
Covers LED brightness, language selection, factory reset, and firmware information.
Details how to upgrade operational firmware for new features and fixes, and where to find updates.
Provides solutions for common problems like no sound, mute issues, and touchpad malfunctions.
Explains the amplifier's error codes for Mains, Amp Over Current, Thermal, and PSU faults.
Lists detailed technical specifications for power, performance, dimensions, and audio formats.
Outlines the warranty period, terms, exclusions, and claims process.
Explains the WEEE symbol and proper disposal procedures for the product.
| Type | Integrated Amplifier |
|---|---|
| Damping Factor | >150 |
| Analogue inputs | 4 x RCA |
| Digital inputs | 2 x Optical |
| Outputs | Pre-out |
| Dimensions (H x W x D) | 215mm x 360mm |