4
Management Options
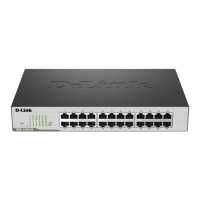
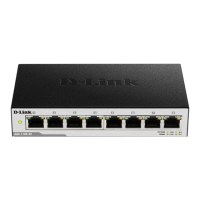
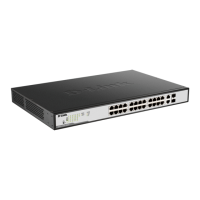
The DGS-1100-10MP switch can be managed through
the Web UI or the D-Link Network Assistant (DNA)
utility.
If you want to manage only one D-Link Smart switch, the
Web-based management is the better option. Each switch
must be assigned its own IP address, which is used for
communication with Web UI. The PC should have an IP
address in the same range as the switch.
However, if you want to manage multiple D-Link switches,
the DNA utility is the better option. Using the DNA utility,
you don't need to change the IP address of your PC and it
is easy to start the initial setting of multiple switches.
Please refer to the following detailed installation instructions
for the Web-based management and DNA.
1. Web-Based Management Interface
After a successful physical installation, you can
configure the switch, monitor the LED panel and
display statistics graphically using a Web browser,
such as Microsoft Internet Explorer, Firefox, Chrome or
Safari.
You need the following equipment to begin the web
configuration of your device:
• A PC with a RJ-45 Ethernet connection
• A standard Ethernet cable
1. Connect the Ethernet cable to any of the ports in front
panel of the switch and to the Ethernet port on the PC.
2. In order to log in the Web UI, the PC must have an
IP address in the same range as the switch. For
example, if the switch has an IP address of 10.90.90.90,
the PC should have an IP address of 10.x.y.z (where
x/y is a number between 0 and 255, z is a number
Note: The switch's factory default IP address is
10.90.90.90 with a subnet mask of 255.0.0.0 and a
default gateway of 0.0.0.0.
between 1 and 254) and a subnet mask of 255.0.0.0.
3. Open your Web browser and enter http://10.90.90.90
in the address box.
Note: The Web configuration can also be accessed
4. When the logon box appears, enter "admin" for the
password. Press OK to enter the main configuration
window.
through the DNA. You can click the IP hyper link in the
device list in the DNA to open the Web UI of the devices.
2. D-Link Network Assistant
The D-Link Network Assistant (DNA) is a program for
discovering switches with the same L2 network segment
connected to your PC. You can install DNA through the
autorun program or manually.
Additional Information
To find out more about D-Link products, please visit
the website
http://www.dlink.com/
Option 1: Follow these steps to install DNA via
the autorun program on the installation CD.
1. Insert the CD into your CD-ROM drive. The autorun
program will pop up automatically.
2. Click on the "Install DNA (D-Link Network Assistant)"
button and an installation wizard will guide you
through the process.
3. After successful installing you can find the DNA
under "Start > Programs > D-Link > DNA".
Option 2: Follow these steps to install DNA
manually.
1. Insert the CD into your CD-ROM drive.
2. From the Start menu on the Windows desktop choose
Computer.
3. Double click on your CD-ROM drive to start the
autorun menu, or right click on the drive to open the
folder. Select DNA (D-Link Network Assistant) and
4. Follow the on-screen instructions to install the
utility.
5. Upon completion, go to "Start > Programs > D-Link >
DNA" and open DNA.
Connect the switch to the same L2 network segment of
your PC and use DNA to discover the Smart switches.
E
N
G
L
I
S
H
2. D-Link Network Assistant
The D-Link Network Assistant (DNA) is a program for
discovering switches with the same L2 network segment
connected to your PC. You can install DNA through the
autorun program or manually.
Option 1: Follow these steps to install DNA via
the autorun program on the installation CD (in case
the installation CD is included):
1. Insert the CD into your CD-ROM drive. The autorun
program will pop up automatically.
2. Click on the "Install DNA (D-Li nk Network Assistant)"
button and an installation wizard will guide you through
the process.
3. After successful installing you can find the DNA
under "Start > Programs > D-Link > DNA".
Option 2: Follow these steps to install DNA manually
(in case the installation CD is included):
1. Insert the CD into your CD-ROM drive.
2. From the Start menu on the Windows desktop choose
Computer.
3. Double click on your CD-ROM drive to start the
autorun menu, or right click on the drive to open the
folder. Select DNA (D-Link Network Assistant) and
double click on the setup.exe file.
4. Follow the on-screen instructions to install the utility.
5. Upon completion, go to "Start > Programs > D-Link >
DNA" and open DNA.
Connect the switch to the same L2 network segment of
your PC and use DNA to discover the Smart switches.
Option 3: (in case the installation CD is not included):
1. Download the required software from the D-link website
at in the "Download" site
section of the switch model you have purchased and
unpack the archive.
2. Double click on the "Setup.exe" button to start the
installation of the software you have chosen.
3. Follow the on-screen instructions to install the utility.
4. Upon completion, go to "Start > Programs > D-Link >
DNA" and start D-Link Network Assistant.
For detailed information of DNA, please refer the user
manual.
Additional Information
Option 3: (in case the installation CD is not included):
Download DNA (D-Link Network Assistant) from Google
Play at https://play.google.com/store/apps/ and follow the
on-screen instructions to install the utility.
For detailed information of DNA, please refer the user
manual.
Additional Information
To find out more about D-Link products, please visit
the website http://www.dlink.com/.
 Loading...