DKVM-210H
2
ENGLISH
The DKVM-210H supports hot-plugging. You don't need to turn your computers off before installing
the device.
Installing the DKVM-210H
Package Contents
2-PORT KVM SWITCH WITH HDMI AND USB PORTS
DKVM-210H
SMART DESKTOP CONTROLLER
SWITCH BETWEEN YOUR COMPUTERS
If any of these items are missing from your packaging, please contact your reseller.
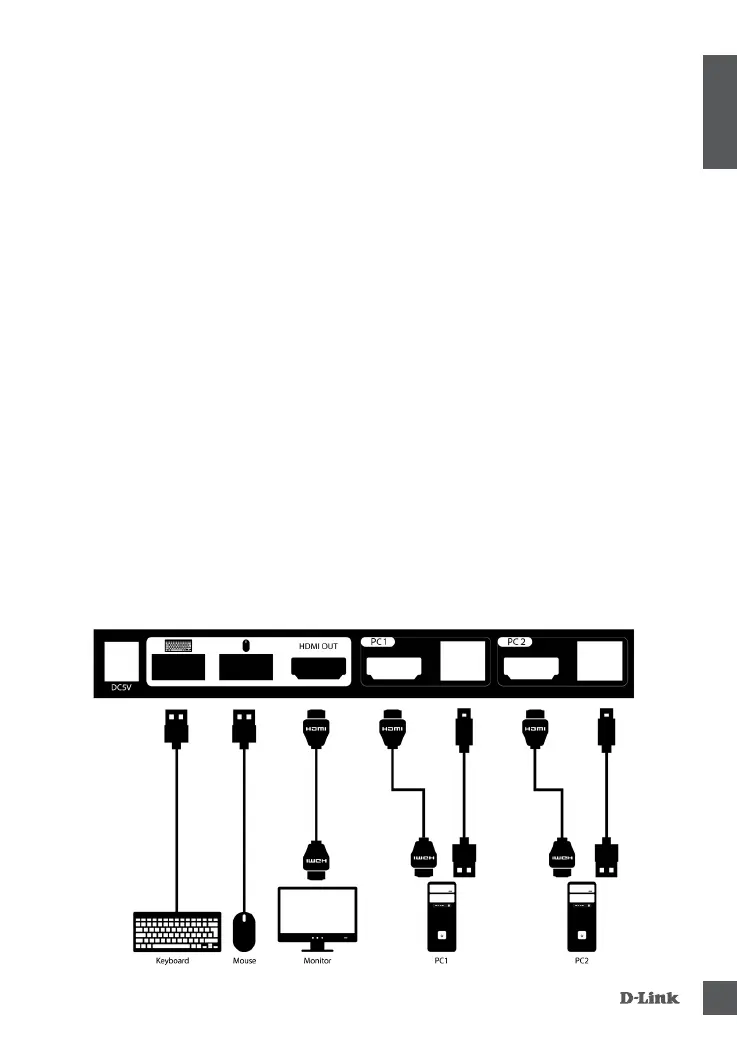
A. Attach your USB keyboard connector to the console USB Type-A port of the DKVM-210H.
B. Attach your USB mouse connector to the console USB Type-A port of the DKVM-210H.
C. Attach your monitor' s HDMI connector to the console HDMI port (HDMI OUT) of the DKVM-210H.
The following steps below apply to each computer that you are using with your DKVM-210H.
D. Attach the KVM cable (HDMI connector) to the HDMI port of the DKVM-210H.
E. Attach the KVM cable (USB Type-B connector) to the USB Type-B port of the DKVM-210H.
Installation of the DKVM-210H is now complete.
QUICK INSTALLATION GUIDE
1.5 M LENGTH KVM CABLE WITH HDMI AND USB (x2)
CONNECT THE DKVM-210H TO YOUR COMPUTERS
F. Attach the KVM cable (HDMI connector) to the HDMI port located on the back of your computer
case.
G. Attach the KVM cable (USB Type-A connector) to the USB Type-A port located on the back
of your computer case.