EasyManuals Logo

D-Link DKVM-4U User Manual

D-Link DKVM-4U
8 pages
To Next Page IconTo Next Page
To Previous Page IconTo Previous Page
Page #4 background imageLoading...
Page #4 background image
4
Installing the DKVM-4U(continued)
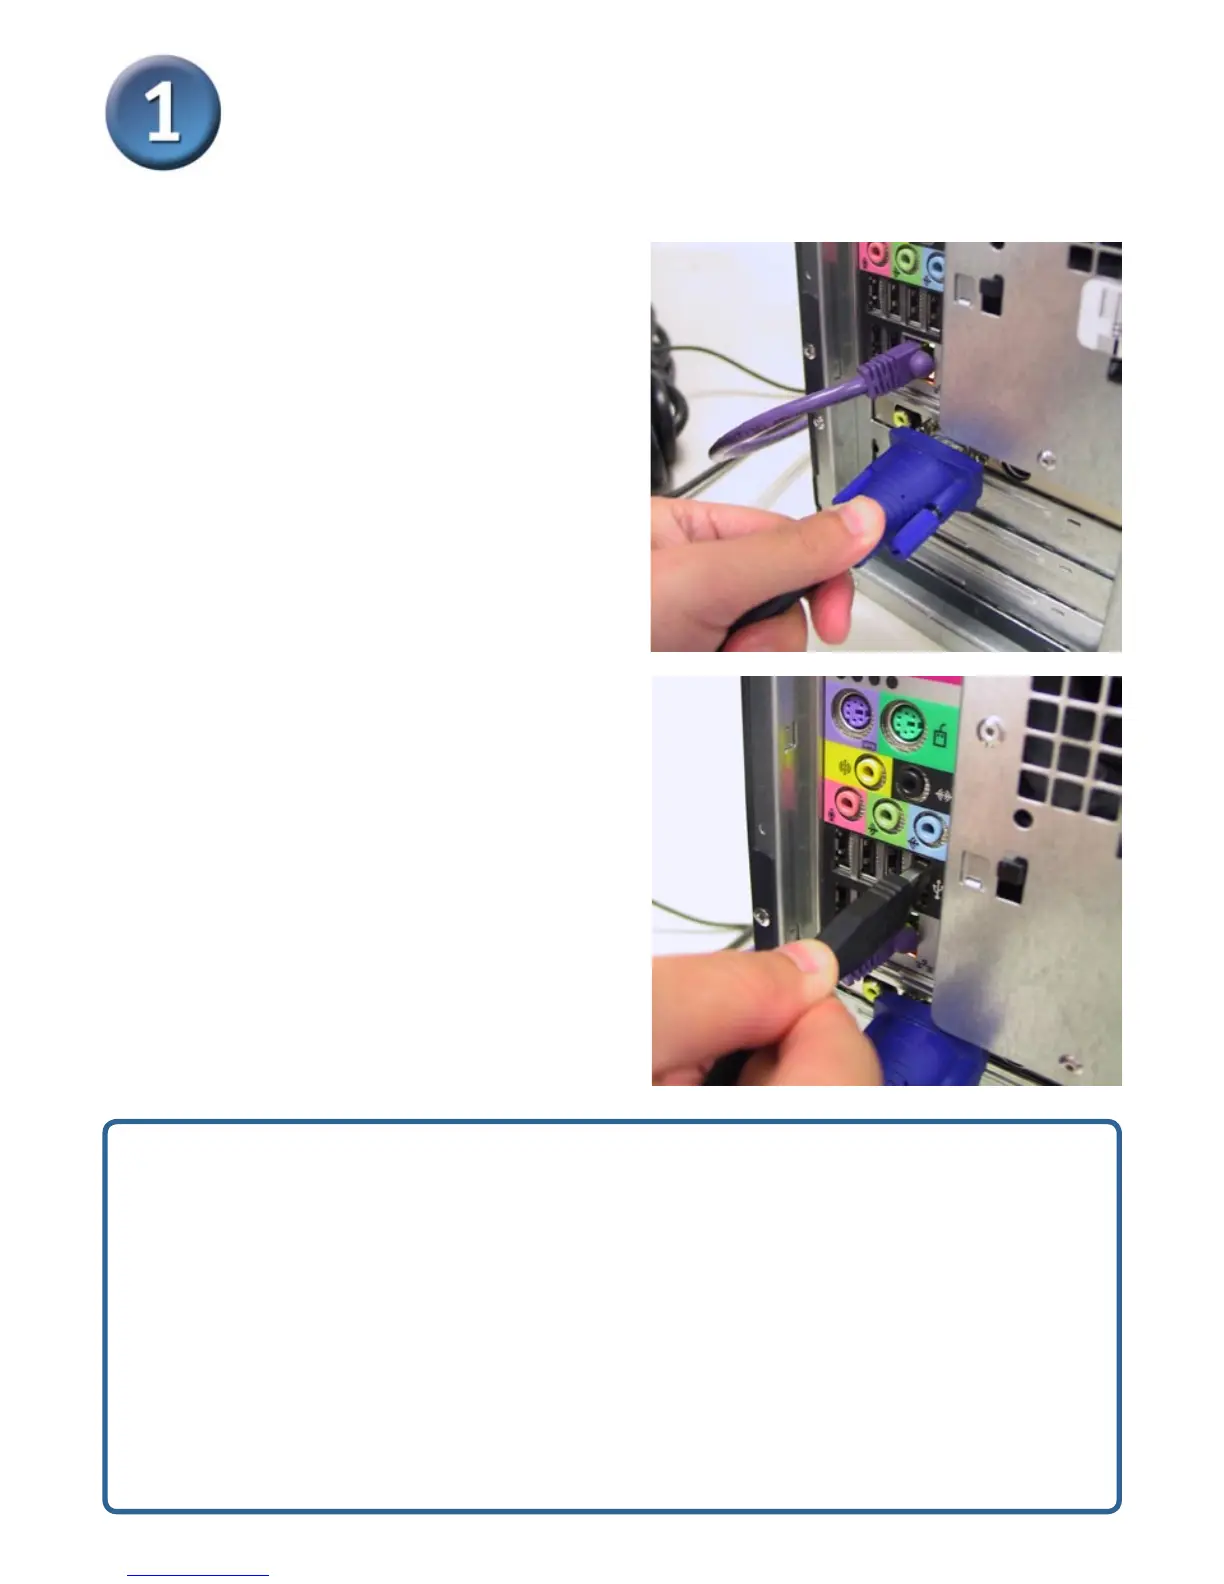
Repeat the steps below for each computer that you are connecting to the DKVM-4U
Using the connectors on the
other end of the included KVM
cables that you connected to
the DKVM-4U in the previous
section, attach the VGA
connector to the VGA port
located on the back of your
computer case.
Attach the USB A type
connector to the an available
USB port located on the back
of your computer case.
Installation of the DKVM-4U
is now complete.
Note:
1.Windows 98SE users may require the Windows installation CD to complete
the installation of the DKVM-4U.
2.If you power on the PC2, PC3, or PC4 without turning on the PC1 first, you
need to use HOT KEY or push button to switch the PC to it’s corresponding
LED. This is because all PC is directed to light LED by default.
3.The USB ports are designed only for Keyboard and Mouse respectively. DO
NOT connect the USB HUB to any of the USB ports on console side.

Other manuals for D-Link DKVM-4U

Questions and Answers:

Question and Answer IconNeed help?

Do you have a question about the D-Link DKVM-4U and is the answer not in the manual?

D-Link DKVM-4U Specifications

Display IconDisplay
video resolution2048 x 1536
Ports & Interfaces IconPorts & Interfaces
console keyboard connector1 x USB female
console mouse connector1 x USB female
console monitor connector1 x DB-15 HDDB female VGA, SVGA, XGA, MultiSync
Power IconPower
power sourceBus Powered
external power adapter requirementNo
Operating Environment IconOperating Environment
operating temperature32°F TO 122°F (0°C TO 50°C)
operating humidity80% Maximum (Non-condensing)
Weight and Dimensions IconWeight and Dimensions
dimensions7” x 4.1” x 1.2” (178mm x 105mm x 30.5 mm)
weight0.61 lb (275 grams)

Related product manuals