CONNECTION AND CONFIGURATION
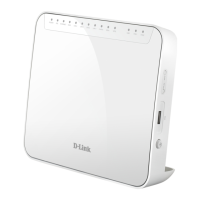
1. To connect via USB modem: connect your USB modem to the USB port
2
located on the right side panel of the router.
!
In some cases you will need to reboot the router after connection of the USB
modem.
2. To connect the router to a DSL line: connect a phone cable between the DSL
port of the router and the MODEM port of the splitter. Connect your phone to
the PHONE port of the splitter. Then connect another phone cable between a
phone jack and the LINE port of the splitter.
3. To connect the router to an Ethernet line: connect an Ethernet cable between
the WAN port of the router and the Ethernet line.
4. Connect the power cord to the power connector port on the back panel of the
router, then plug the power adapter into an electrical outlet or power strip.
5. Connect the router to your PC.
• PC with Ethernet adapter: connect an Ethernet cable between an available
LAN port of the router and the Ethernet port of your PC. Turn on the router
by pressing the power button on its right side panel. Make sure that the
Ethernet adapter of your PC is configured to obtain an IP address
automatically.
• PC with Wi-Fi adapter: turn on the router by pressing the power button on
its right side panel. Make sure that the Wi-Fi adapter of your PC is on and
configured to obtain an IP address automatically. Connect to the network
DSL-G2452GR (for operating in the 2.4GHz band) or
DSL-G2452GR-5G (for operating in the 5GHz band). Use WPS PIN from
the barcode label as the network key.
6. Connect another phone cable between an FXS port of the router and the phone.
7. Start a web browser. In the address bar of the web browser, enter the IP address
of the router (by default, 192.168.1.1). Press the Enter key.
After the first access to the web-based interface you are forwarded to the start page of
the Initial Configuration Wizard.
8. Click the START button.
9. Select a language for the router's web-based interface.
10. Click the CONTINUE button in order to configure the device with the Initial
Configuration Wizard or the ADVANCED SETTINGS button to configure all
needed setting manually.
When the web-based interface is accessed the next time and after, the login page
opens. Enter the username (admin) in the Username field and the password you
specified in the Password field, then click the LOGIN button.
Use the menu in the left part of the page to configure the router.
To select another language, go to the Configuration page in the System section.
For detailed description of every page of the web-based interface, see the “User
Manual” document on D-Link website (see www.dlink.ru).
2 It is recommended to use a USB extension cable to connect a USB modem to the router.

 Loading...