DNH-100 Quick Installation Guide
3
ENGLISH
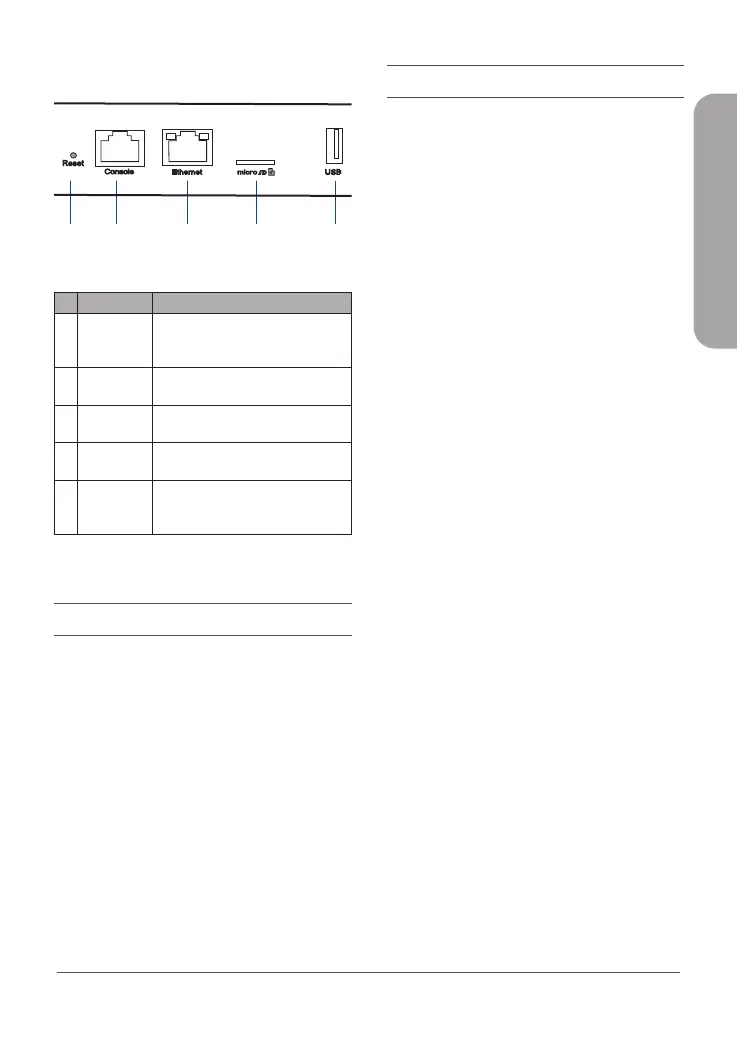
Interface Connectors
Figure 2: Front Connectors
# Connector Description
1 Reset
Used for rebooting or resetting
the device back to factory default
settings.
2
Console
Port
RJ-45 port to connect the RJ-45
console cable for CLI management.
3
Ethernet
Port
Gigabit RJ-45 port for LAN
connection.
4
MicroSD
Slot
MicroSD slot for MicroSD card
2,3
up to 32 Gb.
5 USB Port
USB 3.0 Type A port
2
(provides
5V/1A power for optional HDD
connection).
Table 2: Interface Description
Installation
The DNH-100 can be powered using the
following methods:
Using the Power Adapter
1. Connect the power connector of the
adapter to the power input on the
DNH-100 and plug the adapter into a
nearby power outlet.
Conguration
Using Nuclias Connect
The DNH-100 comes preloaded with Nuclias
Connect. For detailed instructions on the use
of Nuclias Connect please refer to the Nuclias
Connect Manual.
Manual Conguration
Note: D-Link recommends manually conguring
the device before mounting it. The management
computer, DHCP server and DNH-100 must be
in the same subnet.
Use one of the following methods to access the
web user interface:
Connecting through Ethernet
You need the following equipment to access the
Web UI of your device:
• A PC with a RJ-45 Ethernet connection
• A standard Ethernet cable
1. Use an Ethernet cable to connect the
DNH-100 to the management computer
or to the switch or router the management
computer is connected.
2. Manage the device from a computer. Enter
https://192.168.0.200 in the address eld
of your browser.
3. Log in to the administration user
interface. The default login information is
Username: admin
Password: admin
1 2 3 4 5
 Loading...