Do you have a question about the D-NAIL 1.4 and is the answer not in the manual?
Instructions for plugging in the power cord and D-NAIL heater, and turning on the controller.
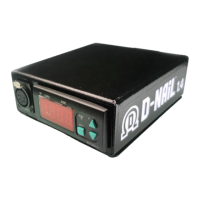
Identifies the front and back panel connections and controls of the digital controller.
Details on fuse warnings, causes of blowing fuses, and how to check or replace the fuse.
Steps for setting the desired temperature using the SET and UP/DOWN buttons on the controller.
Instructions for safely turning off the heater switch and unplugging the heater after use.
Guidance on how to clean the controller's display and exterior surfaces safely.
Warning against touching heater coils while they are in use due to extreme heat.
Guidelines for assembling the heater and nail, including not assembling while plugged in.
Methods for cleaning the nail after each application and using isopropyl alcohol.
Procedure to clean residue inside the dish by heating and cleaning with a cotton swab.
Tips on proper use to ensure heater longevity and avoid damage.
Suggested temperature ranges for different nail dish styles.
Lists the components included in the complete vaporization kit.
Details on the 2-year warranty, repair options, and lifetime warranty availability.
Provides contact details for warranty service and customer support.
The D-NAIL 1.4 Digital Controller is a device designed for precise temperature control of a D-NAIL heater and nail, primarily used for vaporization. It functions as a control station, allowing users to set and maintain specific temperatures for optimal use.
The core function of the D-NAIL 1.4 is to regulate the temperature of a connected heater and nail. It achieves this through a digital interface that displays the current temperature and allows for user input to adjust the desired temperature. The controller ensures that the heater coils reach and maintain the set temperature, providing a consistent and controlled heating environment. It is specifically designed to work with D-NAIL brand heaters, although other heaters may physically fit the input, they are not guaranteed to function correctly. The device includes safety features such as a fuse to protect against excessive power draw and requires the heater switch to be in the off position before plugging the unit into an outlet, and the heater coils to be in a safe position before powering on the heater.
The D-NAIL 1.4 controller is straightforward to operate. To begin, the power cord is plugged into the power input (E) on the back of the unit. It's crucial to ensure the heater switch (D) is in the off position before connecting to an outlet. Once plugged in, the power switch (D) on the back turns on the controller. If a heater is not plugged in, the screen will flash 'PFA'. The D-NAIL heater is then plugged into the heater input (A) on the front of the unit. Only D-NAIL brand heaters are recommended for use. Finally, the heater switch (E) on the back is turned on to activate the heater. Before doing so, users must ensure the heater coils are in a safe position.
Setting the temperature is a key feature. Users press the SET button once to enter temperature adjustment mode, where the screen will display the current set temperature. Using the UP and DOWN arrows, the desired temperature can be selected. The display will show the selected temperature, and once it stops flashing, the temperature is set. Pressing SET twice will display the alarm set point, which typically does not require adjustment, with a default value of 1112. Pressing SET again returns the display to the current temperature.
After use, it's important to handle the device with care as the heater and nail will be hot. The heater switch (C) should be flipped to the off position, and adequate time should be allowed for the heater and nail to cool down. To unplug the heater, users should press the metal tab above the HEATER INPUT (A) while gently pulling the heater end, avoiding any tugging on the cord.
The device also emphasizes safety regarding the heater coils. Users are explicitly warned that in-use heaters are hot and that they should not touch the heater coils. When assembling the heater and nail, it is critical not to assemble them while the heater is plugged into the controller. Threaded parts should be tightened by hand until snug, avoiding over-tightening.
Maintaining the D-NAIL 1.4 controller and its associated components ensures longevity and optimal performance.
For the controller itself, cleaning should only be performed after powering off the unit. The control face (B) can be wiped with a soft, dry cloth. Other surfaces can be cleaned with a soft damp cloth, using water or isopropyl alcohol.
Keeping the nail clean is essential for proper vaporization. After every application, unvaporized material should be cleaned with a dry cotton swab. This unvaporized material can build up as black residue. Once the nail is cool, isopropyl alcohol can be used for cleaning.
To address built-up residue inside the dish, a specific cleaning process is recommended. The dish should be heated to approximately 900°F for several minutes until the residue turns into ash. After this, the nail should be allowed to cool, and then cleaned with a dry cotton swab.
To maximize the lifespan of the heater, which is designed to last thousands of hours with proper use, several practices should be avoided. Users should not heat above 1100°F / 600°C, apply water for cooling or cleaning, or bend, twist, or otherwise stress the cord. Recommended heater temperatures vary depending on the nail style: Halo Dish (550-650°F), Deep Dish (600-650°F), and all Quartz (650-750°F), with lower temperatures generally being recommended.
The device also comes with warranty information. There is a 2-year warranty on all parts against failure. Repairs after two years or for accidental damage can be done at a fair price. A lifetime warranty option is available on D-NAIL.COM, and information from the sticker on the bottom of the controller is needed to claim warranty service.
| Compatibility | Universal |
|---|---|
| Input Voltage | 100-240V AC |
| Output Voltage | 12V |
| Frequency | 50/60 Hz |
| Operating Temperature | 0°C to 40°C |