1
Step 4:
Close the Garage door/s, ensuring
that the door’s rubber seal/s (1) are
sing flat on the floor.
10
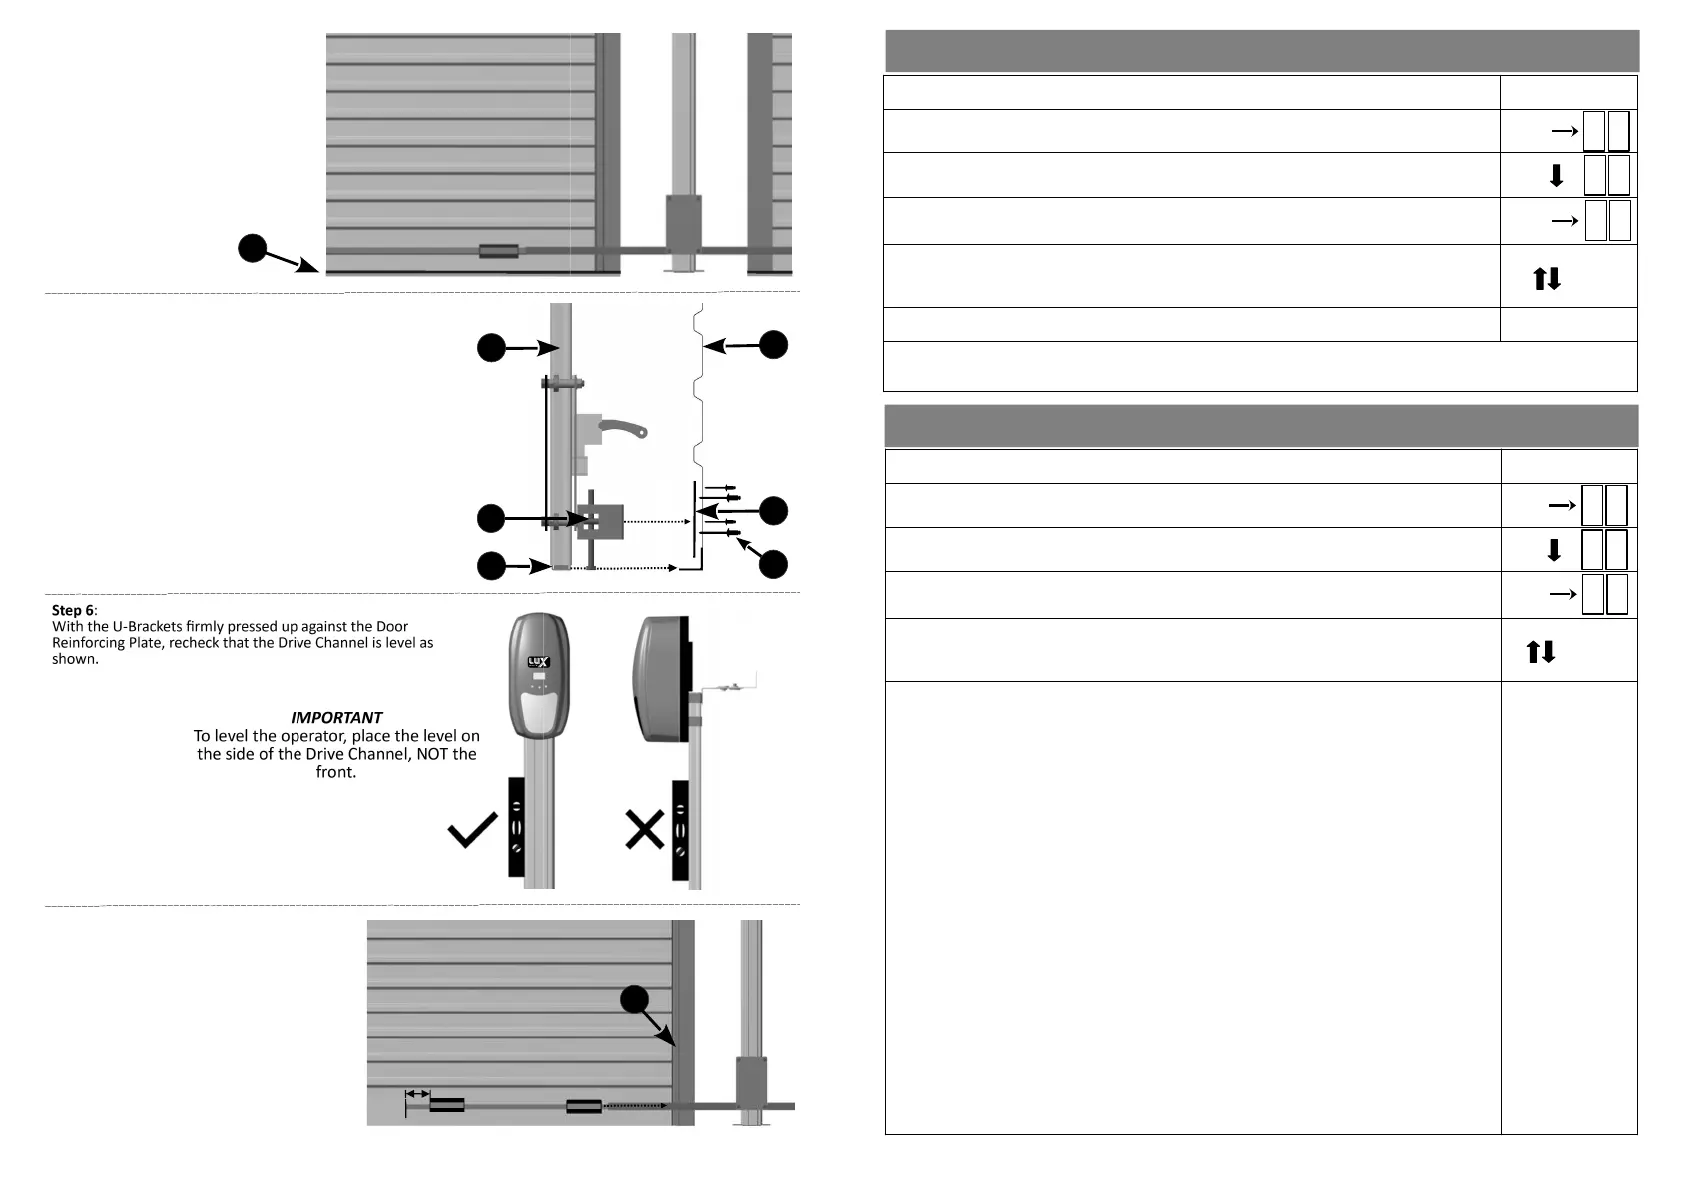
Step 7:
With the door/s sll closed, and ensuring that
the Door Liing Tube and the U-Brackets are
level, pop rivet the U-Brackets to the door and
Door Reinforcing Plates.
U-Bracket A must be as close to the door guide
(1) as possible and U-Bracket B should be
placed 30mm from the end of the Door Liing
Tube.
AB
1
Step 5:
Push the Drive Channel Foot (1) towards the door unl the
Door U-Brackets (2) gently touch the door (3). Slip the Door
Reinforcing Plates (4) between the Door U-Brackets and the
door. Pop rivet (5) the Door Reinforcing Plates, central to
the Door U-Brackets. Insert the pop rivet heads from the
outside.
Item (6): Drive Channel
1
2
6
3
Side view
4
5
15
SETTING AUTO CLOSE ....Menu 4
1) Ensure the baery is connected to the Operator.
2) Press the SET buon to enter the Programming Menu (Pr).
3) Press the DOWN buon unl the Auxiliary Output Menu (AU) is visible.
4) Press the SET buon to enter the Auxiliary Output Menu. The display will change to
the currently selected auxiliary funcon (default AL).
5) Press the UP and DOWN buons to scroll through the Auxiliary Output Menu
opons.
Note: Auxiliary Output is a single connector and only one opon can be selected.
Output opons available:
a) Auxiliary Light (AL):
This is an adjustable pulsed output, ranging from 0,25 seconds (T0) to 9 minutes
(T9), in increments of 1 minute.
This output will acvate when the door is opened and can be used to temporarily
switch on lights or bypass alarm passives when entering the garage.
Press the SET buon to enter the AL menu. Press the UP or DOWN buons to
scroll through the me opons (T0 to T9). Press the SET buon to select the
desired me.
b) Low Baery Warning (Ab):
This output will acvate when there is a low baery condion.
This output, which can be connected to a buzzer, light or external GSM, will acvate
to indicate that the operator baery is low.
From the Auxiliary Output Menu (AU), press the UP or DOWN buons unl reaching
Ab. Press SET to select.
c) Auxiliary Trigger (At):
This output gives a pulsed trigger output every me the door is acvated when it is in
the fully closed posion. It can be connected to a wired remote to acvate other
devices or to pulse stretching devices to switch lights on, bypass beams or passives
etc.
From the Auxiliary Output Menu (AU), press the UP or DOWN buons unl reaching
At. Press SET to select.
.................................................................................................Connued on next page
A U
SET
p r
SET
A L
SETTING THE AUXILIARY OUTPUT ....Menu 5
1) Ensure the baery is connected to the Operator.
2) Press the SET buon to enter the Programming Menu (Pr).
3) Press the DOWN buon unl the Auto Close Menu (AC) is visible.
4) Press the SET buon to enter the Auto Close Menu. The display will change to the
number A0 (Auto Close Time value).
5) Press the UP and DOWN buons to scroll through the Auto Close me values. A0
(zero seconds or DISABLE Auto Close) to A9 (90 seconds). This is in increments of 10
seconds.
6) Press the SET buon on the desired Auto Close me value to select.
Important: Auto Close can only be acvated if Safety Beams have been installed. It should be noted that the
Safety Beam funcon will automacally be enabled when seng the Auto Close funcon.
SET
SET
SET
p r
A C
A 0
 Loading...