5
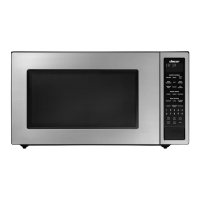
Figure 8
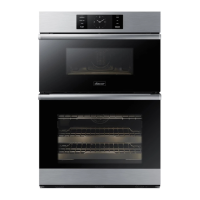
Figure 9
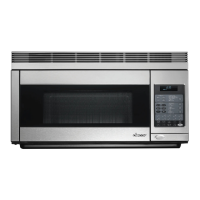
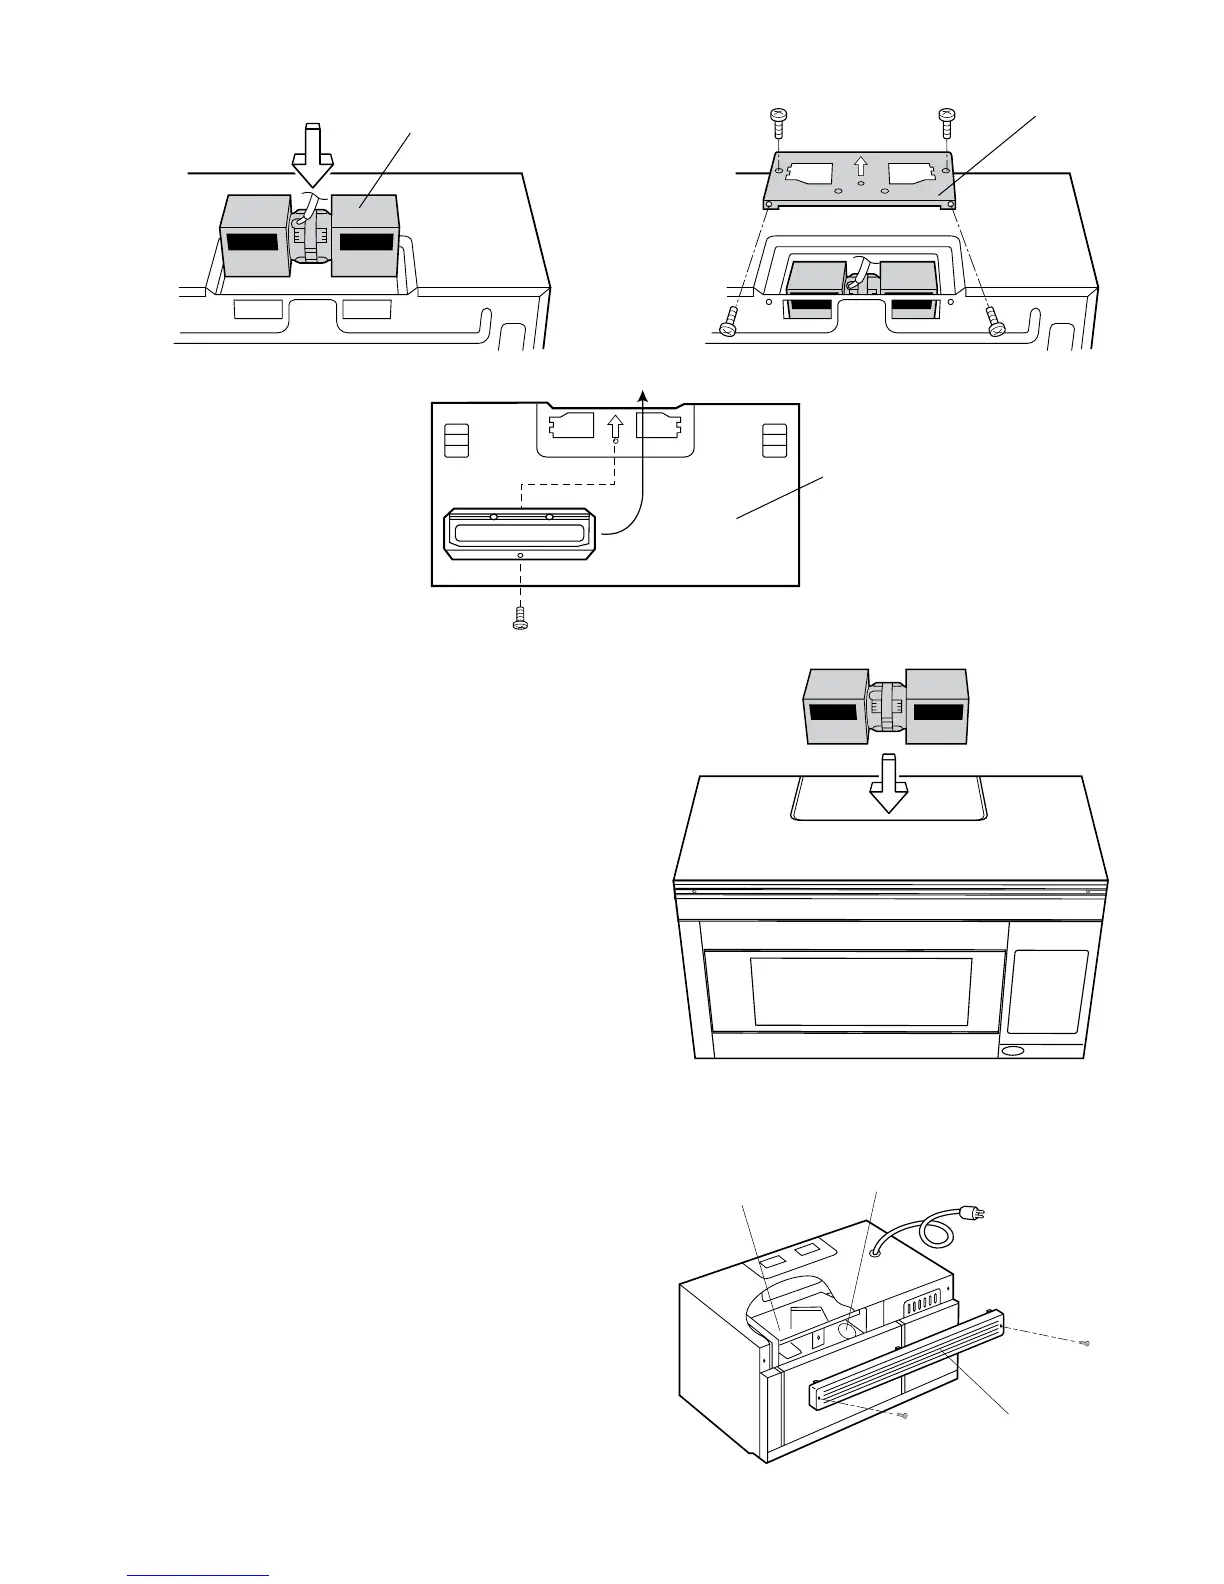
Figure 10
(C) RECIRCULATING: Non-Vented, Ductless Operation
1. Remove and save 4 fan cover screws and fan cover bracket
as shown in Fig. 6.
2. Remove hood fan unit. See Fig. 7.
3. Rotate hood fan unit/end-over-end, then rotate it 90˚ (1/4 turn)
so that exhaust ports faces toward front of oven unit. The fan
blades should be visible through the openings facing toward
the front of the oven.
4. Replace hood fan unit into oven unit as shown in Fig. 11.
5. Put the lead wire into the box.
6. Replace the fan cover bracket. If the cover does not t properly,
the hood fan unit is improperly placed. Check steps 3 and 4
again.
7. Attach the fan cover bracket to the oven unit with 4 existing
screws as shown in Fig. 9.
NOTE:
The exhaust damper assembly is not required for recirculat-
ing exhaust.
CHARCOAL FILTER
Charcoal Filter is used for non-vented, recirculated installation. The
lter should be changed every 6 to 12 months depending on use.
1. Disconnect power to the oven at the circuit breaker panel or
by unplugging.
2. Remove 2 screws that secure louver.
3. Pull the louver away from the oven.
4. Slide charcoal lter into position on support tabs.
5. Push louver back into place and gently snap tabs into place by
hand and replace the 2 screws to secure louver.
Hood Fan Unit
Fan Cover Bracket
Mounting Plate
(back side)
Figure 11
Louver
Oven light
Charcoal filter
Screw
Screw
 Loading...