EasyManua.ls Logo

Daihen OTC XD350 User Manual

Daihen OTC XD350
35 pages
To Next Page IconTo Next Page
Page #1 background imageLoading...
Page #1 background image
Service Manual No.C0056-1
SERVICE MANUAL
DAIHEN DC arc welding power source
350/500
CPXD- 350 C0056
CPXD- 500 C0052
DAIHEN Corporation WELDING PRODUCTION DIVISION
Aug.11.2006
CO
2
/MAG
DYNA AUTO
NOTE: Ther is a case that contents of thes service
munual is different from the latest information by
revision after product shipment. Use the owner’
s
manual of this procuct together.
Question and Answer IconNeed help?

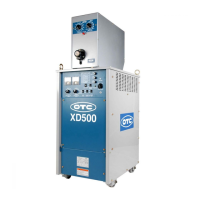
Do you have a question about the Daihen OTC XD350 and is the answer not in the manual?

Daihen OTC XD350 Specifications

General IconGeneral
Input Frequency50/60 Hz
Duty Cycle60% at 350A
Welding MethodGMAW (MIG/MAG)
Wire Diameter0.8mm
Protection ClassIP21

Summary

1. Caution in maintenance

1.1 To avoid electric shock and accident

Precautions to prevent electric shock and accidents during maintenance.

1.2 Handling of printed circuit board

Guidelines for safe and proper handling of printed circuit boards.

1. Caution in maintenance (continued)

1.3 Handling of main circuit component

Instructions for handling main circuit components like thyristors.

1.4 Insulation Resistance Test Procedure

Steps for performing insulation resistance and withstand voltage tests.

1.5 Sequence Operation Check

Procedure for checking the sequence operation of the machine.

1.6 Investigating WARNING Causes

How to investigate and resolve causes indicated by WARNING messages.

2. Function of each printed circuit board

2.1 PCB Function and Mounting Position

Details on the function and mounting location of various printed circuit boards.

2. Function of each printed circuit board (continued)

2.2 Printed Circuit Board Check Terminals

Operation of check terminals on printed circuit boards, covering different models.

2. Function of each printed circuit board (continued)

2.3 PCB Adjustment Resistance and Jumper Switch Settings

Explanation of adjustment resistors and jumper switch functions on PCBs.

2. Function of each printed circuit board (continued)

2.4 Printed Circuit Board Check Point Positions

Identification of check point positions on various printed circuit boards.

3. Troubleshooting

3.1 WARNING Lamp Interpretation

Interpretation of WARNING lamps and their corresponding error codes.

3. Troubleshooting (continued)

3.1 WARNING Lamp Interpretation (continued)

Detailed explanations of WARNING lamp error conditions and troubleshooting.

3. Troubleshooting (continued)

3.2 Main Circuit Parts Check

Procedures for checking the functionality of main circuit components.

3. Troubleshooting (continued)

3.3 Welding Error Table

A table listing welding errors, their causes, and checkpoints for resolution.

3. Troubleshooting (continued)

3.4 Troubleshooting Guide

Table of common troubles, their causes, and suggested solutions.

3. Troubleshooting (continued)

3.4 Troubleshooting Guide (continued)

Continuation of troubleshooting steps for various machine issues.

4. Block Diagram

5. Correspondence for User Needs

5.1 Initial Current Control Usage

How to enable and use the initial current control feature.

5.2 Changing Pre-flow Time (CO2/MAG)

Procedure for adjusting the pre-flow time for CO2/MAG welding.

5.3 Changing Post-flow Time

Procedure for adjusting the post-flow time for welding.

5.4 Wire Feeder Configuration

Settings for C0056P and P10174X to match different wire feeders.

5. Correspondence for User Needs (continued)

5.5 Changing Anti-stick Time

How to adjust the anti-stick time based on welding parameters.

5.6 Changing Anti-stick Voltage

How to adjust the anti-stick voltage for different welding methods.

5.7 Changing Crater Repetition Period

Procedure for adjusting the crater repetition period.

5.8 Using AC100V Heater Receptacle

Instructions for using the AC100V heater receptacle and energy saving.

5. Correspondence for User Needs (continued)

5.9 Arc Spot Timer Usage

Steps for connecting and using the arc spot timer accessory.

5. Correspondence for User Needs (continued)

5.10 Internal Terminal Connections for Automation

How to connect the machine to an automatic system via internal terminals.

5.11 Automatic Machine Connection

Wiring instructions for connecting to an automatic machine using optional controls.

5.12 Special Correspondence ROM

Information regarding ROM replacement and software updates.

6. Schematic Diagram and Parts Layout

6.1 Schematic Diagram for CPXD-350

Electrical schematic diagram for the CPXD-350 model.

6. Schematic Diagram and Parts Layout (continued)

6.2 Schematic Diagram for CPXD-500

Electrical schematic diagram for the CPXD-500 model.

6. Schematic Diagram and Parts Layout (continued)

6.3 Parts Layout for CPXD-350

Physical layout of components for the CPXD-350 model.

6. Schematic Diagram and Parts Layout (continued)

6.3 Parts Layout for CPXD-350 (continued)

Continued physical layout of components for the CPXD-350 model.

6. Schematic Diagram and Parts Layout (continued)

6.4 Parts Layout for CPXD-500

Physical layout of components for the CPXD-500 model.

6. Schematic Diagram and Parts Layout (continued)

6.4 Parts Layout for CPXD-500 (continued)

Continued physical layout of components for the CPXD-500 model.

7. Parts List

7. Parts List (continued)

8. Supplement

8. Supplement (continued)

9. Standard of Current and Voltage Setting Signal

10. Outside Characteristics

CPXD-350 Performance Data

Performance characteristics and output data for the CPXD-350 model.

10. Outside Characteristics (continued)

CPXD-500 Performance Data

Performance characteristics and output data for the CPXD-500 model.

10. Outside Characteristics (continued)

Related product manuals