This document describes the ARC417 Series remote controller and its associated air conditioning units, including models ARC417A14 and ARC417A15. It covers the remote controller's functions, how to operate the air conditioner, and basic maintenance procedures.
Remote Controller Description and Functions
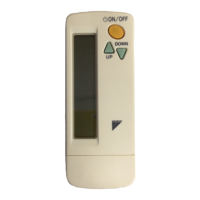
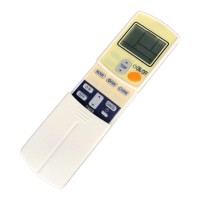
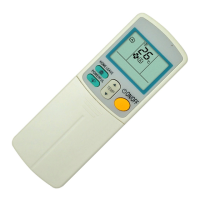
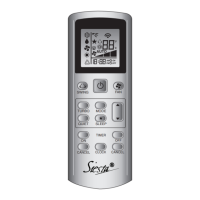
The remote controller is the primary interface for controlling the air conditioning unit. It features a display that shows current settings and various buttons for different functions.
- Transmitter: This component sends signals to the indoor unit, allowing the remote controller to communicate with and control the air conditioner.
- ON/OFF Button: Pressing this button once initiates the air conditioner's operation. Pressing it again stops the operation.
- Display: The display shows all current settings of the air conditioner. For illustrative purposes in the manual, all possible display segments are shown as "ON."
- Temperature / Time Adjustment Buttons: These buttons are used to change both the temperature and time settings. There are two buttons, typically labeled "UP" and "DOWN," for increasing or decreasing values.
- CLOCK Button: This button is used to set the current time on the remote controller.
- OFF TIMER Button: This button is used to set a timer for the air conditioner to turn off automatically.
- ON TIMER Button: This button is used to set a timer for the air conditioner to turn on automatically.
- TIMER CANCEL Button: This button allows you to cancel any active timer settings.
- FAN Setting Button: This button selects the desired air flow rate, offering multiple levels of fan speed.
- MODE Selector Button: This button cycles through different operation modes, including AUTO, DRY, COOL, HEAT, and FAN.
- SWING Buttons: These buttons control the direction of the air flow, allowing adjustment of both horizontal and vertical blades.
- OUTDOOR UNIT SILENT Button: This function reduces the noise level of the outdoor unit.
- POWERFUL Button: This button activates a "POWERFUL" operation mode for rapid cooling or heating.
- HOME LEAVE Button: This button activates a "HOME LEAVE" operation mode, designed to maintain a comfortable temperature while you are away.
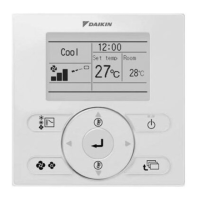
Unit Operation Panel and Display Panel
The indoor unit also has an operation panel with indicator lamps:
- OPERATION Lamp (green): This lamp indicates that the unit is currently operating.
- ON/OFF Switch: A physical switch on the unit for basic power control.
- HOME LEAVE Lamp (red): This lamp lights up when the HOME LEAVE operation is active.
- TIMER Lamp (yellow): This lamp indicates that a timer function (ON or OFF) is active.
Preparation Before Operation
Setting the Batteries:
- To install batteries, slide the back cover of the remote controller off using a finger.
- Insert two LR03 alkaline dry batteries, ensuring correct polarity (positive and negative ends).
- Replace the back cover. After battery installation, the figures on the display will flash, indicating that the clock needs to be set.
Operating the Remote Controller:
- Always aim the remote controller's transmitter at the indoor unit. Obstructions like curtains can block signals and prevent operation.
- Avoid dropping the remote controller or getting it wet.
- The maximum effective distance for communication between the remote controller and the indoor unit is approximately 7 meters.
Fixing the Remote Controller Holder on the Wall:
- Choose a location where the remote controller can easily send signals to the indoor unit.
- Secure the provided holder to a wall or pillar using screws.
- Fit the claw of the holder into the bottom of the remote controller and push the remote controller onto the wall to secure it.
- To remove the remote controller from the holder, pull it upwards.
Setting the Air Purifying Filters:
- Open the front grille: Hold the grille by the tabs on both sides and lift it until it clicks into place (approximately 60 degrees).
- Pull out the air filters: Push upwards on the tab at the center of each air filter, then pull it down to remove it.
- Set the air purifying filters: Attach an air purifying filter to each air filter.
- Set the air filters in their original positions and close the front grille: Operating the unit without air filters can lead to dust accumulation inside the indoor unit and potential malfunctions.
Setting the Clock:
- Press the CLOCK button. The display will show "AM 0:00" and the time will blink.
- Use the TEMPERATURE / TIME adjustment buttons (UP/DOWN) to set the current time. Holding down either button will rapidly change the time display.
- Press the CLOCK button again to confirm the setting.
Turning the Breaker ON:
- When the main breaker for the air conditioner is turned ON, the flap on the indoor unit will open and then close. This is a normal initialization procedure.
General Operation (AUTO • DRY • COOL • HEAT • FAN)
The air conditioner operates according to your chosen settings. Once set, the unit will typically retain these settings for subsequent operations.
- Select a Mode: Press the MODE button to cycle through and select the desired operation mode (AUTO, DRY, COOL, HEAT, FAN). Each press advances to the next mode.
- Start Operation: Press the ON/OFF button. The OPERATION lamp on the indoor unit will light up.
- Stop Operation: Press the ON/OFF button again. The OPERATION lamp will turn off.
Changing the Temperature Setting:
- In AUTO, HEAT, or COOL modes, use the TEMPERATURE / TIME adjustment buttons (UP/DOWN) to set your desired temperature.
- In DRY or FAN modes, the temperature setting is not variable.
Changing the Air Flow Rate Setting:
- Press the FAN setting button.
- In AUTO, HEAT, COOL, or FAN modes, you can select from five levels of air flow rate, indicated by different fan icons, plus an "A" for automatic.
- In DRY mode, the air flow rate setting is not variable.
- Note that smaller air flow rates result in a smaller cooling effect.
Notes on Operation Modes:
- HEAT Mode: Heating capacity decreases in lower outdoor temperatures. If heating is insufficient, supplementary heating may be needed. The heat pump system circulates hot air, so it takes some time for the room to warm up. Frost may form on the outdoor unit in heating operation, triggering a defrosting operation during which hot air will not flow from the indoor unit.
- DRY Mode: This mode dehumidifies the indoor air when humidity is high.
- AUTO Mode: The system automatically selects a temperature setting and an appropriate mode (COOL or HEAT) based on the room temperature at the start of operation. It periodically reselects settings to maintain the desired temperature. If AUTO mode is not preferred, you can manually select the mode and settings.
Adjusting the Air Flow Direction
This feature allows you to direct the air flow for increased comfort.
Adjusting the Horizontal Blade (Flap):
- Press the SWING button.
- Each press of the SWING button will toggle the horizontal swing display (a " " icon) on or off. When active, the flap automatically swings up and down.
- To stop the flap at a desired angle, press the SWING button again when the flap is in the preferred position.
Adjusting the Vertical Blade (Louvre):
- Press the SWING button.
- Each press of the SWING button will toggle the vertical swing display (a " " icon) on or off. When active, the louvre automatically swings right and left.
- To stop the louvre at a desired angle, press the SWING button again when the louvre is in the preferred position.
Notes on Flap Angles:
- When SWING is selected, the flap's swinging range varies depending on the operation mode.
- In heating operation with SWING selected, the flap and diffuser swing up and down in combination.
- The diffuser remains open in DRY or COOL modes.
3-D Air Flow:
The 3-D air flow function combines horizontal (up and down) and vertical (left and right) swings to circulate air throughout the room, reducing temperature fluctuations.
- To activate, press both SWING buttons (horizontal and vertical) simultaneously while the air conditioner is operating. The up/down and left/right swing displays on the remote controller will move.
- To cancel 3-D air flow, press either SWING button.
- For optimal performance, set the flap at a downward angle in HEAT mode and a near-horizontal angle in COOL or DRY mode, unless SWING is selected.
POWERFUL Operation
This function maximizes cooling or heating effect rapidly.
- Activate POWERFUL Operation: Press the POWERFUL button during operation. The "POWERFUL" icon will appear on the display.
- POWERFUL operation lasts for 20 minutes, after which the system automatically reverts to the settings used before POWERFUL operation.
- Other functions are not available during POWERFUL operation.
- Cancel POWERFUL Operation: Press the POWERFUL button again.
Notes on POWERFUL Operation:
- COOL and HEAT Mode: To maximize effect, the outdoor unit's capacity is increased, and the air flow rate is fixed to maximum. Temperature and air flow settings are not variable.
- DRY Mode: Temperature setting is lowered by 3°C, and air flow rate is slightly increased.
- FAN Mode: Air flow rate is fixed to maximum.
OUTDOOR UNIT SILENT Operation
This function reduces the noise level of the outdoor unit by adjusting its frequency and fan RPM. It is useful for quiet environments, such as during sleep.
- Activate OUTDOOR UNIT SILENT Operation: Press the SILENT button.
- Cancel OUTDOOR UNIT SILENT Operation: Press the SILENT button again.
Notes on OUTDOOR UNIT SILENT Operation:
- This function is not available with Multi-system connections.
- It is available in COOL, HEAT, and AUTO modes, but not in FAN and DRY modes.
- Activating POWERFUL operation during OUTDOOR UNIT SILENT operation will disengage the SILENT mode.
- If the unit is turned off (either by remote or physical switch) during SILENT operation, it will resume SILENT operation when turned back on.
HOME LEAVE Operation
This function maintains a comfortable temperature when you are away from home. It is only available in COOL and HEAT modes.
- Activate HOME LEAVE Operation: Press the HOME LEAVE button while the air conditioner is operating. The HOME LEAVE lamp (red) on the indoor unit will light up.
- Cancel HOME LEAVE Operation: Press the HOME LEAVE button again. The HOME LEAVE lamp will turn off.
Before Using HOME LEAVE Operation (First Time Setup):
- When using HOME LEAVE Operation for the first time, you need to set the desired temperature and air flow rate.
- Initial settings: Heating - Temperature 25°C, Air flow rate AUTO; Cooling - Temperature 25°C, Air flow rate AUTO.
How to Set Temperature and Air Flow Rate for HOME LEAVE:
- Press the HOME LEAVE button.
- Adjust the set temperature using the TEMPERATURE / TIME adjustment buttons (UP/DOWN).
- Adjust the air flow rate using the FAN setting button.
- For subsequent uses, the unit will remember the previous settings. To change them, repeat steps 1-3.
What is HOME LEAVE Operation?
- During heating: It prevents the room temperature from dropping too low on cold days by using weak heating operation. Disengaging HOME LEAVE Operation returns the room to the previously set temperature.
- During cooling: It prevents the room temperature from rising too high on hot days by using weak cooling operation. Disengaging HOME LEAVE Operation returns the room to the previously set temperature.
- You can customize the set temperature and air flow rate for HOME LEAVE as desired.
Useful Scenarios for HOME LEAVE:
- Daily Use: Before leaving home, activate HOME LEAVE. The air conditioner will adjust capacity to maintain the preset temperature. Upon return, deactivate HOME LEAVE, and the unit will adjust to normal operation settings.
- Before Bed: Activate HOME LEAVE before going to bed. The unit will maintain a comfortable temperature throughout the night. In the morning, deactivate HOME LEAVE to return to normal operation.
Notes on HOME LEAVE Operation:
- Only available in COOL and HEAT modes (not AUTO, DRY, or FAN).
- It runs according to the operation mode the unit was in before activation.
- Temperature settings can be adjusted: Heating (10°C to 30°C), Cooling (18°C to 32°C).
- Air flow rate can be set in 5 steps (weak to strong) or automatic.
- Activating POWERFUL operation during HOME LEAVE will disengage HOME LEAVE.
- If the unit is turned off by the physical switch during HOME LEAVE, it will resume HOME LEAVE when turned back on.
- If the unit is turned off by the remote control during HOME LEAVE:
- In H/P (Heat Pump) models, HOME LEAVE will be disengaged when turned back on.
- In C/O (Cooling Only) models, HOME LEAVE will continue when turned back on.
Timer Operation
Timer functions allow automatic ON/OFF scheduling. OFF TIMER and ON TIMER can be used in combination.
OFF TIMER Operation:
- Ensure the clock is set correctly.
- Set OFF TIMER: Press the OFF TIMER button while the air conditioner is operating. "AM 0:00" will display, and the time will blink.
- Adjust Time: Use the TEMPERATURE / TIME adjustment buttons (UP/DOWN) to set the desired OFF time. Each press changes the time by 10 minutes; holding down changes it rapidly.
- Confirm: Press the OFF TIMER button again. The TIMER lamp on the indoor unit will light up.
- Cancel OFF TIMER: Press the TIMER CANCEL button. The TIMER lamp will turn off.
Notes on OFF TIMER:
- NIGHT SET MODE: When OFF TIMER is set, the air conditioner automatically adjusts the temperature (e.g., 0.5°C up in COOL mode) to ensure comfortable sleep.
ON TIMER Operation:
- Ensure the clock is set correctly.
- Set ON TIMER: Press the ON TIMER button while the air conditioner is NOT operating. "AM 6:00" will display, and the time will blink.
- Adjust Time: Use the TEMPERATURE / TIME adjustment buttons (UP/DOWN) to set the desired ON time. Each press changes the time by 10 minutes; holding down changes it rapidly.
- Confirm: Press the ON TIMER button again. The TIMER lamp on the indoor unit will light up.
Combining ON TIMER and OFF TIMER:
- You can set both an OFF TIMER and an ON TIMER in combination.
- When a timer is set, the current time is not displayed.
- Once set, timer settings are stored in memory (unless remote controller batteries are replaced).
- The actual length of operation when using ON/OFF Timer may vary slightly (maximum approx. 10 minutes) from the user-entered time.
Maintenance Features
Tips for Saving Energy:
- Avoid excessive cooling or heating. Maintaining moderate temperature settings helps save energy.
- Recommended for cooling: 26°C – 28°C
- Recommended for heating: 20°C – 24°C
- Use blinds or curtains to block sunlight and outdoor air, enhancing cooling or heating efficiency.
- Clean clogged air filters approximately every two weeks, as they reduce efficiency and waste energy.
- The air conditioner consumes 15-35 watts of electricity even when not operating.
- If the air conditioner will not be used for an extended period (e.g., spring or autumn), turn off the main breaker.
- Operating Conditions: The manual specifies safe operating temperature ranges for both indoor and outdoor units across different modes (COOL/DRY, HEAT). Operating outside these ranges may trigger safety devices, stop operation, or cause condensation and dripping from the indoor unit.
- For DRY mode, it is recommended to use the unit in humidity 60% or lower when the outdoor temperature is 10°C or lower.