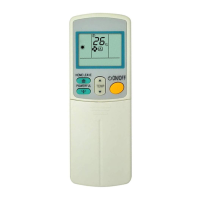
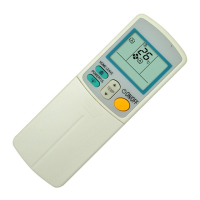
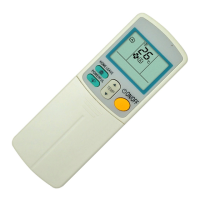
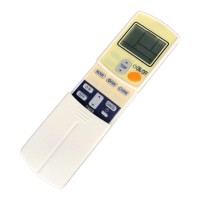
Daikin ARC433B46, B47 Remote Controller
This document describes the Daikin ARC433B46 and ARC433B47 remote controllers, which are used to operate Daikin air conditioning units. The remote controller allows users to manage various functions of the air conditioner, including operation mode, temperature, fan speed, and timer settings.
Function Description
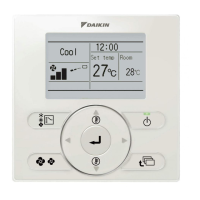
The remote controller serves as the primary interface for controlling the air conditioning unit. It transmits signals to the indoor unit to initiate, modify, or terminate operations. The display on the remote controller shows the current settings, providing visual feedback to the user.
Key Functions:
- ON/OFF Operation: Starts and stops the air conditioner.
- Mode Selection: Allows selection of various operation modes: AUTO, DRY, COOL, HEAT, and FAN.
- Temperature Adjustment: Enables users to set their desired temperature.
- Fan Speed Setting: Controls the airflow rate, offering multiple levels including an "AUTO" setting and a "Quiet" setting for reduced noise.
- Timer Functions: Includes OFF TIMER and ON TIMER for scheduled operation, as well as a TIMER CANCEL function.
- Specialized Operations:
- ECONO Operation: Enables efficient operation by lowering the maximum power consumption.
- POWERFUL Operation: Quickly maximizes cooling or heating effect for rapid temperature changes.
- QUIET Operation (Outdoor Unit): Reduces the noise level of the outdoor unit, particularly useful at night.
- MOLD PROOF Operation: Reduces mold spread by using fan mode to lower humidity inside the indoor unit after cooling or dry mode.
- INTELLIGENT EYE Operation: Utilizes an infrared sensor to detect human movement, enabling energy-saving operations when no one is in the room.
- HOME LEAVE Operation: Allows users to record and recall preferred temperature and airflow rate settings for energy saving or convenience.
- COMFORT AIRFLOW Operation: Adjusts the flap position to prevent air from blowing directly on occupants, enhancing comfort.
- Airflow Direction Adjustment: Controls both horizontal (flap) and vertical (louvers) airflow direction, including a 3-D Airflow function for comprehensive air circulation.
- Clock Setting: Allows setting the current time on the remote controller.
- RESET Function: Restarts the unit if it freezes, typically requiring a thin object to push the button.
Important Technical Specifications
- Signal Transmission: The remote controller uses an infrared signal transmitter.
- Communication Distance: The maximum effective distance for communication between the remote controller and the indoor unit is approximately 7 meters.
- Power Source: The remote controller is powered by two AAA dry batteries.
- Display: Features an LCD screen that shows current settings and operational icons.
- Temperature Range (Selectable for HOME LEAVE):
- Cooling: 18-32°C (5 steps)
- Heating: 10-30°C (5 steps)
- Airflow Rate (Selectable for HOME LEAVE): 5 steps, plus "AUTO" and "Quiet" settings.
- INTELLIGENT EYE Sensor Range:
- Vertical angle: 90° (Side View)
- Horizontal angle: 110° (Top View)
- Detection distance: Up to 7 meters.
Usage Features
Battery Installation:
- Slide the front cover off.
- Insert two AAA dry batteries, ensuring correct polarity.
- Replace the front cover.
- Note: Replace both batteries at the same time with the same type. Remove batteries if the unit will not be used for a long period. Replace batteries annually or when the display fades.
Operating the Remote Controller:
- Aim the transmitter at the indoor unit.
- Ensure no obstructions (e.g., curtains) block the signal path.
- Avoid dropping the remote controller or getting it wet.
Fixing the Remote Controller Holder:
- Choose a location where signals can reach the unit.
- Fix the holder to a wall or pillar using the supplied screws.
- Place the remote controller in the holder. To remove, pull it upwards.
Setting the Clock:
- Press the "CLOCK" button. "0:00" will blink on the display.
- Use the "TIMER setting" buttons (▲/▼) to adjust the time. Holding the button increases/decreases time rapidly.
- Press the "CLOCK" button again to confirm.
Starting/Stopping Operation:
- Press the "MODE selector" button to choose the desired operation mode (AUTO, DRY, COOL, HEAT, FAN).
- Press the "ON/OFF" button to start. The OPERATION lamp on the indoor unit will light up.
- Press the "ON/OFF" button again to stop. The OPERATION lamp will turn off.
Temperature Adjustment:
- Use the "TEMPERATURE adjustment" buttons (▲/▼) to raise or lower the temperature in AUTO, COOL, or HEAT modes. Temperature is not variable in DRY or FAN modes.
Airflow Rate Setting:
- Press the "FAN setting" button to cycle through five levels of airflow rate, plus "AUTO" and "Quiet" settings. Airflow rate is not variable in DRY mode.
- Indoor Unit Quiet Operation: Setting the airflow to "Quiet" reduces indoor unit noise. Note that capacity might be reduced.
Airflow Direction Adjustment:
- Horizontal (Flap): Press "SWING" once to start swinging. Press again to stop at the desired position.
- Vertical (Louvers): Press "SWING" (louvers icon) once to start swinging. Press again to stop at the desired position.
- 3-D Airflow: Press "SWING" (flap icon) and then "SWING" (louvers icon) to activate both horizontal and vertical swing for comprehensive air circulation. Press either "SWING" button to cancel.
- Attention: Always use the remote controller to adjust louvers/flaps. Forcibly moving them by hand can cause damage.
ECONO Operation:
- Press the "ECONO" button to start. The "ECONO" icon will appear.
- Press the "ECONO" button again to cancel. The icon will disappear.
- Note: ECONO operation limits power consumption and is available in AUTO, COOL, DRY, and HEAT modes. It cannot be used simultaneously with POWERFUL operation.
POWERFUL Operation:
- Press the "POWERFUL" button to start. The "POWERFUL" icon will appear.
- Press the "POWERFUL" button again to cancel. The icon will disappear.
- Note: POWERFUL operation runs for 20 minutes. It cannot be used simultaneously with COMFORT AIRFLOW or OUTDOOR UNIT QUIET operation. Some functions may be unavailable during POWERFUL operation.
OUTDOOR UNIT QUIET Operation:
- Press the "QUIET" button to start. The "QUIET" icon will appear.
- Press the "QUIET" button again to cancel. The icon will disappear.
- Note: This function reduces outdoor unit noise. It is available in COOL, HEAT, and AUTO modes (not FAN or DRY). It cannot be used simultaneously with POWERFUL operation.
MOLD PROOF Operation:
- Press and hold the "MOLD PROOF" button for two seconds to start. The "MOLD PROOF" icon will appear.
- Press and hold the "MOLD PROOF" button for two seconds again to cancel. The icon will disappear.
- Note: Operates for approximately one hour after DRY or COOLING mode is turned off. Not designed to remove existing mold/dust. Not available when the unit is turned off using the OFF TIMER.
INTELLIGENT EYE Operation:
- Press the "SENSOR" button to start. The "INTELLIGENT EYE" icon will appear.
- Press the "SENSOR" button again to cancel. The icon will disappear.
- Note: Detects human movement to enable energy-saving (e.g., adjusting temperature or airflow when no one is present). Not active during POWERFUL operation. Avoid placing large objects or heating units near the sensor. Do not hit the sensor.
HOME LEAVE Operation:
- Press the "HOME LEAVE" button to start. The "HOME LEAVE" icon will appear, and the lamp will light up.
- Press the "HOME LEAVE" button again to cancel. The icon and lamp will disappear.
- Setting Preferences: When using for the first time, set desired temperature and airflow rate using the temperature and FAN setting buttons while "HOME LEAVE" is active. These settings will be remembered for future use.
- Note: Available in COOL and HEAT modes only. Cannot be used with POWERFUL operation.
COMFORT AIRFLOW Operation:
- Press the "COMFORT AIRFLOW" button to start. The "COMFORT AIRFLOW" icon will appear.
- Press the "COMFORT AIRFLOW" button again to cancel. The icon will disappear.
- Note: Adjusts flap position to avoid direct airflow on occupants. Airflow rate is set to "AUTO". Cannot be used with POWERFUL operation.
TIMER Operation (OFF TIMER / ON TIMER):
- OFF TIMER:
- Press the "OFF TIMER" button. "0:00" will blink.
- Use the "TIMER Setting" buttons (▲/▼) to set the desired OFF time.
- Press the "OFF TIMER" button again to confirm. The TIMER lamp will light up.
- ON TIMER:
- Press the "ON TIMER" button. "0:00" will blink.
- Use the "TIMER Setting" buttons (▲/▼) to set the desired ON time.
- Press the "ON TIMER" button again to confirm. The TIMER lamp will light up.
- Cancel Timer: Press the "CANCEL" button. The TIMER lamp will turn off.
- Note: Timers can be combined. Settings are retained in memory unless batteries are replaced or power is lost.
- NIGHT SET MODE: When OFF TIMER is set, the air conditioner automatically adjusts temperature (0.5°C up in COOL, 2.0°C down in HEAT) for comfortable sleep.
Multi System Notes:
- Operation Mode Priority: In a multi-system, the first indoor unit turned on sets the operation mode priority. Other units must operate in a compatible mode or will enter standby.
- POWERFUL Operation Priority: If the priority room uses POWERFUL operation, capacity will be concentrated there, potentially reducing efficiency in other rooms.
- OUTDOOR UNIT QUIET Priority: Setting the priority room to QUIET operation activates outdoor unit quiet operation for the entire system.
- NIGHT QUIET Mode (Cooling Only): Reduces outdoor unit noise at night. Requires initial programming. Activates when temperature drops 5°C or more below the day's highest.
- Cooling / Heating Mode Lock (Heat Pump Models): Sets all indoor units to a forced Cooling or Heating mode. Requires initial programming.
Maintenance Features
- Battery Replacement: Replace batteries when the remote controller display begins to fade or reception deteriorates.
- Cleaning: Wipe off dust from the signal transmitter or receiver with a soft cloth to maintain sensitivity.
- Air Filter Cleaning: Clogged air filters cause inefficient operation. Clean them once every two weeks.
- Long-Term Storage: If the air conditioner will not be used for a long period (e.g., spring or autumn), turn off the breaker and remove batteries from the remote controller.
Attention Points:
- Avoid direct sunlight exposure to the remote controller.
- Signal communication may be affected by electronic-starter-type fluorescent lamps.
- If the remote controller accidentally operates another appliance, move the appliance or consult the shop.
- In case of a power failure or breaker turn-off, timer settings may need to be reset.