English 5
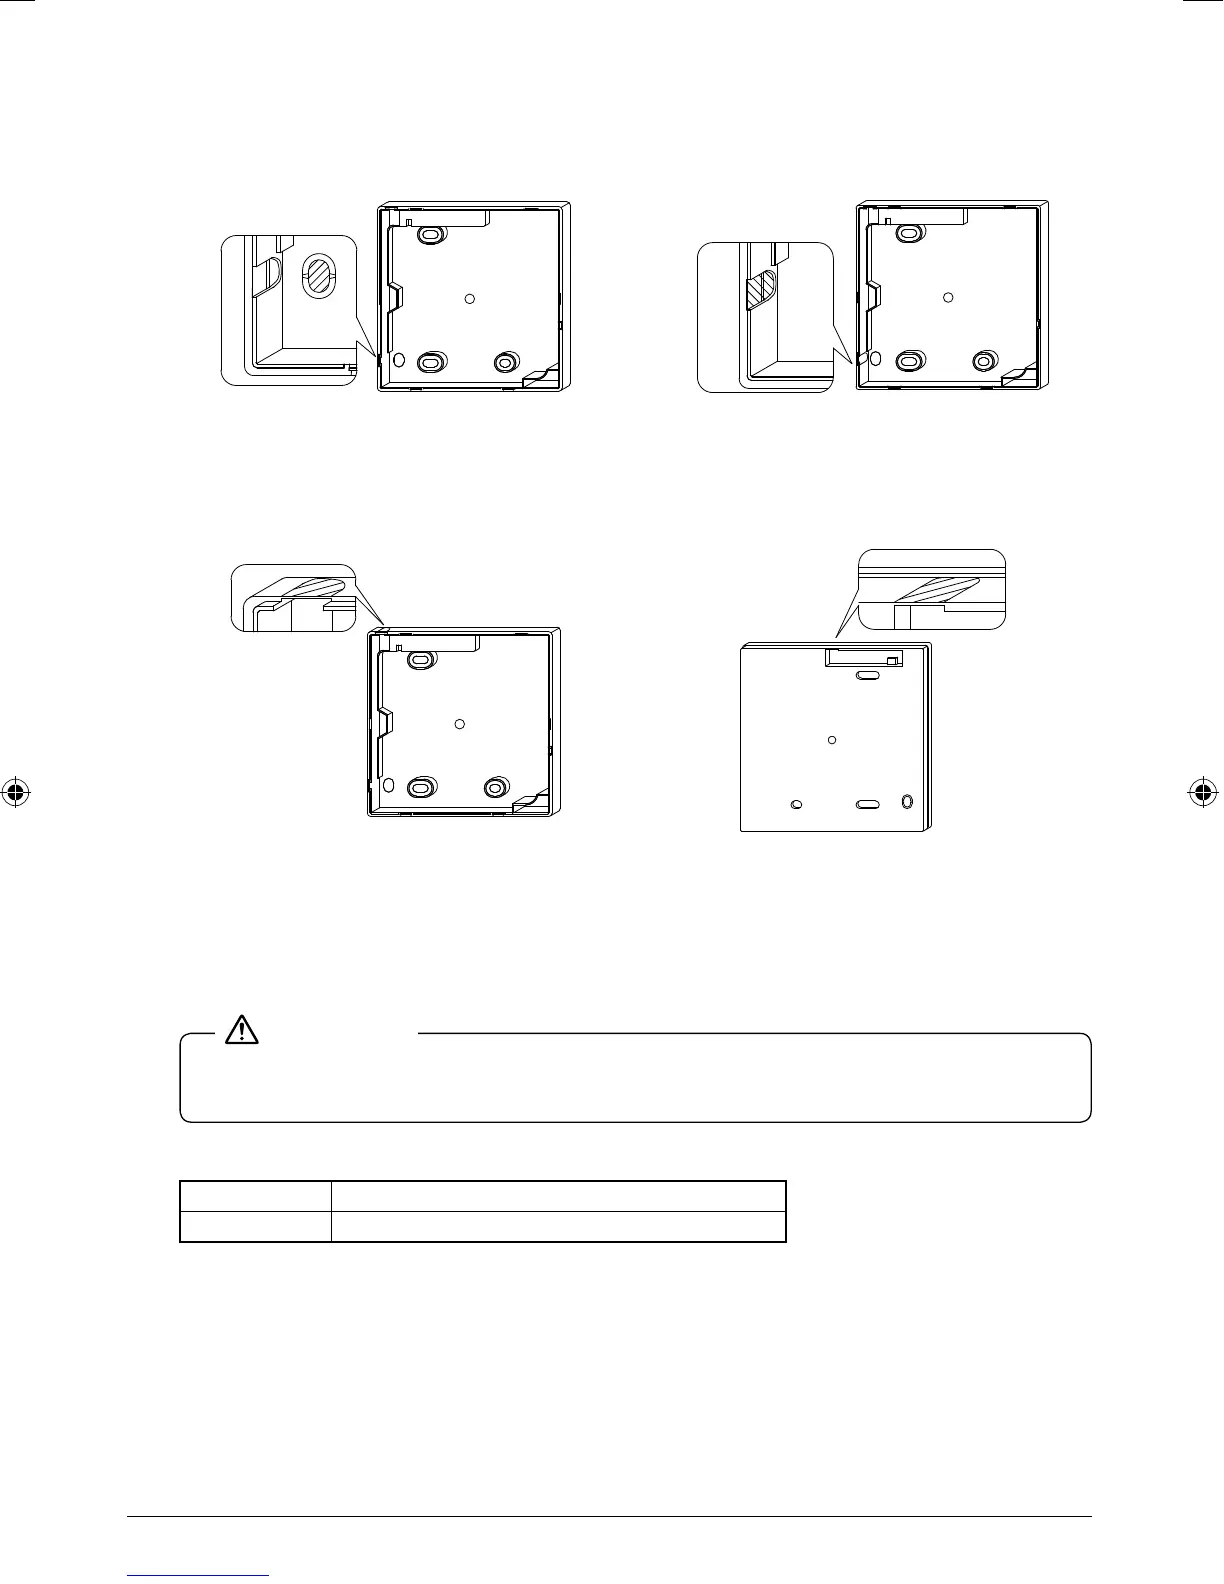
Determine the direction of controller wiring outlet (back 3-4
outlet, left outlet, upper center outlet, upper outlet).
Back outlet3-4-1 Left outlet3-4-2
Cut off resin area (hatched area). Cut off thin area (hatched area) with nippers
or the like, and then remove burr with a fi le or
the like.
Upper outlet3-4-3 Upper center outlet3-4-4
Cut off thin area (hatched area) with nippers
or the like, and then remove burr with a fi le or
the like.
Cut off thin area (hatched area) with nippers
or the like, and then remove burr with a fi le or
the like.
Conduct wiring.3-5
1. Switch box and transmission wiring are not attached.
Do not directly touch the remote controller PC-board. 2.
CAUTION
Wiring Specifi cations
Wiring Type Sheathed vinyl cord or cable
Wiring Size 0.75-1.25mm²
01_EN_EM08A086.indd 501_EN_EM08A086.indd 5 4/7/2009 7:32:08 PM4/7/2009 7:32:08 PM
 Loading...