Do you have a question about the Daikin BRC1E52B7 and is the answer not in the manual?
This document outlines the installation and operational procedures for the Daikin Wired Remote Controller (BRC1E52B7). It serves as a comprehensive guide for installers and users, ensuring proper setup, functionality, and maintenance of the device.
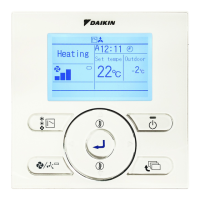
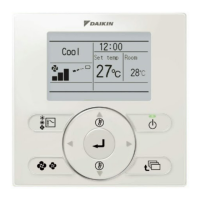
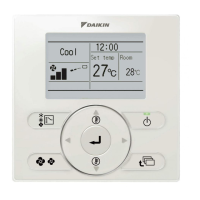
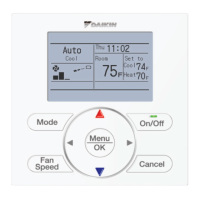
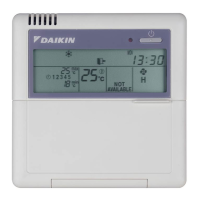
The remote controller is designed to manage Daikin air conditioning units, offering a range of functions to optimize comfort and energy efficiency. Its primary function is to provide a centralized interface for controlling various aspects of the air conditioning system, including operation mode, fan speed, airflow direction, and scheduling.
The installation process begins with determining the optimal location for the remote controller, emphasizing adherence to safety precautions outlined in the manual. This involves avoiding areas with high concentrations of mineral oil spray, corrosive gases, electromagnetic radiation, flammable gases, high temperatures, or excessive moisture, as these can impair the unit's performance or lead to safety hazards. The manual also advises installing the remote controller on a strong foundation capable of supporting its weight.
Wiring is a critical step, requiring careful attention to detail. The manual specifies the use of sheathed vinyl cord or cable with a wiring size of 0.75~1.25 mm². It provides detailed instructions for stripping the sheath and connecting terminals (P/P1, N/P2) of the remote controller to the indoor unit, noting that P1 and P2 have no polarities. Different wiring outlet directions (back, left, upper, upper center) are illustrated, guiding the installer on how to cut resin areas or thin areas for proper wire routing and securing. The importance of sealing wiring draw-in ports with putty to prevent insect entry and electrical noise is highlighted.
Fixing the lower case of the remote controller involves securing it to the wall using wood screws or to a switch box using small screws, with specific dimensions provided for each method. Finally, the upper case is installed by aligning it with tabs on the lower case and ensuring the wiring is not pinched. A protective seal on the upper case should be removed after installation.
Upon power-on, the remote controller displays "Checking the connection Please stand by." During this phase, the backlight does not activate with button presses. For systems with one indoor unit controlled by two remote controllers, the sub remote controller must be set by pressing and holding the Operation mode selector button for 4 seconds or longer. If this is not done, an "Error code: U5" may appear. After successful connection, the basic screen is displayed.
Field settings allow for customization of the air conditioning unit's operation. This menu is accessed by pressing and holding the Cancel button for 4 seconds or longer. Users can select "Field settings" and then choose a "Mode No." to adjust various parameters. For individual settings per indoor unit in a group control system, the unit number can be selected. The "SECOND CODE NO." allows for further refinement of settings, with multiple identical mode number settings available. Examples of settings include filter contamination levels (heavy/light), long-life filter type, thermostat sensor in the remote controller, and spacing time for filter sign display. The manual also details settings for external ON/OFF input, thermostat differential changeover, high air outlet velocity, airflow direction, and drain pump operation with humidifying. Once settings are confirmed, they are saved, and the system returns to the basic screen after initialization.
The test operation method, specifically for SkyAir systems, ensures the air conditioning unit functions correctly after installation. It involves checking wiring, closing switch box covers, and cleaning the indoor unit. Before starting, the power supply should be turned on at least 6 hours in advance to protect the compressor. Stop valves for both liquid and gas must be open. The operation mode is set to cooling, and the "Service Settings" menu is accessed by holding the Cancel button. Selecting "Test operation" initiates a 3-minute check. During this, airflow direction can be adjusted and confirmed. After the test, if the decorative panel is not yet installed, the power supply should be shut off to prevent contamination from interior work.
The remote controller includes features for maintenance and error diagnosis. The "Maintenance Information" screen, accessible through the main menu, displays error code records. If an error code is present, it indicates a malfunction, and users are directed to the indoor unit's installation manual for a detailed error code list. Error records can be cleared by pressing and holding the On/Off button for 4 seconds or longer on the "Maintenance Information" screen. The "Error History" menu, also found in "Service Settings," provides a log of the 10 most recent error events, including unit number, date, and time. This helps in diagnosing recurring issues.
The remote controller allows for the registration of a maintenance contact number. This is done through the "Maintenance Contact" option in the "Service Settings" menu. Users can enter a telephone number using the Up/Down buttons, with blank digits represented by "-". This feature ensures that contact information for service is readily available.
The "Clock & Calendar" menu in the main menu allows users to set the date and time. Year, month, day, and time can be adjusted using the Left/Right and Up/Down buttons. The day of the week is set automatically. If a power outage exceeds 48 hours, a reset of these settings is required.
The remote controller supports multiple languages, including English, Deutsch, Shqip, Български, Hrvatski, Česky, Magyar, Română, Srpski, Slovenčina, and Slovenščina. The "Language" option in the main menu allows users to select their preferred language for the display.
To restrict access to certain controls, the remote controller offers "Prohibit buttons" and "Prohibit Function" features. The "Lock function" menu, accessible by holding the Menu/Enter button for 4 seconds, allows users to disable specific buttons like Up/Down/L/R, On/Off, Mode, and Fan Speed. Similarly, "Function Prohibition" allows disabling entire functions such as Schedule, Configuration, Clock & Calendar, Energy Saving List, Setpoint Range Set, and Setback Condition. When a function is prohibited, a specific icon is displayed next to it in the main menu. These features are particularly useful when setting up a sub remote controller, ensuring that only authorized functions are accessible. To lock or unlock the menu button from the basic screen, a specific sequence of button presses is required.
| Model | BRC1E52B7 |
|---|---|
| Compatibility | Daikin Air Conditioners |
| Display | LCD |
| Type | Remote Control |
| Functions | Mode selection, Timer |
| Power Source | Battery |
| Weight | 150g |
| Temperature Range | 16°C - 30°C |