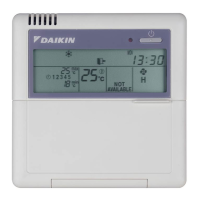
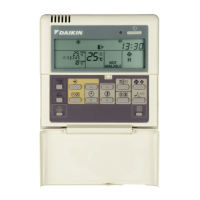
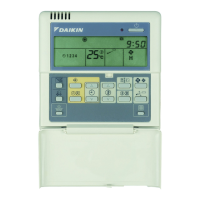
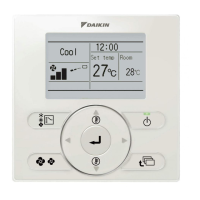
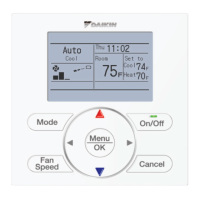
The Daikin BRC1D61 is a sophisticated remote controller designed to offer comprehensive control over your air conditioning installation. It integrates basic remote control functions with advanced scheduling and limit operation capabilities, ensuring optimal comfort and energy efficiency.
Function Description
The BRC1D61 serves as a central interface for managing various aspects of your air conditioning system. Its core functionality includes:
- Basic Remote Controller Functions:
- ON/OFF: Allows you to start or stop the system with a simple button press. An operation lamp indicates the system's status, lighting up during operation or blinking in case of a malfunction.
- Operation Mode Change-over: Enables selection from various operation modes, including FAN, DRY, AUTOMATIC, COOLING, and HEATING. These modes are clearly indicated by dedicated icons on the display.
- Temperature Adjustment: Provides the ability to adjust the setpoint temperature to your desired level.
- Air Volume Adjustment: Controls the fan speed, with options for Low (L), High (H), Very High (HH), and Automatic (A). This is indicated by the fan speed icon.
- Air Flow Direction Adjustment: For installations with motorized air flow flaps, this function allows you to adjust the direction of the airflow. You can switch between fixed or variable air flow direction, and select the desired fixed direction.
- Ventilation Mode (HRV only): If an HRV (Heat Reclaim Ventilator) is installed, this button operates the HRV and allows for adjustment of the ventilation amount, which is indicated by the fan speed icon.
- Clock Function:
- 24-hour Real-time Clock: Displays the current time in a 24-hour format.
- Day of the Week Indicator: Shows the current day of the week (MON, TUE, WED, THU, FRI, SAT, SUN). This is crucial for programming the schedule timer.
- Schedule Timer Function:
- Programmable Actions: The schedule timer allows for up to 5 actions to be programmed for each day of the week, totaling 35 actions. These actions can include switching the installation ON with a setpoint, switching it OFF, or switching it ON in limit operation.
- Enable/Disable: The schedule timer can be enabled or disabled at any time, indicated by a dedicated icon.
- "Last Command" Overrule: The system executes the last command given, meaning manual adjustments temporarily override scheduled actions until the next scheduled command.
- Power Failure Resilience: Programmed actions are not lost after a power failure, although the clock and day of the week may need to be reset if the power failure exceeds 1 hour.
- Limit Operation:
- Thermostat Control: This mode provides thermostat control within a specified range of minimum and maximum temperatures. The minimum temperature setting triggers heating, while the maximum temperature setting triggers cooling. This is indicated by "min" and "max" icons on the display.
- Leave Home Function:
- Temperature Maintenance: Prevents the room temperature from dropping excessively when occupants are away. If the room temperature falls below 10°C, heating automatically starts. Once 15°C is reached, the controller reverts to its original status. This function is enabled/disabled and its status (active/inactive) is indicated by a dedicated icon.
- Air Cleaning Function:
- Indicates when an optional air cleaning unit is operational.
- Defrost/Hotstart Mode:
- Indicates when the defrost or hotstart mode is active, which occurs during heating operation to prevent freezing of the outdoor heat exchanger or to prevent cold air from being discharged from the indoor unit at startup.
- Air Filter Cleaning Time Icon:
- Indicates when the air filter needs cleaning. This icon can be reset after cleaning.
- Element Cleaning Time Icon (HRV only):
- Indicates when the HRV element needs cleaning.
- Inspection Required Icon:
- Indicates that an inspection is required, prompting the user to consult their installer.
- External Control Icon:
- Indicates when another controller with higher priority is managing or disabling the installation.
- Change-over Under Centralized Control Icon:
- Indicates that the system's change-over is under centralized control, managed by another indoor unit or an optional cool/heat selector connected to the outdoor unit.
- Not Available Icon:
- Displayed when a non-installed option is addressed or a function is not available for the specific installation.
Usage Features
The BRC1D61 is designed for user-friendly interaction, with a clear display and intuitive button layout.
- Setting Up the Controller:
- Clock Setting: To set the clock, hold down the time adjust button for 5 seconds. The clock readout and day of the week indicator will blink, allowing adjustment using the time adjust and temperature adjust buttons. Press the programming button to confirm.
- Schedule Timer Programming: The schedule timer is programmed by first browsing to the desired day, then entering program mode by holding the programming button for 5 seconds. Users can then select an action (ON with setpoint, OFF, or ON in limit operation), set the desired temperature, and specify the start time.
- Browsing Programmed Actions: Users can review programmed actions for each day of the week by pressing the programming button. This allows verification of settings and understanding of the system's expected behavior.
- Editing Programmed Actions: Existing programmed actions can be easily edited by browsing to the desired day and action, entering program mode, and adjusting the settings.
- Deleting Programmed Actions: Individual or all programmed actions can be deleted. To delete specific actions, select the last action to keep, then confirm deletion. To delete all actions, press the schedule timer and programming buttons simultaneously for 5 seconds.
- Button Permission Levels: Three hierarchical permission levels can be set to limit user actions, providing control over who can modify settings.
- Temporary Overrides: Manual adjustments to settings (like temperature or mode) temporarily override scheduled actions until the next scheduled command from the schedule timer.
Maintenance Features
The BRC1D61 itself requires minimal maintenance.
- Cleaning: The remote controller can be cleaned by removing dirt with a soft, damp cloth, moistened with clear tap water.
- Air Filter/Element Cleaning Indicators: The air filter cleaning time icon and element cleaning time icon (for HRV) serve as reminders for routine maintenance of the air conditioning unit and HRV, respectively, rather than the controller itself. These icons can be reset after the cleaning is performed.
- Troubleshooting: The manual provides a troubleshooting section to help users diagnose and resolve common issues, such as a blank display, incorrect schedule timer execution, or inability to enable the schedule timer. For more complex problems, users are advised to consult their installer.