Installation manual BRC1E52A7
5
4PW71264-1 – 10.2011
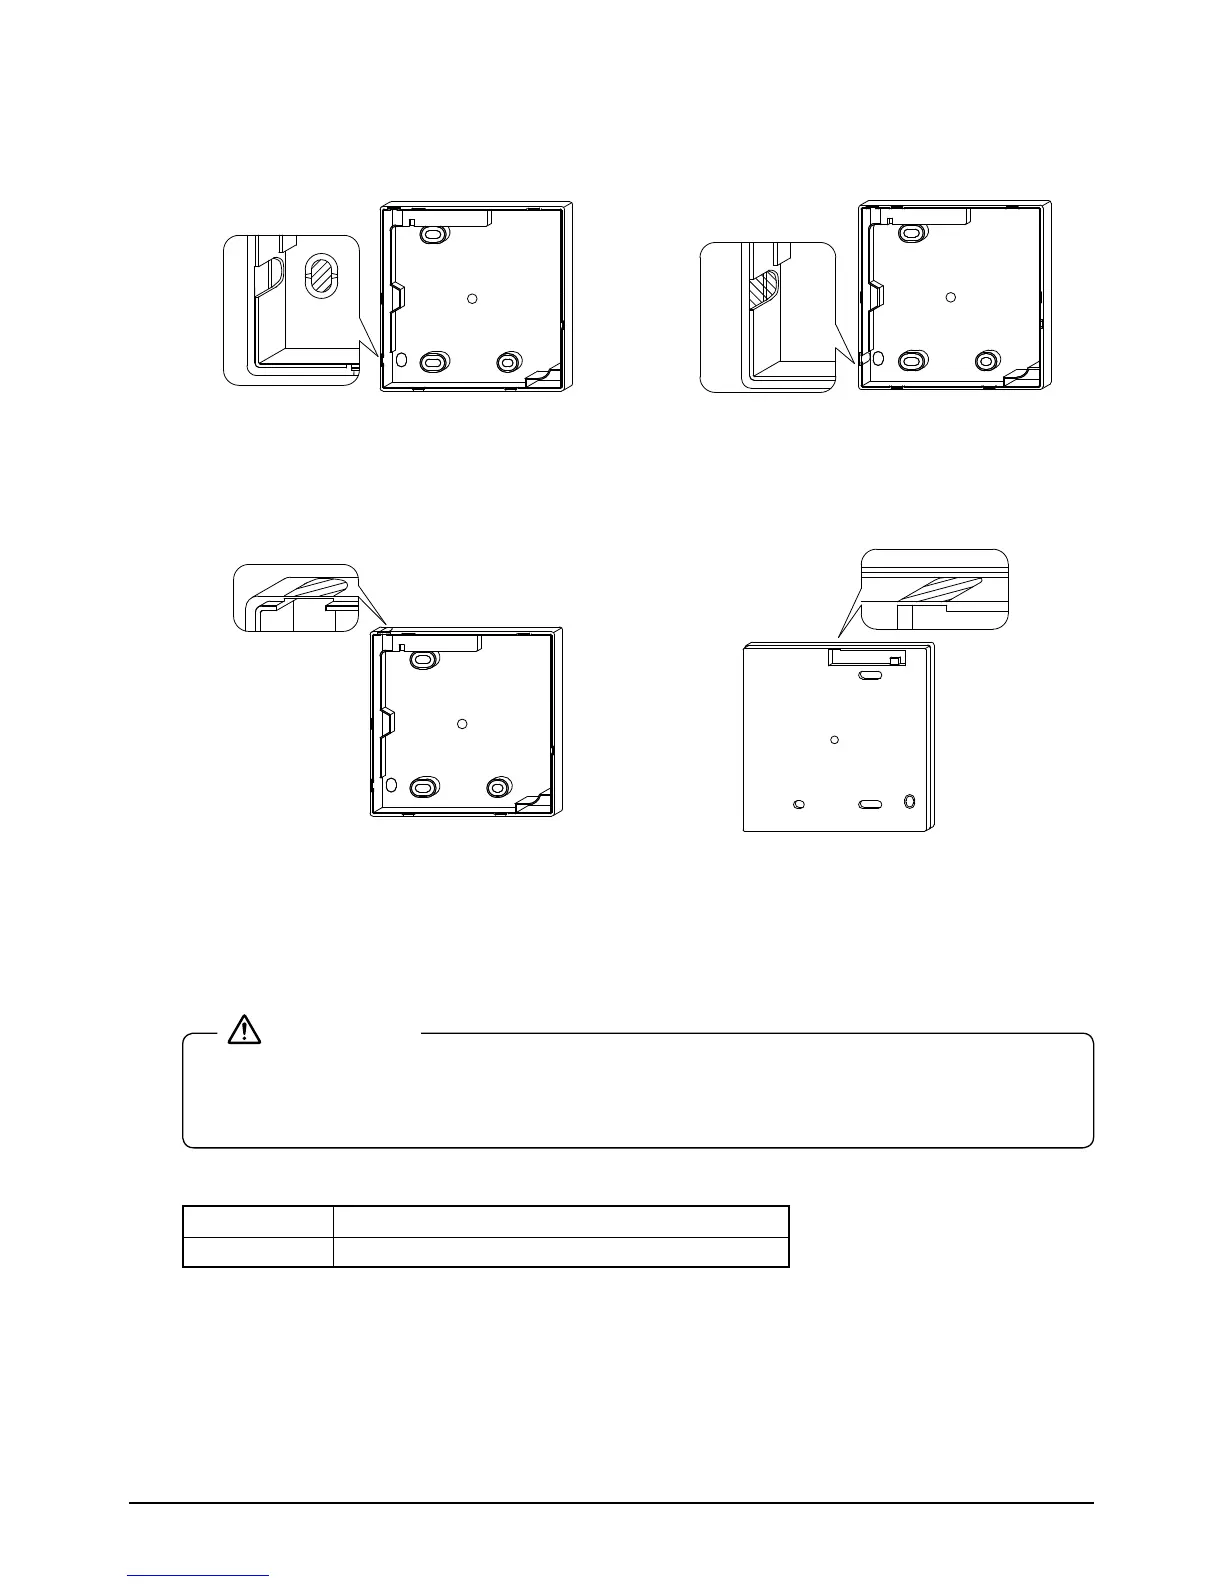
3-4 Determine the direction of controller wiring outlet (back
outlet, left outlet, upper center outlet, upper outlet).
3-4-1 Back outlet 3-4-2 Left outlet
Cut off resin area (hatched area). Cut off thin area (hatched area) with nippers
or the like, and then remove burr with a le or
the like.
3-4-3 Upper outlet 3-4-4 Upper center outlet
Cut off thin area (hatched area) with nippers
or the like, and then remove burr with a le or
the like.
Cut off thin area (hatched area) with nippers
or the like, and then remove burr with a le or
the like.
3-5 Conduct wiring.
1. Switch box and transmission wiring are not attached.
2. Do not directly touch the remote controller PC-board.

 Loading...