ENGLISH
3
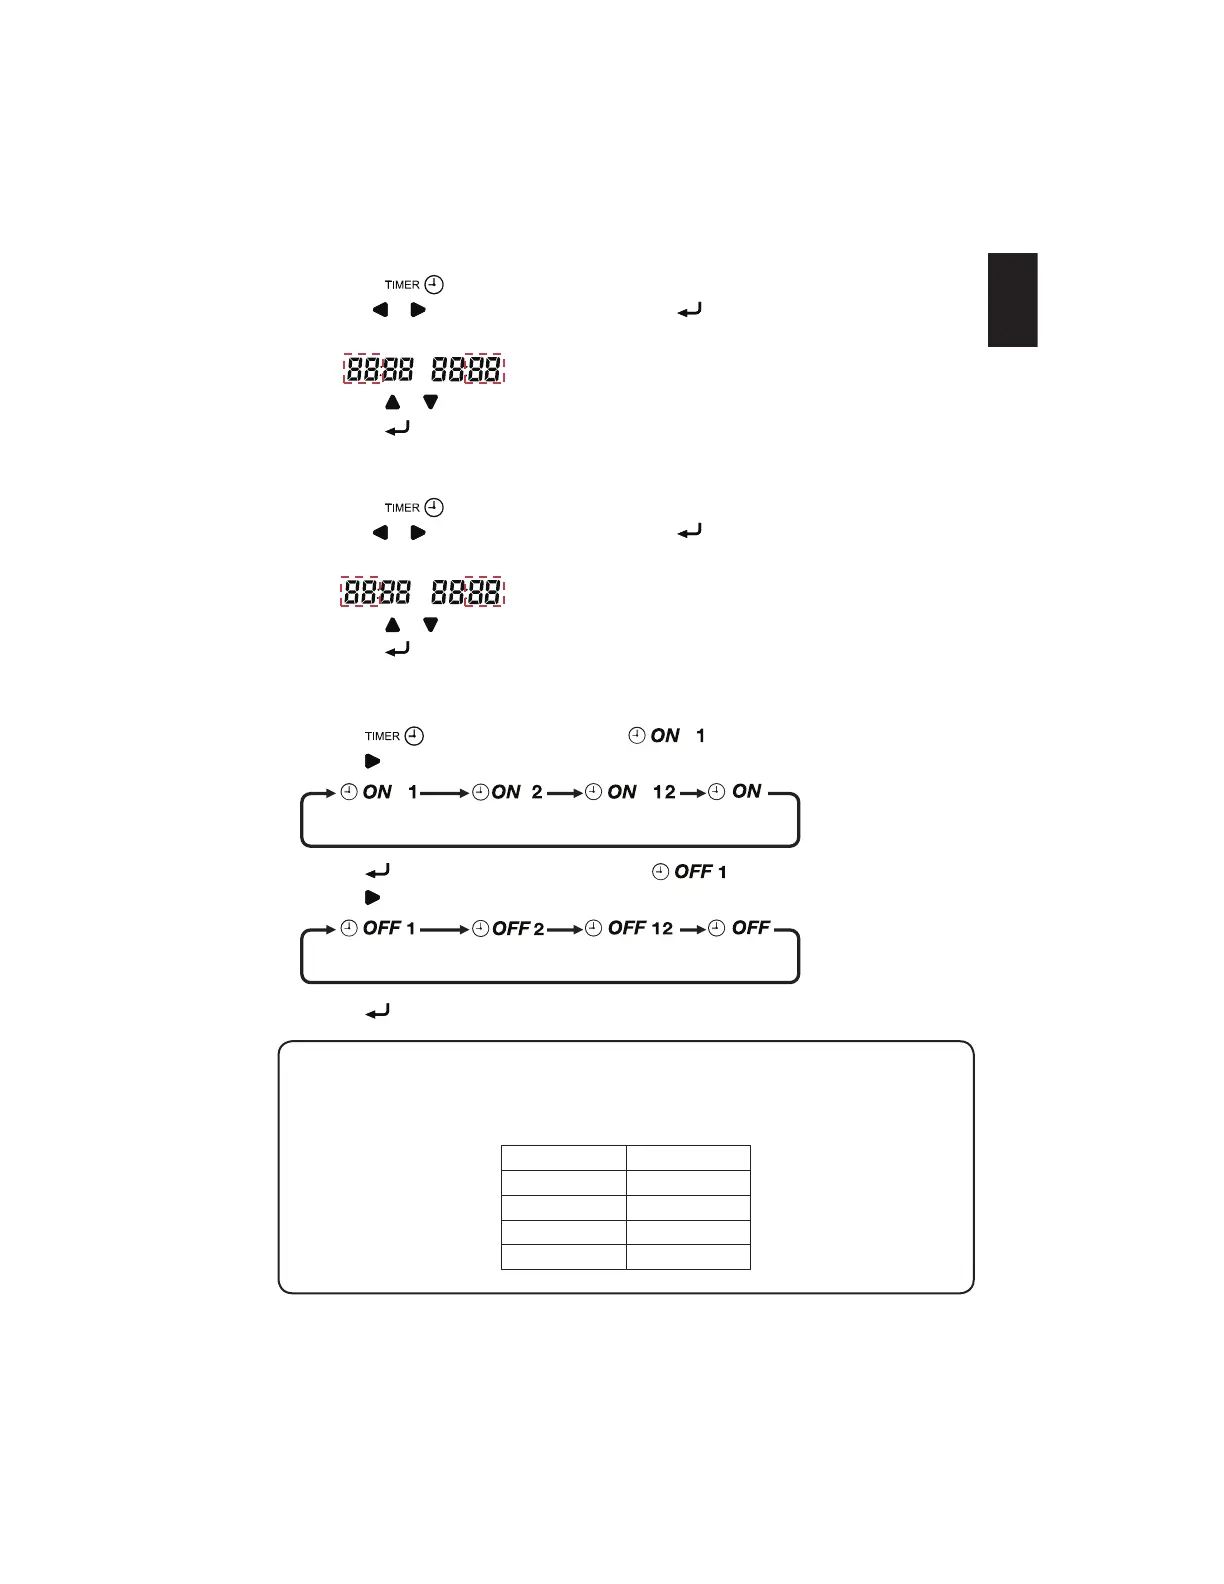
d. OFF Timer 1 Setting
I. Press
button again to enter OFF Timer 1 setting, then “MON” will blink.
II. Use
or button to select the Day and press button to confirm the Day.
III. Hour will blink.
Press or button to change the Hour.
Press
button to confirm the Hour, then Minute will blink.
IV. Repeat Step II to III for the timer setting of other days.
e. OFF Timer 2 Setting
I. Press
button again to enter OFF Timer 2 setting, then “MON” will blink.
II. Use
or button to select the Day and press button to confirm the Day.
III. Hour will blink.
Press or button to change the Hour.
Press
button to confirm the Hour, then Minute will blink.
IV. Repeat Step II to III for the timer setting of other days.
C) Activation of ON/OFF Timer
a. Press
button to activate On Timer. will blink.
b. Press
button for navigation of On Timer selection.
c. Press button to confirm the selection, then will blink.
d. Press
button for navigation of Off Timer selection.
e. Press button to confirm the selection and exit.
! NOTE
•
It is not advisable to set ON TIMER and OFF TIMER to have same values.
•
Shall these occur, the effective timer will be treated with priority as stated in table below:
Priority Timer
1 (Highest) ON TIMER 2
2 OFF TIMER 2
3 ON TIMER 1
4 (Lowest) OFF TIMER 1
1-OM-BRC51D-1117(0)-DAIKIN-EN.in3 3 5/31/18 9:14:42 AM