5 Installation
Installation and operation manual
8
FFA25~60A2VEB
Split system air conditioners
4P456960-1 – 2017.03
g
g
b
d
f
a h
i e
e
b
f
d
c
P1 P2
TRANSM.
WIRING
F1 F2
OFF
FORCED
T1 T2
RC
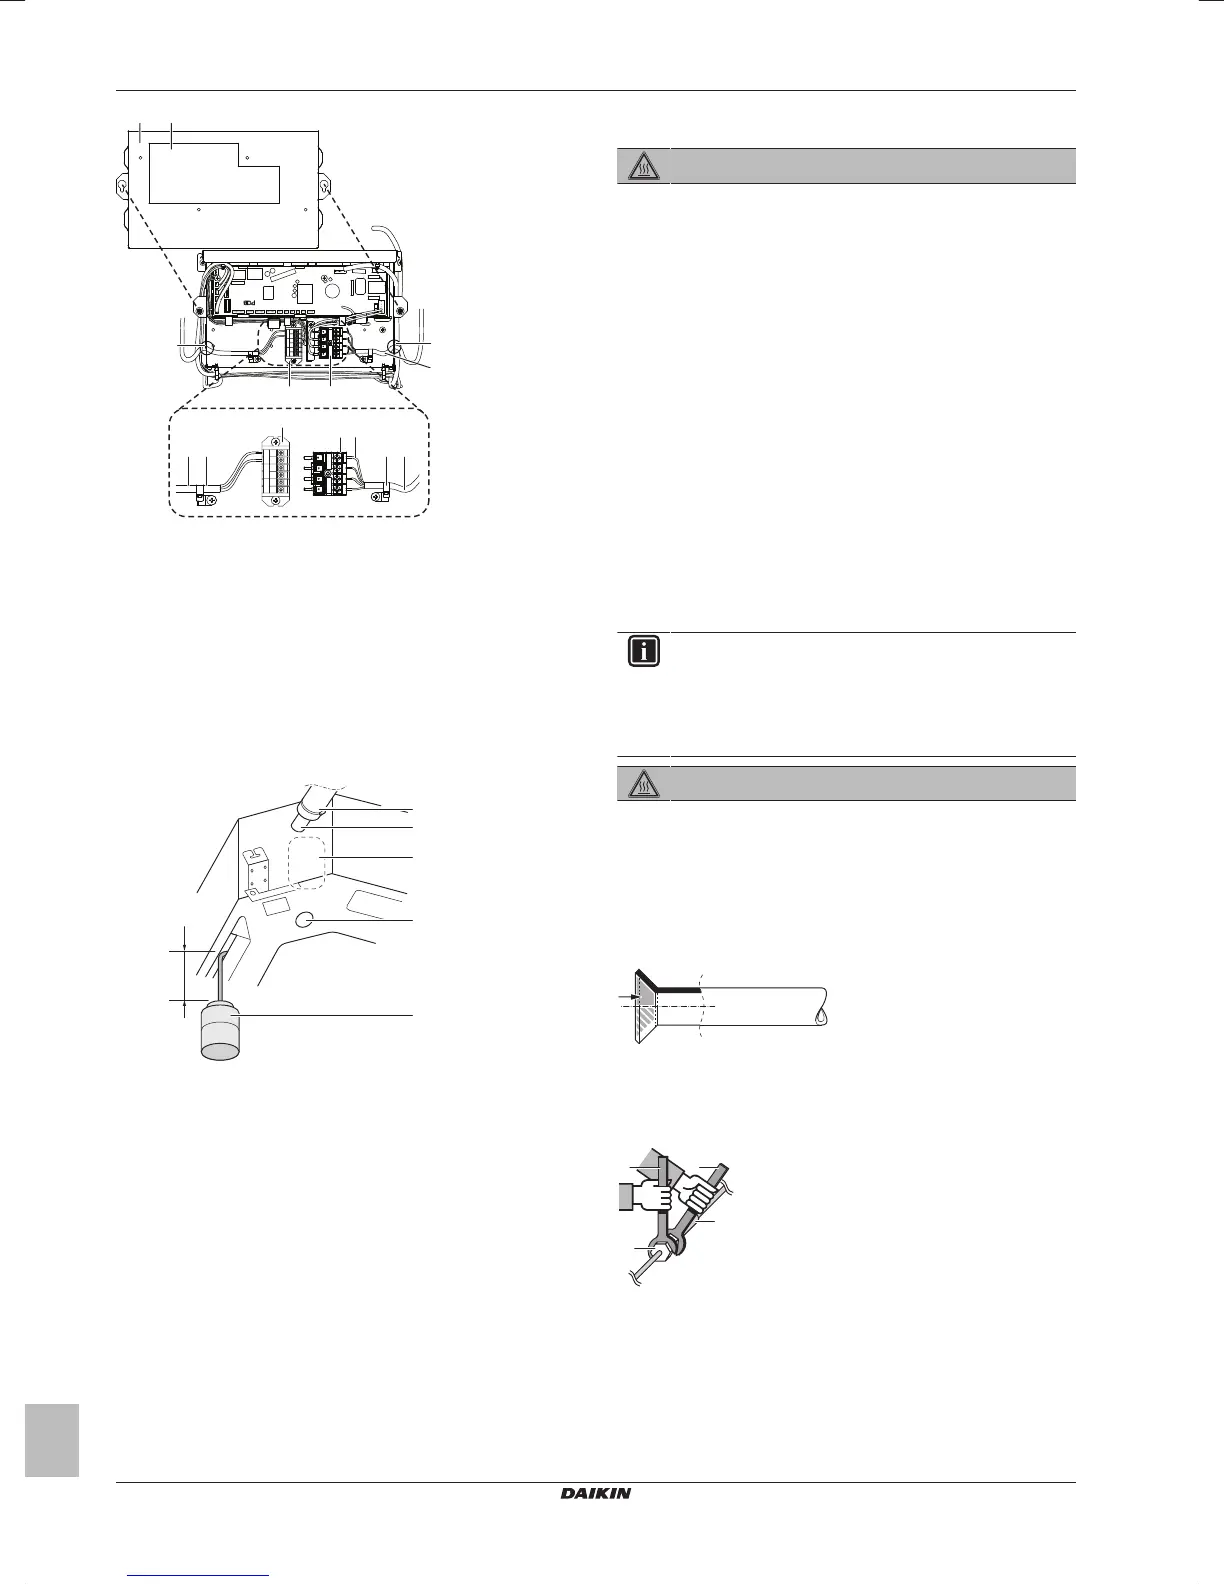
a Control box cover
b Inter-unit wiring
c Earth cable
d Terminal block for power supply
e Clamp
f Terminal board for transmission wiring
g Opening for cables
h Wiring diagram label (on the back of the control box lid)
i Remote controller wiring
2 Turn ON the power.
3 Start cooling operation (see "7.4 To perform a test run" on
page12).
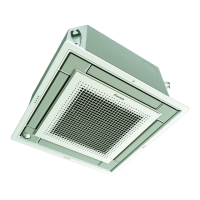
4 Gradually pour approximately 1 l of water through the air
discharge outlet, and check for leaks.
a Plastic watering can
b Service drain outlet (with rubber plug). Use this outlet to
drain water from the drain pan.
c Drain pump location
d Drain pipe connection
e Drain pipe
5 Turn OFF the power.
6 Disconnect the electrical wiring.
▪ Remove the control box cover.
▪ Disconnect the power supply and earth.
▪ Reattach the control box cover.
When electrical wiring is finished already
1 Start cooling operation (see "7.4 To perform a test run" on
page12).
2 Gradually pour approximately 1 l of water through the air
discharge outlet, and check for leaks (see When electrical
wiring is not finished yet).
5.2 Connecting the refrigerant piping
DANGER: RISK OF BURNING
5.2.1 About connecting the refrigerant piping
Before connecting the refrigerant piping
Make sure the outdoor and indoor unit are mounted.
Typical workflow
Connecting the refrigerant piping involves:
▪ Connecting the refrigerant piping to the outdoor unit
▪ Connecting the refrigerant piping to the indoor unit
▪ Insulating the refrigerant piping
▪ Keeping in mind the guidelines for:
▪ Pipe bending
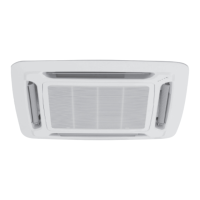
▪ Flaring pipe ends
▪ Brazing
▪ Using the stop valves
5.2.2 Precautions when connecting the
refrigerant piping
INFORMATION
Also read the precautions and requirements in the
following chapters:
▪ General safety precautions
▪ Preparation
DANGER: RISK OF BURNING
5.2.3 Guidelines when connecting the
refrigerant piping
Take the following guidelines into account when connecting pipes:
▪ Coat the flare inner surface with ether oil or ester oil when
connecting a flare nut. Tighten 3 or 4 turns by hand, before
tightening firmly.
▪ Always use 2 wrenches together when loosening a flare nut.
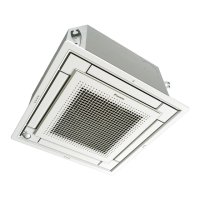
▪ Always use a spanner and torque wrench together to tighten the
flare nut when connecting the piping. This to prevent nut cracking
and leaks.
a Torque wrench
b Spanner
c Piping union
d Flare nut