Do you have a question about the Daikin FHC71KVE9 and is the answer not in the manual?
Ensure power is off for 10 minutes before disassembly to prevent electrical shock.
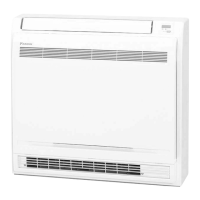
Press buttons, pull grille slowly, then lift at 45° angle to detach.
Wait 10 minutes after power off before disassembly to prevent electrical shock.
Open suction grille, disengage filter hooks, and pull filter down at an angle.
Wait 10 minutes after power off before disassembly to prevent electrical shock.
Pull down cover, disengage fall prevention strap from pin. Repeat for 4 covers.
Wait 10 minutes after power off before disassembly to prevent electrical shock.
Loosen 4 screws, remove 2 outer and 2 inner fixtures, then remove the panel.
Wait 10 minutes after power off before disassembly to prevent electrical shock.
Locate and remove 32 screws from decoration panel and covers to access vanes.
Wait 10 minutes after power off before disassembly to prevent electrical shock.
Remove adjacent cover, unscrew motor, disconnect connector, and pull motor down.
Wait 10 minutes after power off before disassembly to prevent electrical shock.
Remove covers from service monitor and connection wire sides by loosening screws.
Wait 10 minutes after power off before disassembly to prevent electrical shock.
Remove switch box, then fan using resin nut, and finally detach motor with nuts.
Wait 10 minutes after power off before disassembly to prevent electrical shock.
Drain water, remove 5 mounting screws, and pull the drain pan straight down.
Wait 10 minutes after power off before disassembly to prevent electrical shock.
Remove drain pan, hose band, pull hose, remove pump and mounting plate screws.
Confirm local standards suitability, use qualified installers, and Daikin parts only.
Avoid installation in corrosive gas areas or direct sea breeze exposure.
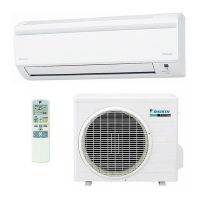
| Model | FHC71KVE9 |
|---|---|
| Category | Heat Pump |
| Cooling Capacity | 7.1 kW |
| Heating Capacity | 8.0 kW |
| Noise Level (Outdoor) | 50 dBA |
| Power Supply | 220-240 V, 50 Hz |
| Operating Temperature Range (Heating) | -15°C to 24°C |