6 | Unit installation
Installer reference guide
22
FTXP-M + FTXF-D + FTXF-A + ATXF-A
Daikin room air conditioner
4P513661-12L – 2021.07
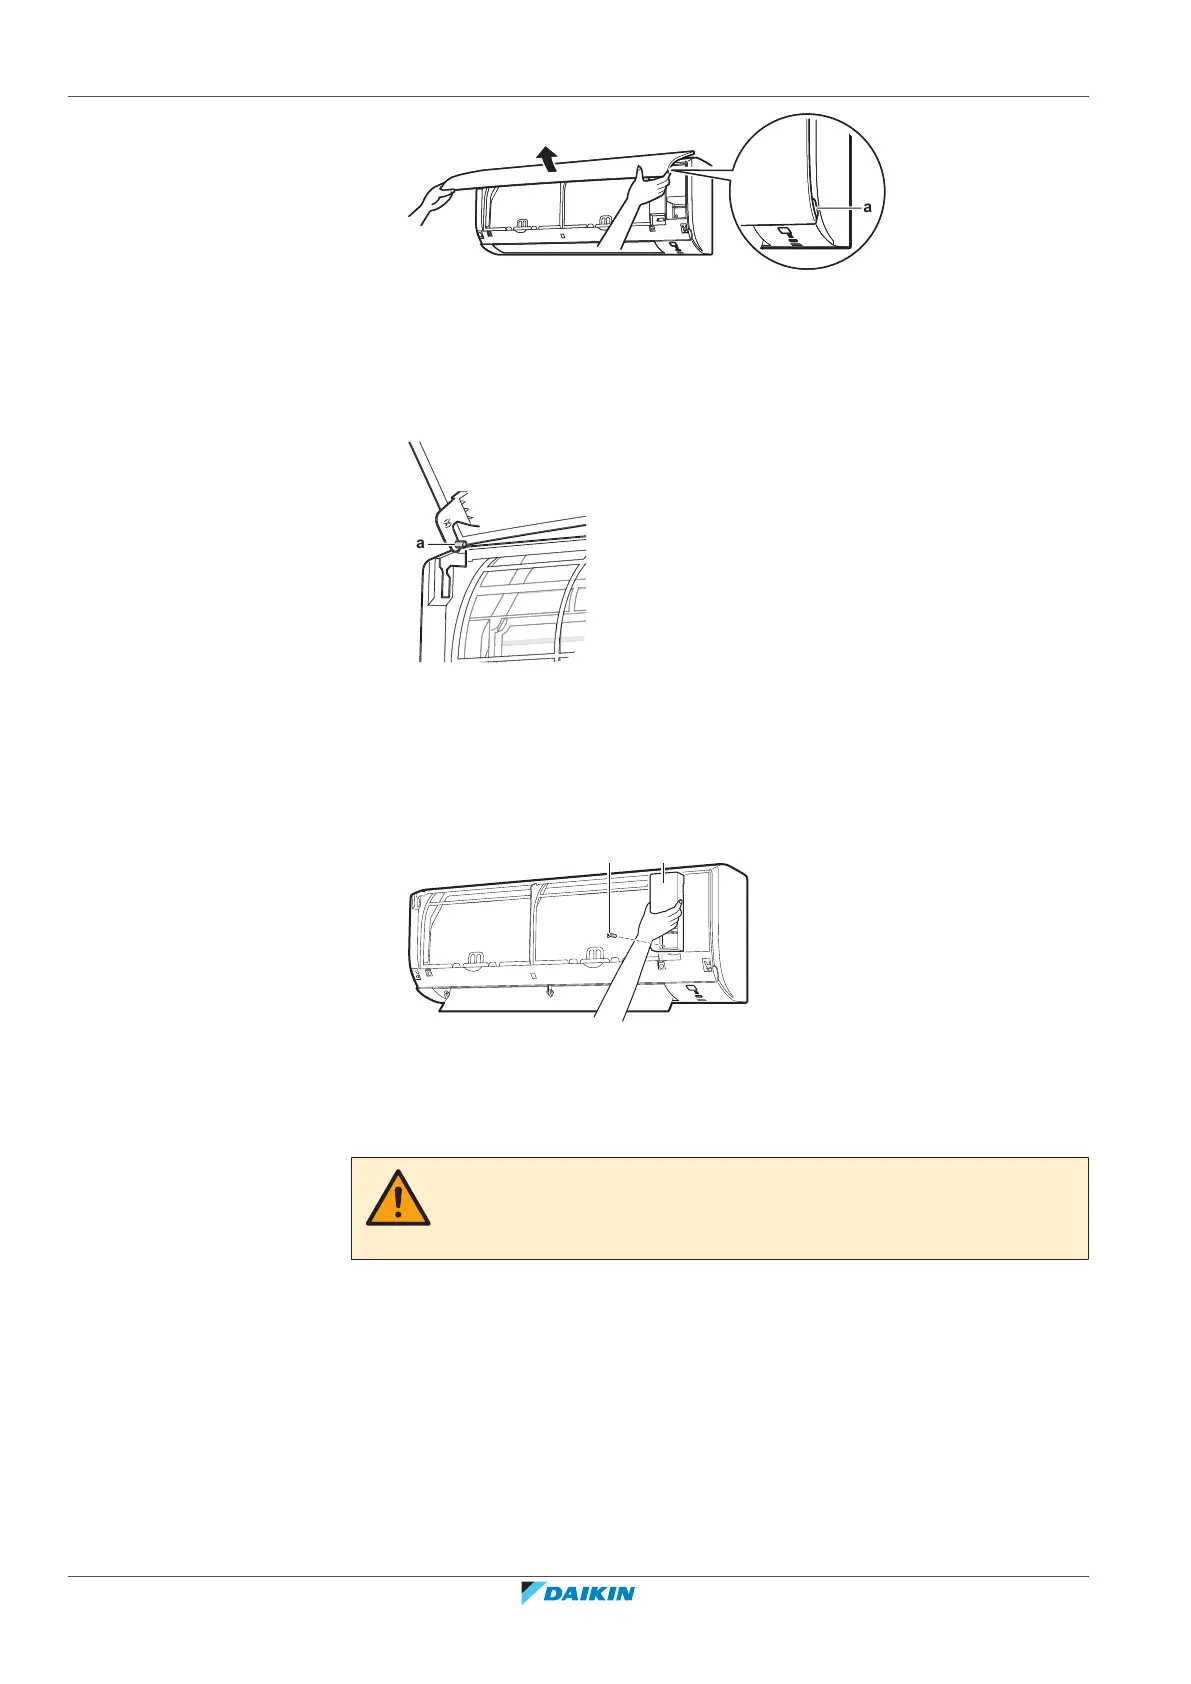
a Panel tabs
2 Remove the front panel by sliding it to the left or the right and pulling it
toward you.
Result: The front panel shaft on 1 side will be disconnected.
3 Disconnect the front panel shaft on the other side in the same manner.
a Front panel shaft
6.2.2 To open the service cover
1 Remove 1 screw from the service cover.
2 Pull out the service cover horizontally away from the unit.
a Service cover screw
b Service cover
6.2.3 To remove the front grille
CAUTION
Wear adequate personal protective equipment (protective gloves, safety glasses,…)
when installing, maintaining or servicing the system.
1 Remove the front panel to remove the air filter.
2 Remove 3 screws from the front grille.
3 Push down the 3 upper hooks marked with a symbol with 3 circles.
 Loading...