■English 4
Installation Tips
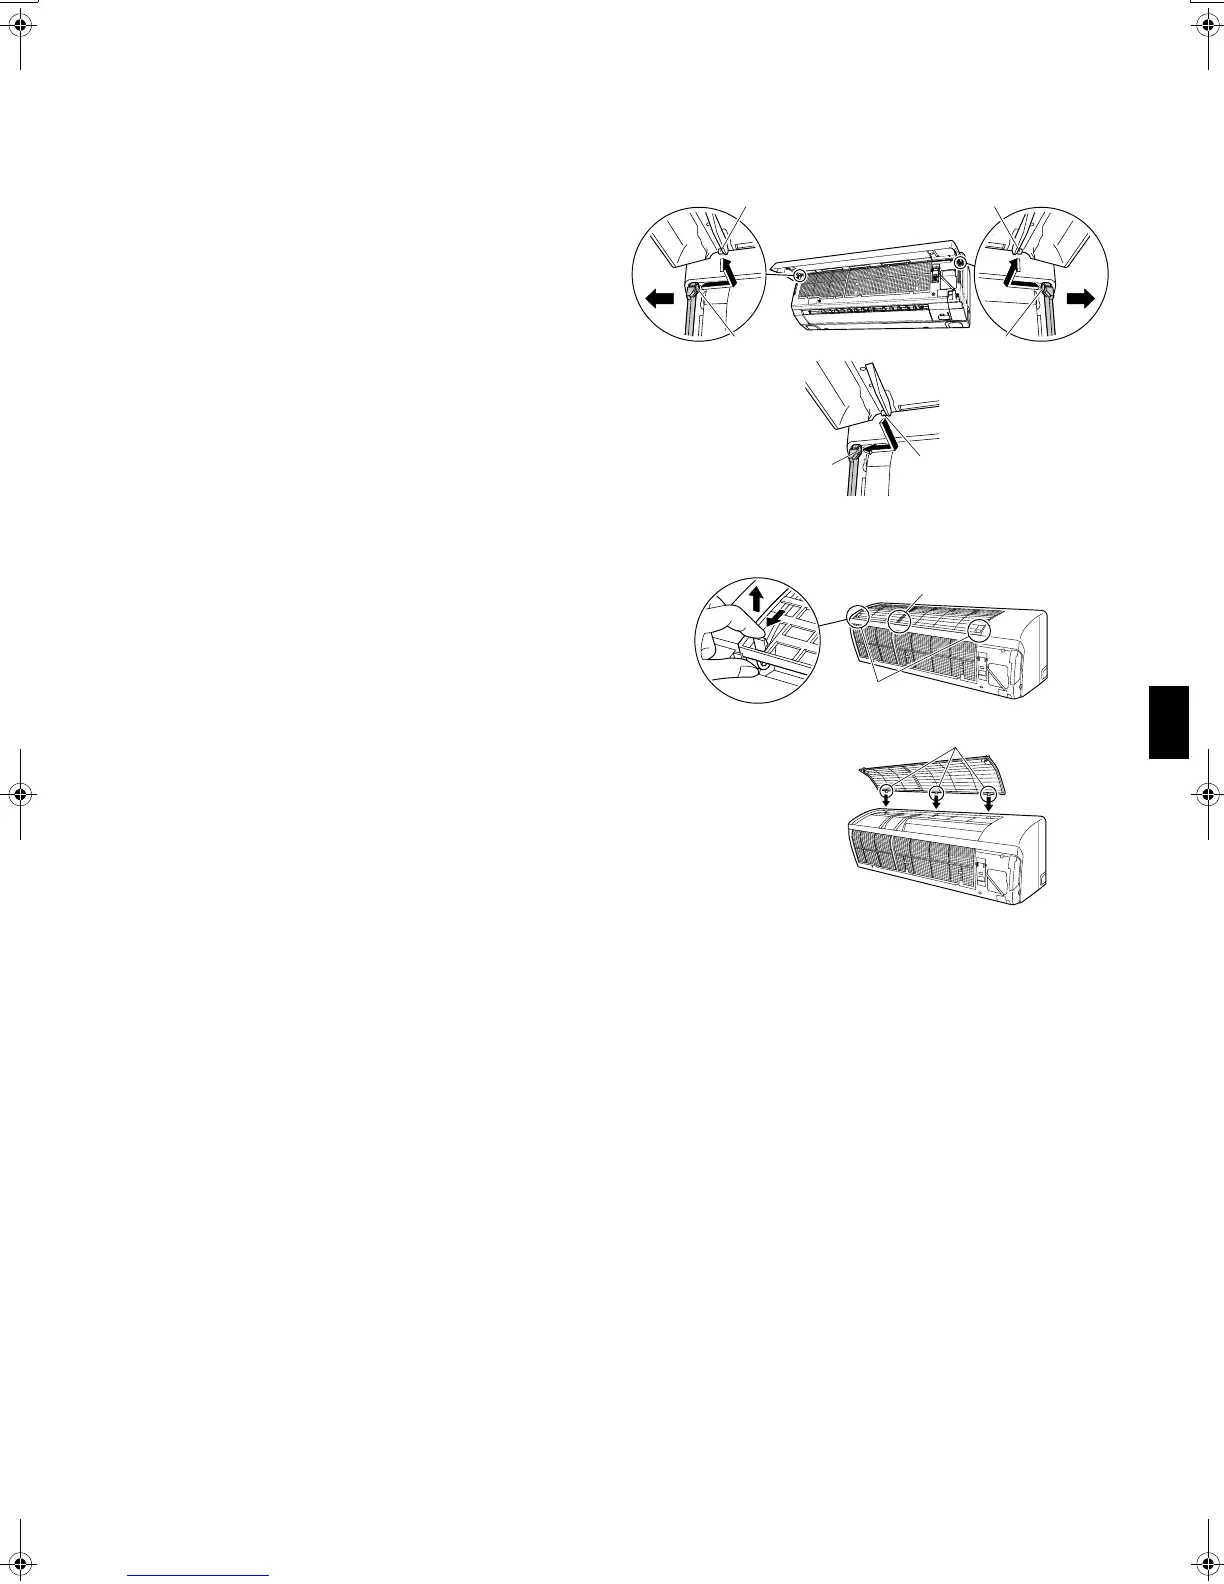
1.
Removing and installing front panel.
• Removal method
1) Open the front panel.
2) Spread out the shaft hole on the left side and
remove the rotating shaft.
Spread out the shaft hole on the right side as well
and remove the rotating shaft.
• Installation method
Insert the right and left rotating shafts on the front
panel into the shaft holes one at a time and slowly
close the panel.
(Press on both sides of the front panel.)
2.
Removing and installing the upper panel.
• Removal method
1) Remove the front panel and air filter.
2) Hold and pull forward 2 tabs on both sides to
discharge them, discharge the center tab, and then
lift up the upper panel.
• Installation method
1) Push in the upper panel along the guide on the top
of the front grille and insert the 3 tabs into the slots
on the front grille.
2) Push the upper panel down until it clicks.
3) Attach the air filter and front panel.
Rotating shaft
Shaft hole
Rotating shaft
Shaft hole
Rotating shaftShaft hole
Tabs
(2 on both sides)
Tab (Center)
Tabs (3 locations)
01_EN_3P177302-1.fm Page 4 Tuesday, May 30, 2006 9:36 AM
 Loading...