1
1
Drain Piping Work
1. Rig the drain piping.
Rig the drain line to ensure proper drainage. Also, observe the following to prevent leaks.
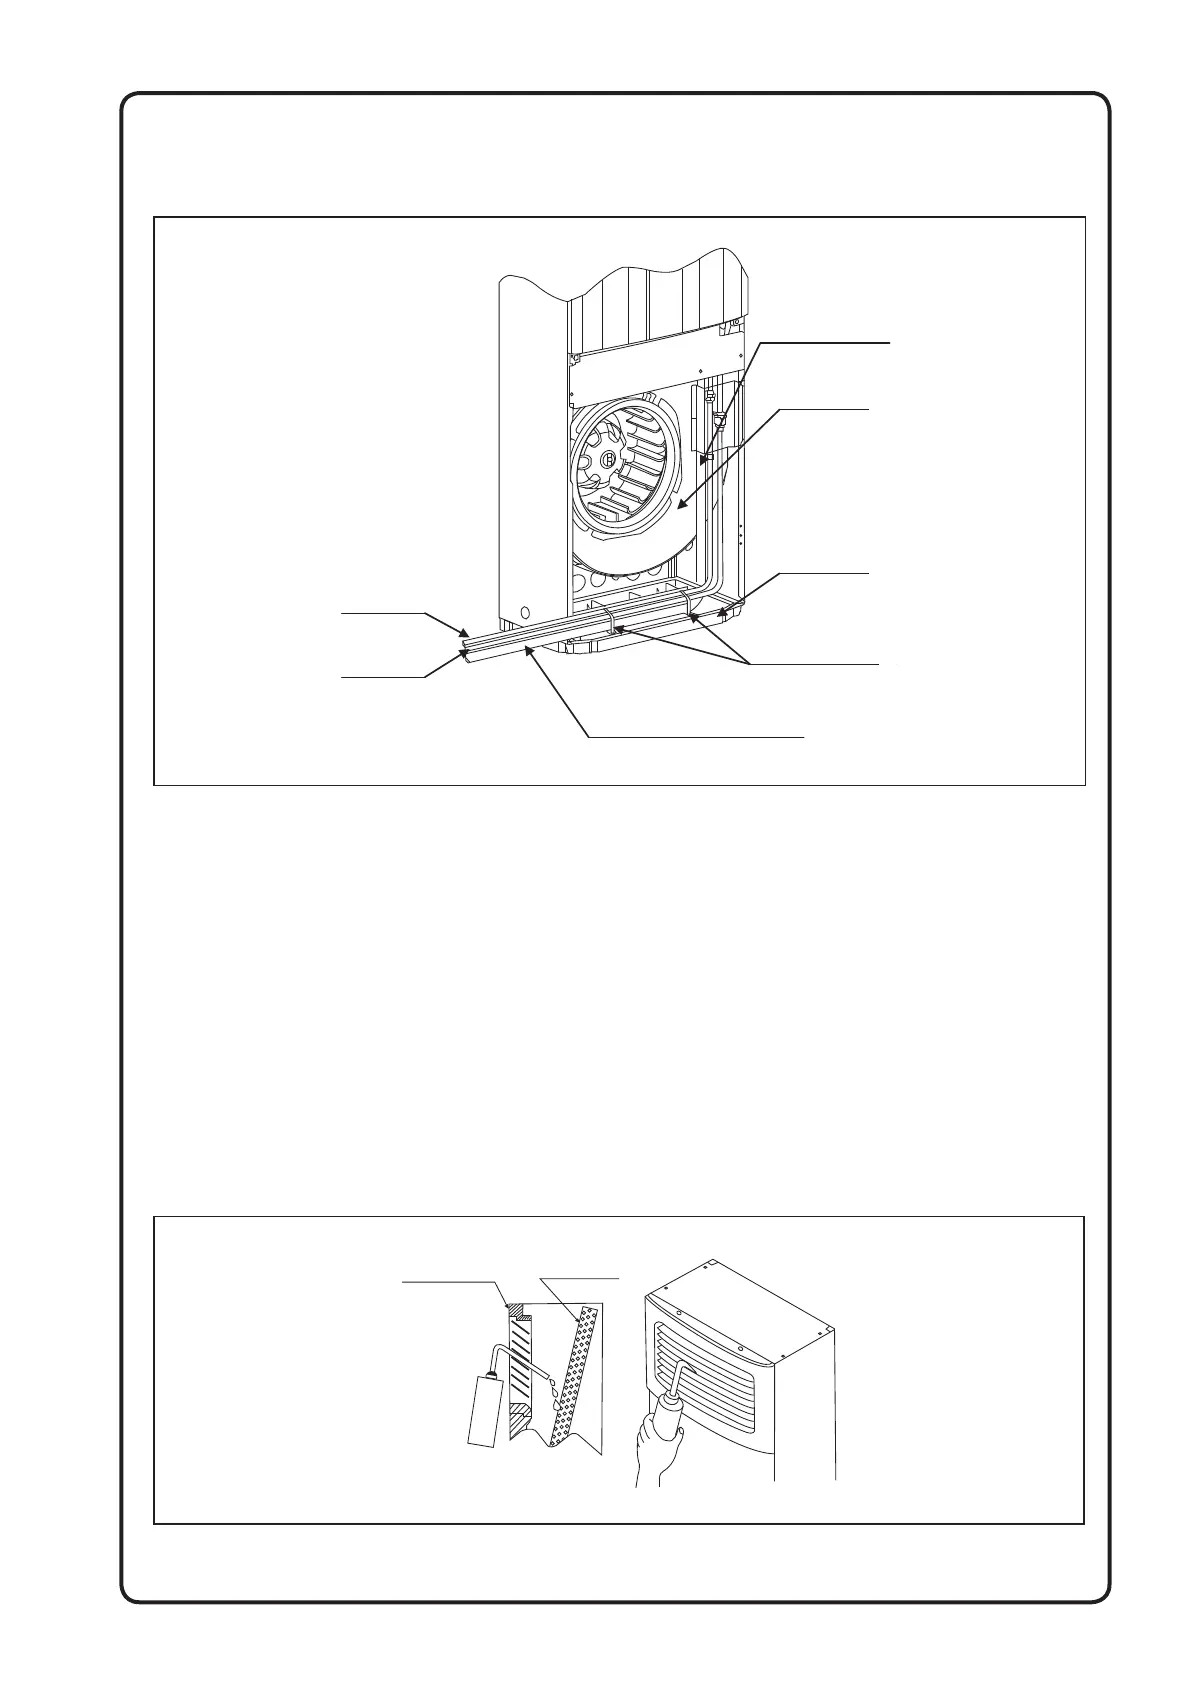
Figure H
Liquid pipe
Gas pipe
Drain hose inside
the unit
Fan housing
Bottom Frame
Anchor hose here
Drain hose (Procure in field).
Vinyl Tube (Pipe size 20mm).
• Bundle the drain hose to the refrigerant pipes as shown at right or take other means to anchor it down,
so as not to apply pressure to the hose inside the unit. This is necessary to prevent the drain hose from
disconnecting and to ensure proper insulation. Keep the drain hose sloping at a minimum 1/100 gradient,
to prevent air pockets.
• Condensate can form on the hose and leak from the unit. Therefore, definitely insulate the hose in at
least the below two places.
• All hose in the room and inside the unit.
• At connection between the unit’s drain hose and building drain pipe.
2. After rigging the drain hose, check that drainage flows smoothly and that water does not leak
from connections.
• Carefully pour approximately 1,000cc of water through the air discharge outlet so that it falls directly
onto the heat exchanger at an angle without splashing. (Refer to Figure I).
* If water is poured too fast or it water pressure is too high, the water will pass through the heat exchanger
and drip on the fan motor below it.
* If water gets on the inner front wall, it will leak onto the fl oor.
Figure I
Heat
exchanger
Air discharge
outlet
1-IMOM-FS-FVFC-RZFC-DAIKIN-EN.indd 131-IMOM-FS-FVFC-RZFC-DAIKIN-EN.indd 13 5/14/2020 5:54:00 PM5/14/2020 5:54:00 PM