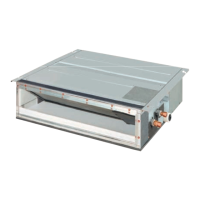
Installation EDUS39-600-F2_a
20 FXDQ-M
WARNING
• If the supporting structural members are not strong enough
to take the unit’s weight, the unit could fall out of place and
NOTE
cause serious injury.
• Install the indoor and outdoor units, power supply wiring
and connecting wires at least 3.5 ft. away from televisions
or radios in order to prevent image interference or noise.
Depending on the radio waves, a distance of 3.5 ft. may not
be enough to eliminate the noise.
(2) Use suspension bolts for installation. Check whether
the ceiling is strong enough to support the weight of
the unit or not. If there is a risk, reinforce the ceiling
before installing the unit.
(Installation pitch is marked on the carton box for installa-
tion. Refer to it to check for points requiring reinforcing.)
4. PREPARATIONS BEFORE INSTALLATION
(1) Confirm the positional relationship between the unit
and suspension bolts. (Refer to Fig. 2)
• Install the inspection opening on the control box side where
maintenance and inspection of the control box and drain
pump are easy. Install the inspection opening also in the
lower part of the unit.
(length : in.)
(2) Make sure the range of the unit’s external static pres-
sure is not exceeded.
See the Engineering Data for the range of the external
static pressure setting.
(3) Open the installation hole. (Pre-set ceilings)
Model A B
07 · 09 · 12 type 27-9/16 29-1/8
18 type 35-7/16 37
24 type 43-5/16 44-7/8
B
A
24-7/16
19-11/16
¨
17-3/4
(Inspection
opening size)
Ceiling
A
Air outlet
Suspension
bolt pitch
(length : in.)
Air inlet
Control box
(Suspension bolt pitch )
Allow view
Inspection door
(Ceiling opening)
Fig. 2
〈SERVICE SPACE〉
Drain pump
24-7/16

 Loading...