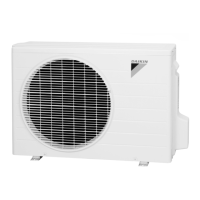
Do you have a question about the Daikin RCS 015D and is the answer not in the manual?
Details found on the unit's nameplate, including model, serial, and electrical characteristics.
Information located on compressor nameplates for tandem and trio compressor designs.
Details about the gas burner nameplate, including model, input, and temperature rise.
Explanation of symbols used for hazards (Danger, Warning, Caution) and their implications.
Illustrates the placement of major unit components within the RPS and RDT models.
A diagram illustrating the flow of the refrigeration circuit with labeled components.
Illustrates the piping configuration for scroll compressors in the condenser section.
Diagram showing the locations of control components within RPS units.
Diagram showing the locations of control components within RDT units.
Diagrams illustrating the locations of various control panels on the unit.
Diagram of a typical main control panel for specific unit sizes and voltage.
Diagram of a typical main control panel for larger unit sizes and voltage.
Diagram illustrating the components within a typical gas heat control panel.
Diagram illustrating the components within a typical propeller exhaust fan panel.
Diagram illustrating the components within a VFD bypass panel.
Diagram of the RCS control panel equipped with MicroTech III.
Diagram illustrating the components within an electric heat panel.
Diagram illustrating the components within a VFD compressor panel.
Detailed illustration of various harness plug connectors and their labels.
Lists controls, their descriptions, reset methods, locations, settings, and part numbers.
Table showing FanTrol setpoints and differentials for various unit sizes and controls.
Table showing fan cycling setpoints and differentials without specific controls.
Shows condenser fan numbering conventions and locations for each unit size.
Procedures for inspecting equipment upon receipt for damage and accuracy.
Specifies the required minimum clearances around the unit for operation and service.
Details the clearance required for accessing serviceable components and performing maintenance.
Recommendations for maintaining adequate ventilation clearances around the unit.
Requirements for overhead obstructions relative to the unit and its components.
Step-by-step instructions for assembling the RCS roof curb.
Step-by-step instructions for assembling the RPS/RDT roof curb.
Table providing dimensions for RPS/RFS roof curb assembly based on unit size.
Diagram illustrating the typical power wire entrance location on the curb.
Instructions and precautions for rigging and handling the unit safely.
Details on determining lift requirements and installation procedures.
Details on splitting and reassembling RPS units at the fan section.
Steps for setting unit sections during the reassembly process.
Steps for reassembling the unit cabinet after splitting.
Steps for reconnecting power and control wiring after unit sections are joined.
Guidelines and recommendations for refrigerant piping installation.
Table specifying refrigerant connection sizes and locations for various unit models.
Table detailing refrigerant piping diameters for various unit sizes.
Procedure for testing the refrigeration system for leaks.
Steps for evacuating the refrigeration system to remove moisture and non-condensables.
Table showing approximate refrigerant charge amounts for each circuit.
Table showing refrigerant weight in copper lines based on size and type.
Table relating pressure and vacuum readings to temperature and boiling point of water.
Steps and guidelines for charging the system in the field.
Table providing typical subcooling operating values based on outdoor ambient temperature.
Description of refrigeration service valves provided with the unit.
Details on connecting the condensate drain line, including P-trap requirements.
Instructions and considerations for piping hot water coils.
Instructions for piping steam coils, including connections and pitch.
Recommendations for proper steam piping installation to prevent damage.
Recommendations for selecting and installing steam traps.
Overview of optional damper assemblies, including actuators and linkages.
Description and adjustment procedures for economizer dampers.
Description of intake hood dampers controlled by a single actuator for 100% outside air.
Description of intake hood dampers for fixed position fresh air quantity control.
Procedures and considerations for installing ductwork to the unit.
Diagram showing the static pressure tubing entrance location into the unit.
Diagram illustrating the installation of pressure sensing tubing.
Recommendations for installing taps for building pressurization control.
Recommendations for installing taps for lab pressurization control.
Diagram of power wiring connections for RPS, RDT, and RFS units.
Diagram illustrating the optional side power wiring entrance.
Details on power wiring connections for RCS units.
Diagram showing the typical power wire entrance for RPS units.
Diagram of power wiring connections for RCS units from 050D to 140D.
Table detailing various multiple point power connection options.
Table specifying recommended power wiring sizes for different ampacities.
Details on making field control wiring connections for RPS, RDT, and RFS units.
Details on control wiring between RFS and RCS units.
Diagram illustrating field wiring connections for RDT, RFS, and RPS units.
Diagram illustrating the routing and installation of the control wiring raceway.
Diagram showing the interconnecting control wiring between RFS and RCS units.
Instructions for releasing spring mounts on fans before unit operation.
Instructions for properly adjusting spring mounts for fan operation.
Instructions for removing relief damper tie-down brackets before operation.
Procedure for adjusting seismic restraints on spring-mounted fans.
Instructions for adjusting scroll dampers for air volume control.
Instructions for adjusting supply fan thrust restraints.
Description of the unit's initial power-up sequence and component energization.
Details the sequence of operation for the supply and return fans.
Description of the economizer operation sequence based on enthalpy and temperature.
Description of the staging sequence for fixed speed compressors.
Explanation of how cooling load is distributed across refrigerant circuits.
Explanation of symbols and abbreviations used in wiring diagrams.
Continues the explanation of symbols and abbreviations used in wiring diagrams.
General notes and guidelines pertaining to the wiring diagrams.
Wiring diagram illustrating VAV fan power with SAF, RAF VFDs, and unit powered outlet/light.
Continues the wiring diagram for VAV fan power.
Wiring diagram illustrating constant volume fan power for SAF and RAF.
Continues the wiring diagram for constant volume fan power.
Wiring diagram for RPS 074 condensing unit power with VFD compressors.
Wiring diagram for RPS 075 condensing unit power with SpeedTrol and fixed scroll compressors.
Wiring diagram illustrating VFD control for SAF and RAF.
Wiring diagram illustrating VAV control inputs to the main control board.
Continues the wiring diagram illustrating VAV control inputs.
Wiring diagram illustrating the schematic for the HTD gas burner.
Continues the wiring diagram illustrating the HTD gas burner schematic.
Wiring diagram illustrating the control schematic for electric heat.
Continues the wiring diagram illustrating the electric heat control schematic.
Wiring diagram for RPS 061 condensing unit control with fixed speed compressors.
Continues the wiring diagram for RPS 061 condensing unit control.
Wiring diagram for RPS 074 condensing unit control with variable speed inverter compressors.
Continues the wiring diagram for RPS 074 condensing unit control.
Wiring diagram for RPS 074 compressor control with variable speed inverter compressors.
Continues the wiring diagram for Constant Volume (CV) fan control.
Wiring diagram illustrating power supply for lights and receptacles.
Describes the function and control of damper and valve actuators.
Explains the electromechanical enthalpy control device and its settings.
Table of enthalpy control settings and corresponding temperature points.
Describes the optional electric differential enthalpy control arrangement.
Explains the ground fault protection system designed to protect motors.
Describes the phase voltage monitor system for protecting loads from power conditions.
Explains the modulating hot gas reheat function used in dehumidification mode.
Refrigeration schematic illustrating the dual 2-way valve system for hot gas reheat.
Describes how dehumidification operation is initiated based on sensor inputs.
Describes the conditions under which dehumidification operation terminates.
Details on MHGRH control, reheat valves, and compressor staging.
Explanation of the hot-gas bypass system for low suction and frosting protection.
Information on using an external time clock for scheduling unit operation.
Information on optional smoke and fire protection systems.
Details on factory-installed smoke detectors and their wiring.
Information on using terminals for emergency shutdown.
Information on the optional freezestat and its operation.
Methods for switching the unit between occupied and unoccupied modes.
Available outputs for field connections to external devices.
Details on using Digital Output #10 for VAV box or fan operation signals.
Description of the VAV box output signal and its behavior in different modes.
Information on the EFT sensor and its role in airflow and heating problems.
Description of the DHL control that protects ductwork from over-pressurization.
Details on GFCI receptacles and optional section lights.
Details on compressor operation at low ambient temperatures.
Diagram illustrating the R-410A Speedtrol system for condenser fan control.
Characteristics of Speedtrol operation for fixed speed compressor units.
Describes condenser fan operation for units with variable speed compressor options.
Characteristics of Speedtrol operation for variable speed inverter compressor units.
Characteristics of Speedtrol operation with start-stop control.
Description of the DesignFlow airflow measurement station option.
Procedure for starting up the DesignFlow station before unit operation.
Illustration of the DesignFlow station, showing the vane and intake.
Diagram showing how to tape the fulcrum alignment plate to the DesignFlow vane.
Diagram showing how to place the leveling weight on the fulcrum for alignment.
Instructions for making level adjustments to the DesignFlow unit.
Diagram illustrating the DesignFlow frame assembly and adjustment points.
Diagram showing how to remove covers from the access opening.
Diagram illustrating the leveling adjustment mechanism for the DesignFlow unit.
Information on propeller exhaust fan options for economizer units.
Diagram showing two fans with a back return configuration.
Diagram illustrating the correct fan rotation direction.
Instructions for adjusting damper counterbalance for optimal effect.
Instructions for making adjustment #1 to dampers for full open balance.
Instructions for making adjustment #2 to dampers for closed position balance.
Information on belt maintenance, tension, and pulley alignment.
Diagram illustrating counterbalance adjustment points.
Diagram illustrating belt adjustment procedures.
Diagram illustrating proper drive pulley alignment.
Troubleshooting guide for propeller exhaust fan problems.
Parts list for propeller exhaust fans, with numbered components.
Information on fan bearing inspection, lubrication, and maintenance.
Information on checking fasteners and setscrews for tightness.
Details on motor and bearing lubrication procedures.
Procedures for cleaning fan components and removing dust or dirt.
Control logic for exhaust fans based on system pressure and damper position.
Description of the ultraviolet lights option for coil and drain pan sanitation.
Diagram illustrating the typical installation of ultraviolet lights.
Explanation of how ultraviolet lights operate and are controlled.
Wiring schematic illustrating the operation of ultraviolet lights.
Description of the remote user interface for Daikin rooftop systems.
Key features of the MicroTech III remote user interface.
Image of the MicroTech III remote user interface unit.
Diagram illustrating process bus wiring connections for remote interfaces.
Specifications and connection details for the remote user interface.
Explanation of how VFD compressors operate and modulate capacity.
Table detailing VFD compressor modulation ranges for various models.
Diagram showing the VFD compressor modulation signal in Volts DC.
Details on controlling the VFD compressor using digital and analog signals.
Describes the transition sequence when staging up compressors with VFD.
Describes the transition sequence when staging down compressors with VFD.
Transition sequence when dehumidification becomes active during cooling.
Sequence of operation for the VFD compressor oil boost state.
Protection controls for VFD compressors to prevent damage.
Control logic for unloading the VFD compressor due to high discharge pressure.
Control logic for unloading the VFD compressor due to high discharge line temperature.
Information on monitoring and controlling discharge superheat for VFD compressors.
Options for manually controlling the VFD compressor for service.
Table listing VFD compressor winding resistance values.
Control logic for the condenser coil splitter solenoid valve.
Emergency stop control function for VFD compressors.
General information on variable speed scroll compressors and their benefits.
Diagram illustrating the information found on a compressor nameplate.
Diagram illustrating the main components of a compressor.
Details on the oil injection control system for VFD compressors.
Description of the optical oil level sensor used to monitor compressor oil.
Diagram showing the assembly components of the oil injection control.
Diagram showing how to dismantle the oil injection control.
Diagram of the sightglass used with the optical oil sensor/switch.
Diagram of the optical oil level sensor/switch.
Information regarding the variable frequency drive used for VFD compressors.
Basic operational steps for the VFD compressor drive.
Table listing compressor drive models and their corresponding frame sizes.
General procedures for checking, testing, and starting the unit.
Safety precautions for servicing control panel components.
List of essential checks and verifications to perform before unit start-up.
Steps for powering up the unit controller and associated systems.
Procedures for starting the supply and return fans.
Procedures for starting and verifying the economizer system.
Procedures for safely starting the unit's compressors.
How to check and verify the correct rotational direction of scroll compressors.
Procedure for adjusting the expansion valve superheat setting.
Recommendations for checking superheat levels on refrigeration circuits.
Procedures for starting heating systems including gas, electric, steam, and hot water.
Procedures for performing air balancing on the unit's fans.
Instructions for ensuring proper alignment of drive sheaves.
Instructions for adjusting drive belt tension.
General guidelines and rules for proper belt tensioning.
Steps for measuring belt tension accurately.
Diagram illustrating the process of sheave alignment.
Diagram illustrating the procedure for drive belt adjustment.
Instructions for mounting and adjusting VM and VP variable pitch sheaves.
Diagram of VM and VP variable pitch sheaves, showing components.
Instructions for mounting and adjusting LVP variable pitch sheaves.
Diagram of LVP variable pitch sheaves, illustrating mounting and adjustment.
Instructions for mounting and adjusting MVP variable pitch sheaves.
Diagram of MVP variable pitch sheaves (Type A-B).
Diagram of MVP variable pitch sheaves (Type A-B) showing adjustment.
Importance of recording and maintaining control parameter settings for reference.
Guide on using the keypad and display interface for unit control and monitoring.
Diagram illustrating the layout and function of the keypad controls.
Information on password levels and access for controller functions.
Explanation of how to navigate through the controller interface menus.
Instructions for entering and using edit mode to change values.
Diagram of the controller's password main page.
Diagram of the controller's password entry page.
Overview of the main menu structure for the MicroTech III controller.
Options available for manual control of various unit functions.
Access to service menus for advanced settings and diagnostics.
Information on how to access and view trending operational data.
Procedures and parameters for commissioning the unit.
Details of the View/Set Unit menu section for configuring parameters.
Settings related to cooling operation, including setpoints and capacity.
Settings related to economizer operation and damper control.
Settings for minimum outside air damper position and ventilation limits.
Settings related to heating operation, including setpoints and staging.
Settings related to dehumidification operation, including RH and dewpoint.
Settings for unit date, time, operating schedules, and holidays.
Details of the Commission Unit menu section for setting up unit parameters.
Parameters for configuring the cooling system operation.
Setup parameters for heating/cooling changeover logic.
Setup parameters for Return Fan (RF) and Exhaust Fan (EF) functions.
Setup parameters for minimum outside air settings.
Setup parameters for evaporator and condenser operation.
Setup parameters for the outside air fan.
Status information for refrigerant circuits, including pressure and temperature.
Setup parameters for the expansion valve.
Setup parameters for heating system operation.
Configuration settings for unit alarms and alert behavior.
Setup parameters for defrost functions to prevent coil freezing.
Setup parameters for dehumidification modes and settings.
Setup parameters for energy recovery system functions.
Setup parameters for controlling head pressure.
Access to various service menus for advanced configuration and diagnostics.
Configuration settings for various unit timers, including service time.
Tracking and display of unit operating hours for various components.
Functionality to save controller parameters and restore them.
Information regarding currently active alarms and their status.
Lists of active and logged alarms, including alarm type and count.
Detailed history of unit alarms, including timestamps and types.
Status information for analog inputs connected to the controller.
Status information for universal input/output points on the controller.
Status information for digital inputs connected to the controller.
Status information for digital outputs controlled by the unit.
Configuration settings for alarms, including limits and delays.
Status information for network inputs connected to the controller.
Status information for Modbus communication between devices.
Status information related to the D3 module.
Adjustments for sensor offsets to ensure accurate readings.
Detailed information on active alarms, including type and status.
Detailed history of logged alarms, including timestamps and types.
Information regarding expansion modules connected to the system.
Details on configuring and managing BMS communication settings.
Details on configuring trending data logging and display.
General preventive maintenance schedule and tasks for the system.
Safety precautions and procedures for servicing control panel components.
Precautions for storing the unit on the ground or at the final site location.
Procedure for checking cabinet sections for moisture or debris accumulation.
Procedures for cooling circuits during unit storage.
Precautions for the control compartment, including heat source usage.
Procedure for performing a complete start-up after extended storage.
Lubrication instructions for supply and return fan motor bearings.
Lubrication instructions for fan shaft bearings.
Table listing recommended lubricants and amounts for fan motor bearings.
Table of recommended relubrication intervals based on speed and cleanliness.
Table listing recommended lubricants for fan shaft ball bearings.
Table showing recommended grease amounts for fan relubrication.
Instructions for the proper installation or removal of bearings.
Information regarding BOA concentric collars used with bearings.
Table specifying the tolerances for shaft sizes.
Table of recommended torque values for concentric locking bearings.
How to monitor installed bearings for noise, vibration, and temperature.
Information on acceptable vibration levels for fan operation.
Table indicating acceptable vibration levels based on fan speed.
Common causes of fan vibration, including imbalance and drive issues.
Schedule for periodic service and maintenance tasks.
Information on setscrews and their importance for locking components.
Special procedure for retightening return fan bearing setscrews.
Diagram of the return fan assembly, showing bearings and shaft support.
Instructions for aligning the supply fan wheel to the funnel.
Diagram for 20" DWDI airfoil wheel-to-funnel alignment.
Diagram for 24" DWDI backward curved wheel-to-funnel alignment.
Diagram for airfoil wheel-to-funnel alignment for 27" to 40" fans.
Table relating wheel diameter to funnel relationship for airfoil fans.
Diagram for SWSI airfoil wheel-to-funnel alignment for 44" and 49" fans.
Table relating wheel diameter to funnel relationship for SWSI airfoil fans.
Diagram showing alignment for a 40" SWSI airfoil wheel.
Table relating wheel diameter to funnel relationship for SWSI fans.
Diagram illustrating the oil equalization line for compressors.
Diagram of the oil equalization line showing Rota-Lock fittings.
Diagram illustrating the suction tubes connected to the compressor.
Diagram illustrating the discharge tubes connected to the compressor.
Procedure for preferred replacement of a failed compressor.
Procedure for alternative replacement of a failed compressor.
Information on the design and benefits of all-aluminum condenser coils.
Procedure for connecting the condenser coil to copper tubing.
Diagram showing a cross-section of a micro-channel coil.
Diagram illustrating the aluminum to copper connections.
Close-up view of the coil connections.
Cleaning procedures recommended for Option E coated coils.
Procedure for removing surface loaded fibers from coils before rinsing.
Recommendation for a monthly clean water rinse to remove contaminants.
Requirements for routine quarterly cleaning of Option E coated coils.
Warning against using harsh chemicals or acid cleaners on coated coils.
Precautions when using high velocity water or compressed air for cleaning.
Table listing approved cleaning agents for Option E coated coils.
Procedures for winterizing water coils to prevent freeze-up damage.
Table listing motor control and protection components used in RoofPak units.
Description of the manual motor protector, its functions, and features.
Additional features of the manual motor protector, such as rotary operator.
Diagram of a manual motor protector, showing its components and operation.
Description of thermal overload relays used for motor protection.
Description of circuit breakers used for short circuit protection.
Diagram of an overload relay, showing its components and operation.
Diagram of a circuit breaker, showing its positions and reset mechanism.
Diagram of field wiring terminal connectors, highlighting spring clamp advantages.
Description of the phase voltage monitor and its protective functions.
Table explaining the LED indicators on the phase voltage monitor.
Diagram of the phase voltage monitor, showing LEDs and features.
Diagram of the through-the-door handle disconnect mechanism.
Diagram illustrating the interlock bypass feature of the disconnect.
Information on pressure sensors used by the MicroTech III controller.
Procedure for troubleshooting suspect pressure transducers.
List of components and their corresponding Daikin part numbers.
Information on how to order replacement parts from Daikin or wholesalers.
Information on scroll compressors used in Daikin rooftop units.
Procedures for replacing parts of tandem or trio compressors.
Procedure for returning warranty materials for credit.
Warranty terms and conditions specific to North America.
List of exclusions and conditions that void the product warranty.
Contact information for obtaining assistance or warranty information.
Statement defining the sole remedy available under the warranty.
Checklist for initial unit checks performed before startup.
Section for recording fan operational data, including voltage, amperage, and RPM.
Section for recording compressor startup data and checks.
Section for recording unit performance data during testing.
Checklist for verifying electric heat components and operation.
Checklist for gas burner function, test, and start procedures.
Calibration procedure for the Design Flow airflow measurement system.
Instructions for maintaining and recording MicroTech controller parameters.
Question regarding any visible shipping damage to the unit.
Question asking for a rating of the product's overall appearance.
Question regarding the proper fitment of all unit sections.
Question about checking for air leakage within the unit cabinet.
Question asking to check for any refrigerant leaks.
Question regarding excessive vibration in the refrigerant piping.
Question verifying the function of all electrical controls at startup.
Question regarding the adequacy of unit labeling and schematics.
Question asking for a rating of the product's serviceability.
Question asking for a rating of the product's overall quality.
Question ranking Daikin product quality against competitors.
| Brand | Daikin |
|---|---|
| Model | RCS 015D |
| Category | Air Conditioner |
| Language | English |