Do you have a question about the Daikin REYQ72TTJU and is the answer not in the manual?
Provides general information about the VRV IV heat recovery system.
Details allowed combinations of indoor and outdoor units for the system.
Specifies the required indoor unit capacity range for the outdoor units.
Outlines the manual's purpose for handling, installing, and connecting outdoor units.
Lists the accessories included with the unit for installation.
Describes how to open the unit panels to access internal components.
Refers to the Engineering Data Book for detailed technical specifications.
Refers to the Engineering Data Book for details on main components and their functions.
Covers site selection, foundation, stability, air circulation, and safety precautions.
Advises on precautions related to rain, wind direction, and weather conditions.
Provides guidance on installing the unit in locations with heavy snow or cold ambient temperatures.
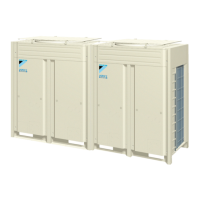
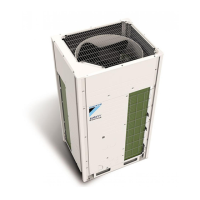
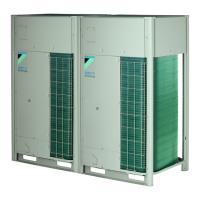
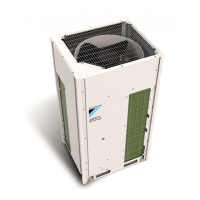
Displays the physical dimensions and foundation bolt hole details for outdoor units.
Details the required clearance space around the unit for servicing and air inlet/outlet.
Instructions for checking the unit for damage upon delivery.
Guidance on safely handling and transporting the unit to prevent damage.
Steps for safely unpacking the unit and its accessories.
Instructions for securely leveling and installing the unit on its base.
Describes the procedure for removing protective shipping plates before installation.
General precautions for R410A refrigerant system cleanliness, dryness, and tightness.
Specifies the type of copper pipe suitable for the refrigerant system.
Provides tables for selecting the correct pipe sizes for different system configurations.
Guidance on selecting appropriate refrigerant branch kits based on system configuration.
Details the maximum allowable lengths and height differences for refrigerant piping.
Provides precautions and methods for brazing refrigerant pipes without contamination.
Describes how to connect refrigerant piping to the unit, considering front or bottom connections.
Instructions for installing refrigerant branching kits, including horizontal and vertical mounting.
Details on how to handle and operate stop valves properly.
Specifies power circuit requirements, safety devices, and cable specifications for unit wiring.
Illustrates wiring connections for the entire system, including power and transmission wiring.
Describes how to route and connect power and transmission wiring to the unit.
Details the procedure for connecting the main power supply wiring to the unit's terminal block.
Outlines the steps for securing and routing power and transmission wiring within the unit.
Describes how to access the unit's printed circuit board for settings.
Explains how to use buttons and DIP switches for system configuration.
Details the procedure for connecting a PC for system configuration via a special cable.
Important safety and procedural notes before charging refrigerant.
Provides formulas and tables for calculating the required refrigerant charge.
Outlines the procedures for adding refrigerant using automatic or manual methods.
Details the procedure for fine-tuning refrigerant charge for optimal performance.
Final checks to ensure proper refrigerant charging and system operation.
Essential checks to perform before powering up the system after installation.
How to monitor unit status and adjust field settings via modes 1 and 2.
Explains how to optimize energy consumption and comfort through various operation methods.
Procedure for verifying correct system operation after installation and configuration.
Lists malfunction codes, their causes, and recommended solutions for troubleshooting.
| Cooling Capacity | 7.2 kW |
|---|---|
| Cooling Capacity (kW) | 7.2 |
| Heating Capacity | 8.0 kW |
| Heating Capacity (kW) | 8.0 |
| Power Supply | 50Hz |
| Operating Temperature (Cooling) | -5°C to 46°C |