6 Installation
Installer and user reference guide
26
SERHQ020~032BAW1 + SEHVX20~64BAW
Split packaged air-cooled water chiller
4P508020-1A – 2018.01
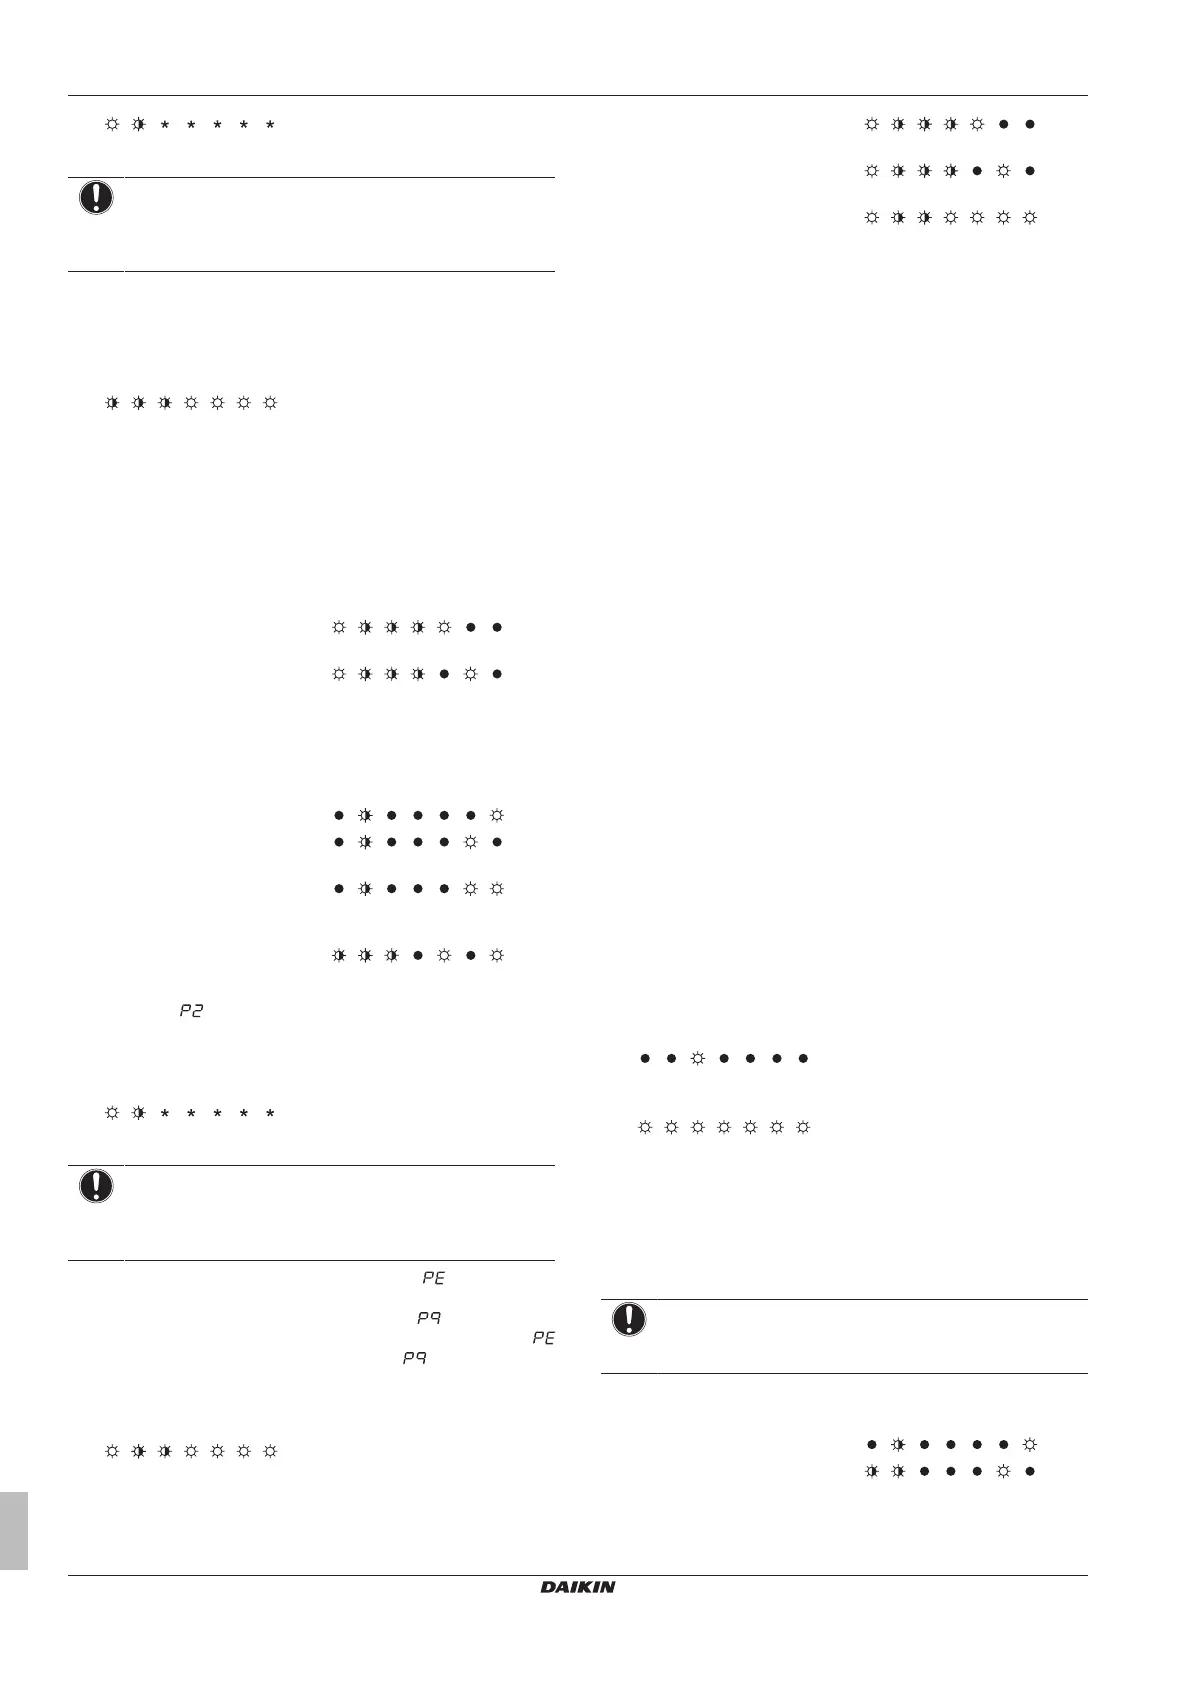
* = The state of this LED is not important.
NOTICE
When a malfunction occurs, check the user interface
display and refer to "6.7.5 Error codes when charging
refrigerant"on page27.
4 When the calculated amount of refrigerant minus 10 kg is
reached, refrigerant charging is complete. Close valve A and
press BS3 once. As long as BS3 is not pressed, the system will
remain in heating mode. This may be required to increase the
indoor temperature.
5 Press BS4 to perform the temperature range check.
Result: If the temperature is outside the temperature range,
press BS1 once and complete refrigerant charging at another
time when the temperature is within range. If the temperature is
within range, the unit will restart from step 7 in "Step 6a: To
automatically charge refrigerant" on page 25, and the cooling
mode will be selected. However, if in the meantime the
temperature has become out of range, the heating mode will be
selected again in order to increase the indoor temperature.
Out of outdoor temperature
range
Out of indoor temperature
range
Automatic refrigerant charging in cooling mode
1 Start up the unit and wait while it is preparing for charging in
cooling mode.
Pressure control (first minute)
Startup control (next
2minutes)
Waiting for stable conditions
(next ±15minutes (depending
on the system))
Ready for charging
2 Press BS4 once within 5 minutes. If BS4 is not pushed within
5minutes, will be displayed on the user interface.
3 When the following LED display is shown, open valve A and
close the front panel. If the front panel is left open, the system
cannot operate properly during the refrigerant charging.
* = The state of this LED is not important.
NOTICE
When a malfunction occurs, check the user interface
display and refer to "6.7.5 Error codes when charging
refrigerant"on page27.
4 If the user interface display shows a flashing code, charging
is almost finished. When the unit stops operating, close valve A
immediately, check the LEDs, and check if is displayed on
the user interface. When the charging amount is little, the
code may not be displayed, but instead will be displayed
immediately. If the LED display is not as shown below, correct
the malfunction (as indicated on the user interface display) and
restart the complete charging procedure.
5 Press BS4 to perform the temperature range check.
Result: If the temperature is outside the temperature range,
press BS1 once and complete refrigerant charging at another
time when the temperature is within range.
Out of outdoor temperature
range
Out of indoor temperature
range
Within range
6 Press BS1 once to complete charging.
7 Record the amount that was added on the additional refrigerant
charge label provided with the unit and attach it on the back
side of the front panel.
8 Perform the test procedure described in "8.6.1 Refrigerant
added using automatic charging"on page45.
Perform the test procedure as described in "8 Commissioning" on
page43.
Step 6b: To manually charge refrigerant
Manual refrigerant charging with the unit at a standstill
1 Calculate how much refrigerant is to be added using the
formula explained in "6.7.3 To determine the additional
refrigerant amount"on page25.
2 Open valve C (valves A and B and the stop valves must be left
closed) and charge the required amount of refrigerant through
the liquid side stop valve service port.
3 When the required amount of refrigerant is fully charged, close
valve C. Record the amount of refrigerant that was added on
the additional refrigerant charge label provided with the unit and
attach it on the back side of the front panel. Perform the test
procedure as described in "8.6.3 Refrigerant added using
manual charging (heating mode, pre-charging)"on page46.
4 When the additional charging is not complete, perform the
procedure below.
Manual refrigerant charging with the unit operating
1 Open the liquid and gas side stop valves and the service port
stop valve. (Valves A, B and C must be closed.)
2 Close all front panels except the electrical component box front
panel and turn the power ON.
3 If the H2P LED is flashing, check the malfunction code on the
user interface. See "6.7.5 Error codes when charging
refrigerant"on page27.
4 Push BS1 if the LED display is not as shown below.
5 Push BS4 once.
6 Push BS4 for at least 5 seconds. The unit will automatically
select the cooling mode or heating mode for charging.
However, if the indoor temperature is 20°C DB or lower, the unit
will first charge in heating mode in order to increase the indoor
temperature.
Manual refrigerant charging in heating mode
NOTICE
When charging in heating mode, valve A must be closed
manually before complete charging is finished.
1 Start up the unit and wait while it is preparing for charging in
heating mode.
Pressure control (first minute)
Startup control (next
2minutes)
 Loading...