SiE25-110 RZP71~140D
Removal Procedure 223
2.8 Removal of Four Way Valve
Procedure Warning Be sure to wait 10 minutes or more after turning off all power supplies
before disassembling work.
Step
Procedure Points
Remove the outside
panels according to the
procedure for removing
outside panels, etc.
Remove the stop valve
mounting plate according
to the procedure for
removing the compressor.
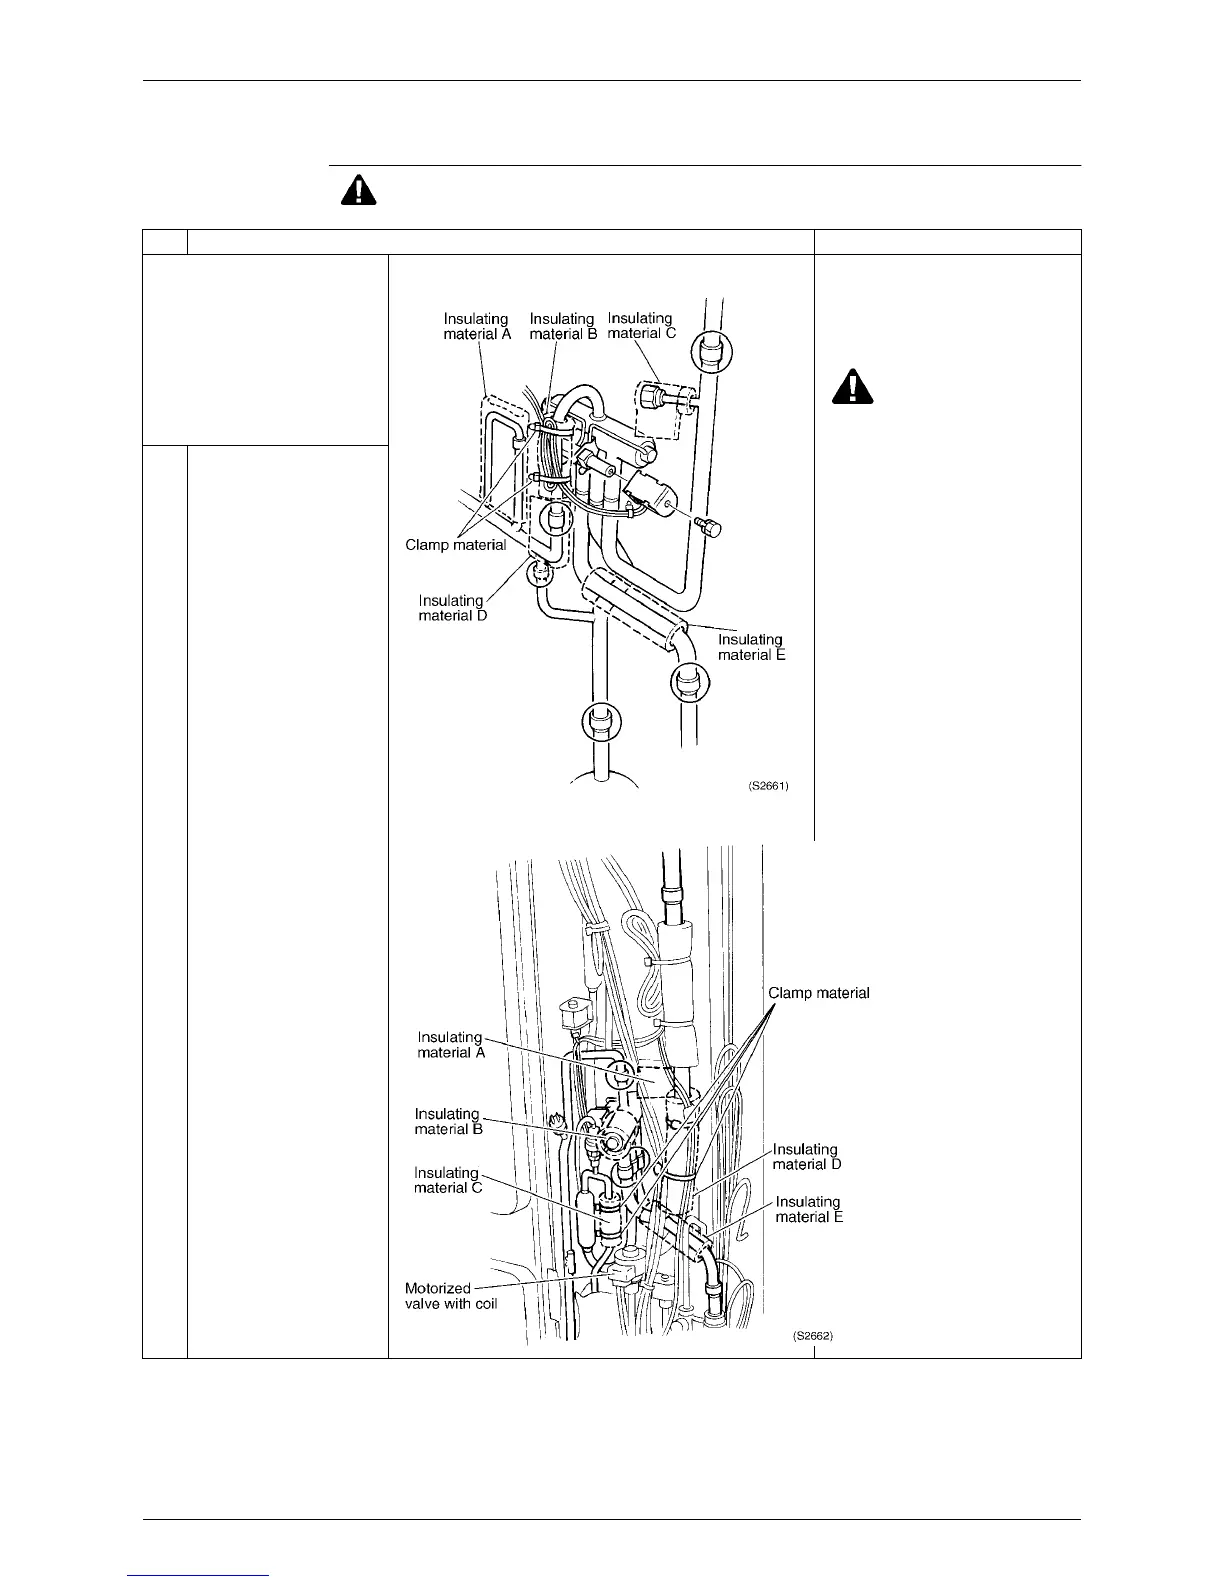
For RZP71D
For RZP100~140D
Make sure that there is no
refrigerant in the unit before
disassembling.
Warning
If the refrigerant gas leaks
during the service work,
ventilate the area. (When the
refrigerant gas contacts
flames, toxic gases may be
generated.)
When welding the pipes,
provide preparation sheets
or iron plates to prevent
flames of gas welder from
contacting other pipes.
Caution
When installing, use wet
cloths to cool the valve and
piping. Do not allow the
temperature of the main unit
to exceed 120˚C or more.
1
Remove the clamp
material securing the
lead wires for four way
valve and solenoid
valve.
2
Remove the 5
insulating materials
(A to E).
3
Remove the 1 screw to
disconnect the four way
valve coil.
4
Disconnect the four way
valve main unit at the 5
brazed sections
(4 brazed sections for
RZP100~140D
models).
 Loading...