Do you have a question about the Dakota Digital BD-140 and is the answer not in the manual?
Steps to physically install the speedometer on handlebars.
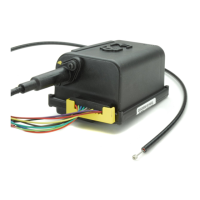
Describes the function of each wire in the speedometer harness.
How to navigate menus and reset displays using the function switch.
Accessing settings for units, calibration, dimming, and service.
Explains Auto Cal and Adjust calibration procedures for accuracy.
Adjusts display brightness for nighttime viewing.
Configures the countdown mile meter for service reminders.
Allows setting the odometer within the first 100 miles of operation.
Lists common problems and their solutions for gauge operation.
Information on sending units for repair and technical consultation.
Details the 24-month warranty terms and conditions.
The BD-140 Big Dog digital speedometer is a sophisticated instrument designed to provide accurate speed, mileage, and performance information for motorcycles. It features a digital display that shows speed in either km/h or MPH, along with an odometer, two trip meters, a service countdown, and performance metrics.
The speedometer's primary function is to display vehicle speed. It incorporates a speed readout, a speed unit indicator (km/h or MPH), and a message center that cycles through various displays including odometer, trip meters, and other information. A single function switch on the lower front face allows users to navigate through different displays and access setup menus.
Auto: Selects speed unit and auto-calibrates speed.Adjust: Selects speed unit and allows manual adjustment of calibration.n19HE: Sets night dimming level.5 SEE: Sets miles to service.PErF: Enables/disables performance readings.InFO: Displays software revision.-odorn: One-time odometer preset (only shown if odometer is less than 100 miles).n19HE setup menu.PErF setup menu. If turned off, the odometer will only cycle through mileage readings.-odorn): This feature allows the customer to preset the odometer within the first 100 miles of operation. It's crucial to select the correct units (MPH or km/h) first. The preset must be to the nearest mile (e.g., 65432 for 65432.1). The process involves incrementing digits using the function switch and saving the final reading.| Brand | Dakota Digital |
|---|---|
| Model | BD-140 |
| Category | Automobile Electronics |
| Language | English |