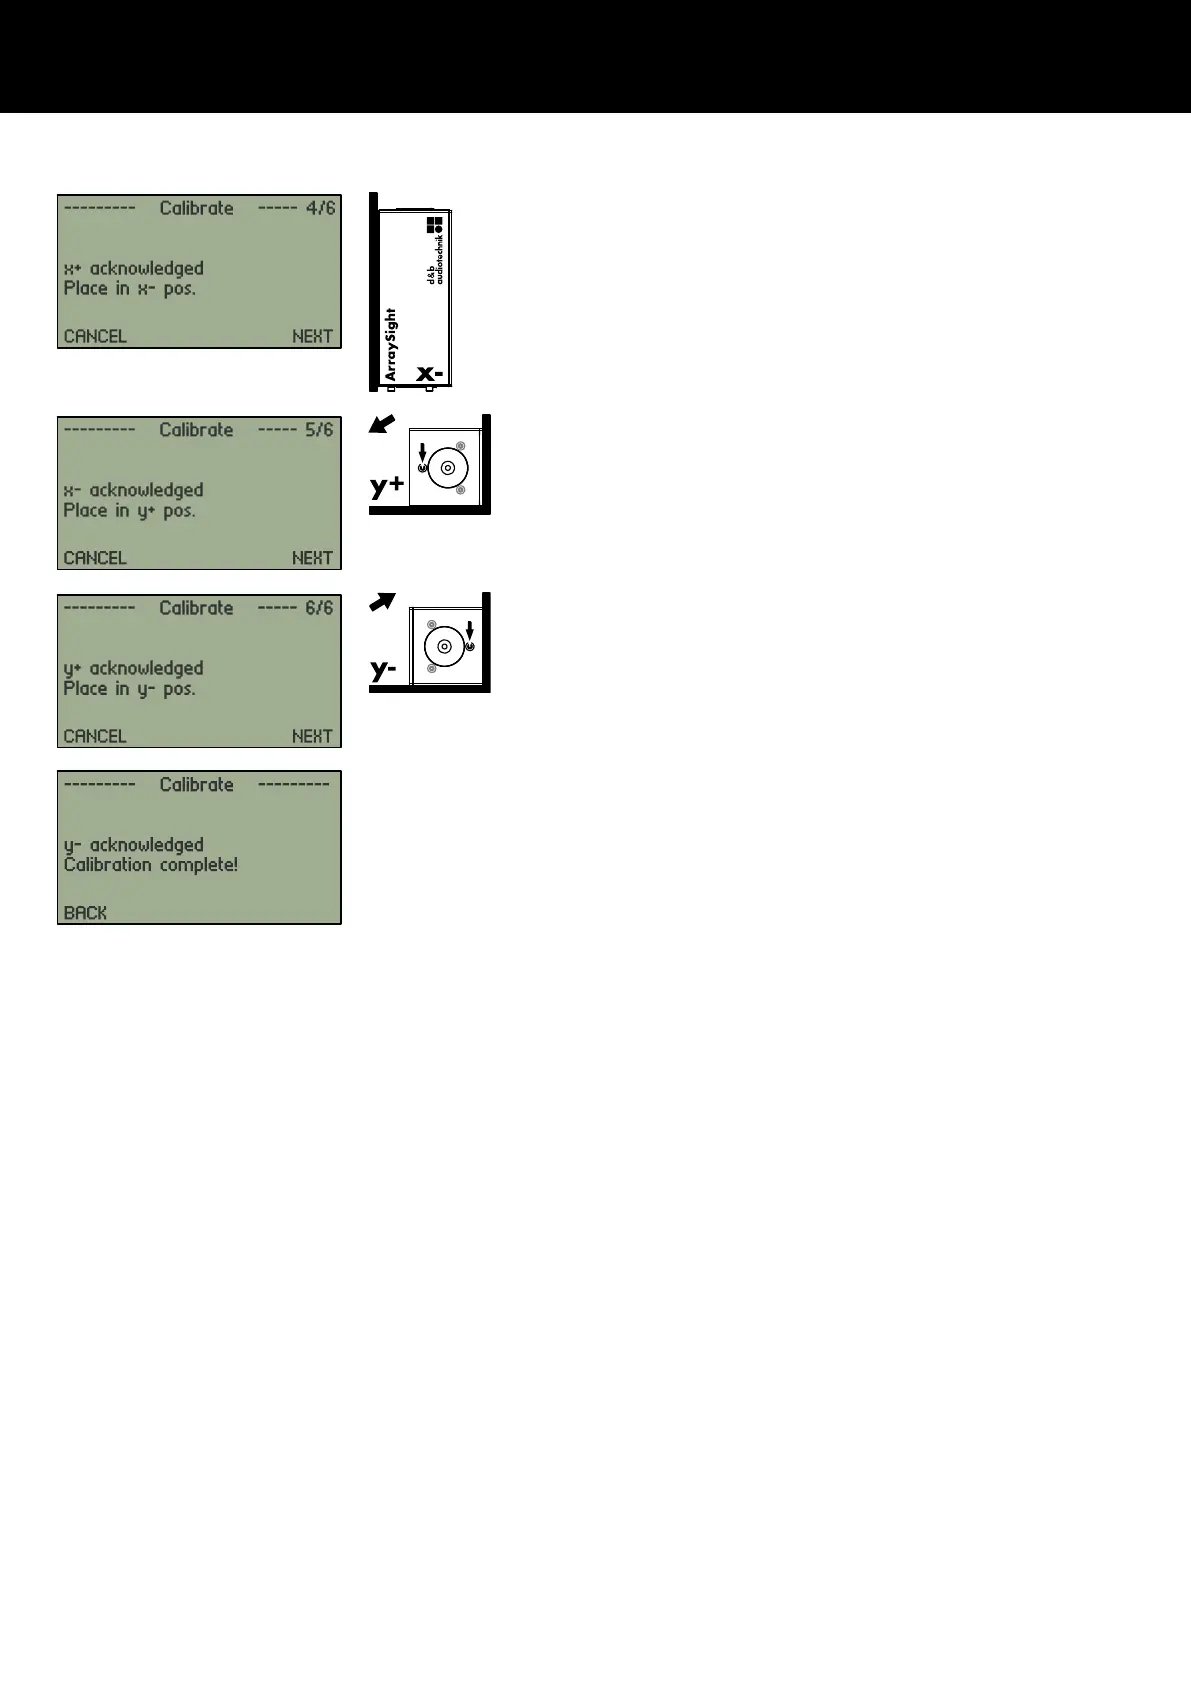
4. When «x+ acknowledged» is displayed, place the unit in the
x– position by turning the unit 180 degrees.
The laser aperture should now point downwards and the top
of the unit should rest against the vertical surface.
Select «NEXT»…
5. When «x– acknowledged» is displayed, you are next
prompted to place the unit in the y+ position.
Turn the unit on its side, in a clockwise direction so when the
unit is viewed from the front, the brass screw nearest the top
surface is now at 9 o’clock, and the base of the unit rests
against the side fence. This is y+.
Select «NEXT»…
6. When «y+ acknowledged» is displayed, you are prompted to
place the unit in the y– position.
Turn the unit through 180 degrees.
The brass screw has moved from 9 o’clock to 3 o’clock.
Select «NEXT»…
When «y– acknowledged» is displayed on the screen, the sender
unit will process the measurements and calibration will be
complete. This data is stored in the non-volatile EEPROM in the
sender unit.
When «y– acknowledged» is displayed on the screen, the sender
unit will process the measurements and calibration will be
complete. This data is stored in the non-volatile EEPROM in the
sender unit.
Correctly calibrated, the sender unit will provide accurate angle
measurements in all orientations.
d&b ArraySight Manual 1.7 en 21
 Loading...