MAINTENANCE: Lubricate the Lokk-Bolt using only graphite powder. DO NOT use oil or grease.
WARRANTY & LIMITATION OF LIABILITY: The products are warranted to be free of defects in materials and workmanship to the
original purchaser for as long as he/she owns the product.
If a defect appears, the original purchaser may return the item, freight prepaid, together with proof of purchase to the company or its
approved international agents. The company or agent will, at its discretion, repair or replace the defective item or part without charge
to the purchaser. THIS WARRANTY SHALL NOT APPLY WHEN the product has been tampered with, when repairs or attempted repairs
have been made by unauthorised persons, where the item has been subjected to misuse, abuse, accident or damage in transit, or
where the installer has not followed the instructions set out during installation or operations. No charges will be accepted for
unauthorised parts, repairs or services. IN NO EVENT SHALL THE COMPANY BE LIABLE FOR ANY INCIDENTAL OR CONSEQUENTIAL
DAMAGES. No warranty is given other than that set out above.
No express or implied warranties (including statutory warranties) apply, other than warranties which may not legally be excluded.
FITTING INSTRUCTIONS CONTINUED…
© Copyright 2002 D&D Group P/L Sydney, Australia
Patents, Trademarks, Registered Designs apply worldwide
DB000000017PA •Inst_LokkBolt (8/02)
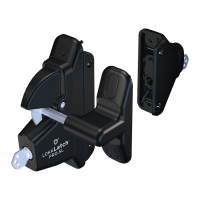
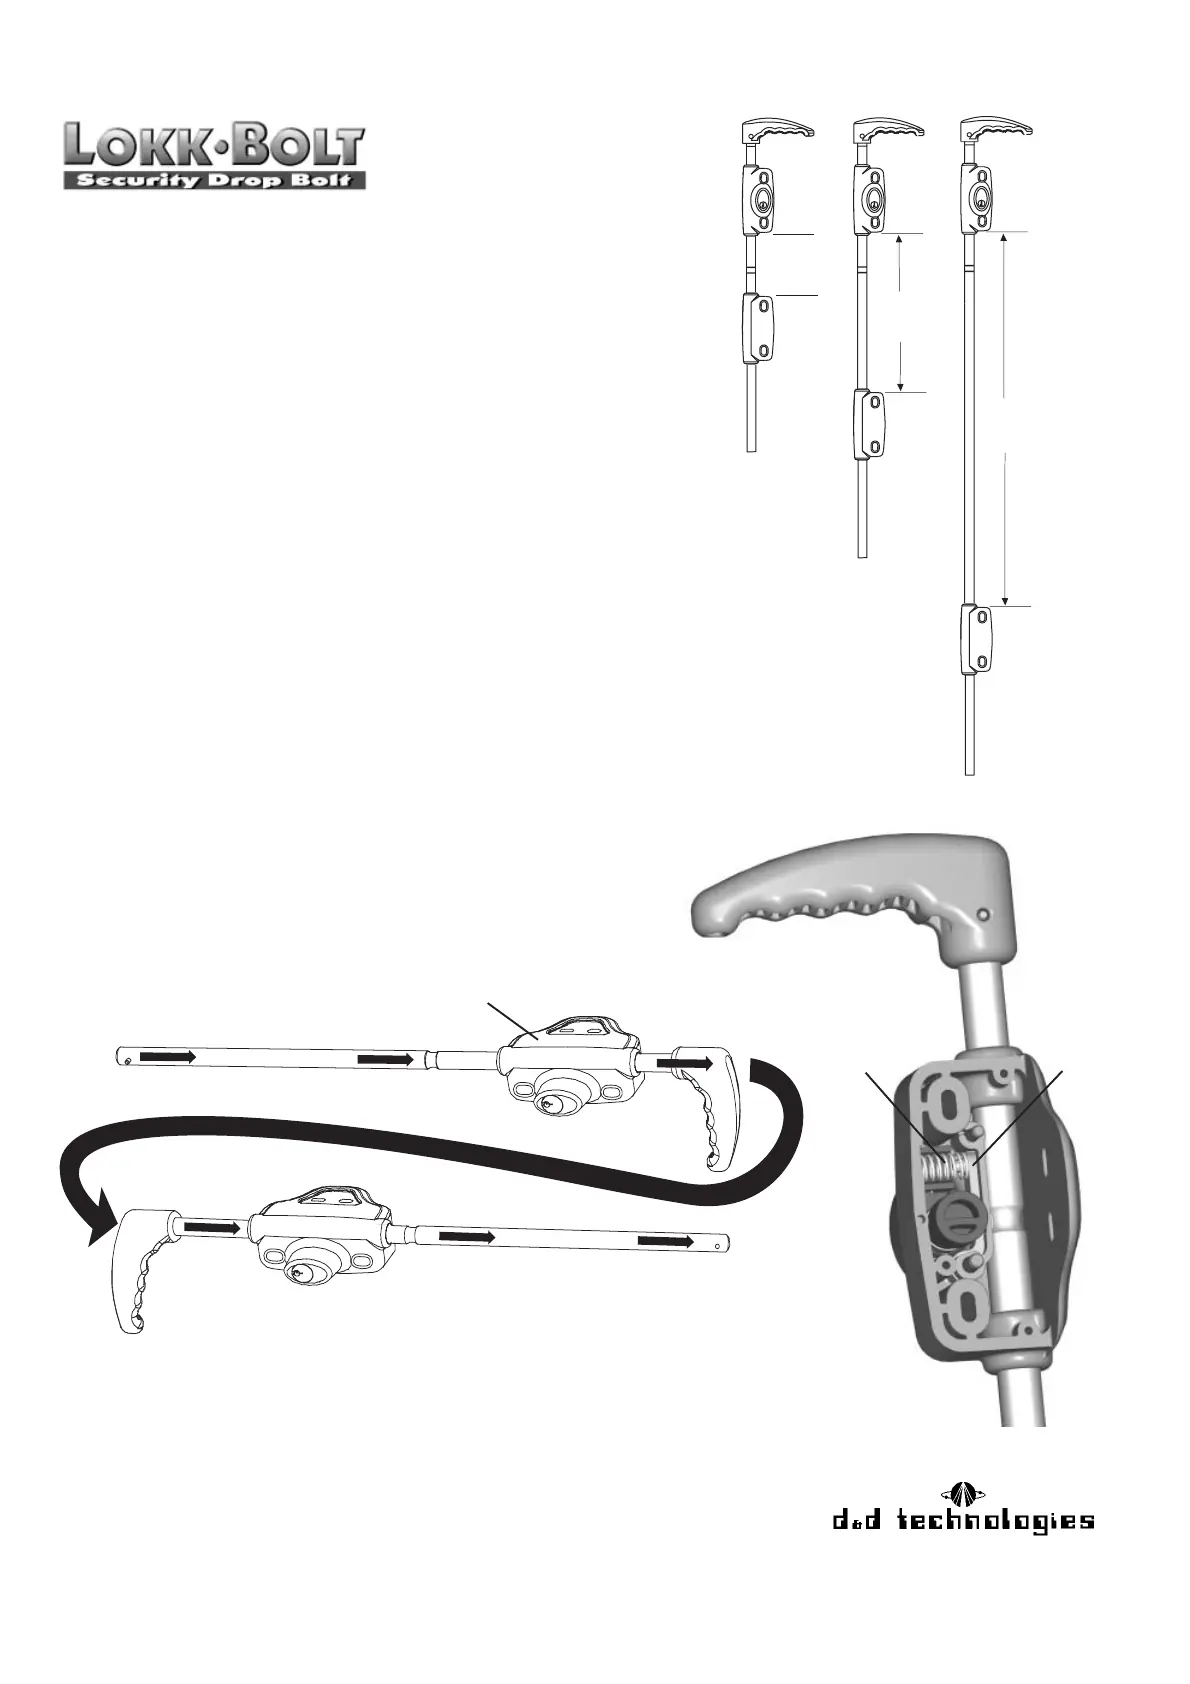
Re-configuring the Lokk-Bolt for Left-Hand Gates
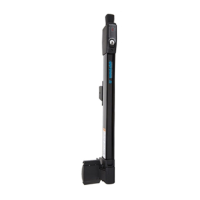
1) Drive the pin out of the lower end of the stainless steel rod.
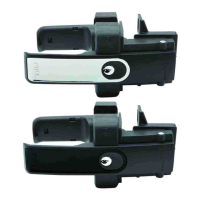
2) Remove the Lower Bracket from the rod. Unlock the Lokk-Bolt to
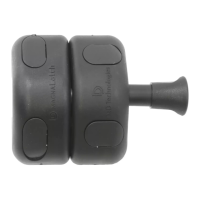
release the Lock Housing, if necessary. Important: Hold the Lokk-Bolt
HORIZONTALLY as shown below in Diagram C, being careful to retain the
Lock Housing in the position shown.
3) Remove the rod slowly and carefully from the Lock Housing.
Very important:
Steadily keep the Lock Housing in the horizontal
position shown!
Reverse the rod and insert in to the other end of the Lock
Housing. Push the rod in until the upper detent groove clicks into position.
4) Test the working of the lock and then reassemble with the Lower Bracket
and the pin.
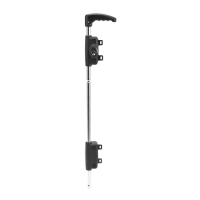
9"
(230mm)
Maximum
3.1/8"
(80mm)
Maximum
21"
(530mm)
Maximum
18"
model
24"
model
36"
model
DIAGRAM B
DIAGRAM C
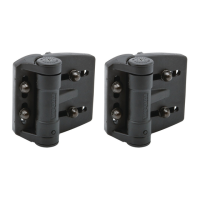
DIAGRAM D
Made in Australia
AUSTRALIA: 192 Harbord Rd, Brookvale NSW 2100
USA: 7731 Woodwind Drive, Huntington Beach, CA 92647
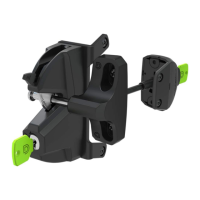
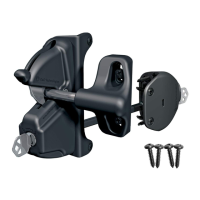
Problems? If the re-configured Lokk-Bolt does not fit into the housing, or
work as expected, it may be the detent spring inside the Lock Housing has
dislodged. See Diagram D. To rectify this, the rod should be removed from the
Lock Housing and the rear cover of the housing removed by unscrewing the
three retaining screws.
Any loose parts should be re-assembled; generally this will be only the Spring
and Lever, as shown in Diagram D. When the parts are re-asembled, the rod
can be pushed back into the Lock Housing.
Replace the rear cover.
Spring
Lever
(cam)
Hold the Lock Housing
carefully (don’t shake) in
this position as the rod is
removed and reversed.