25
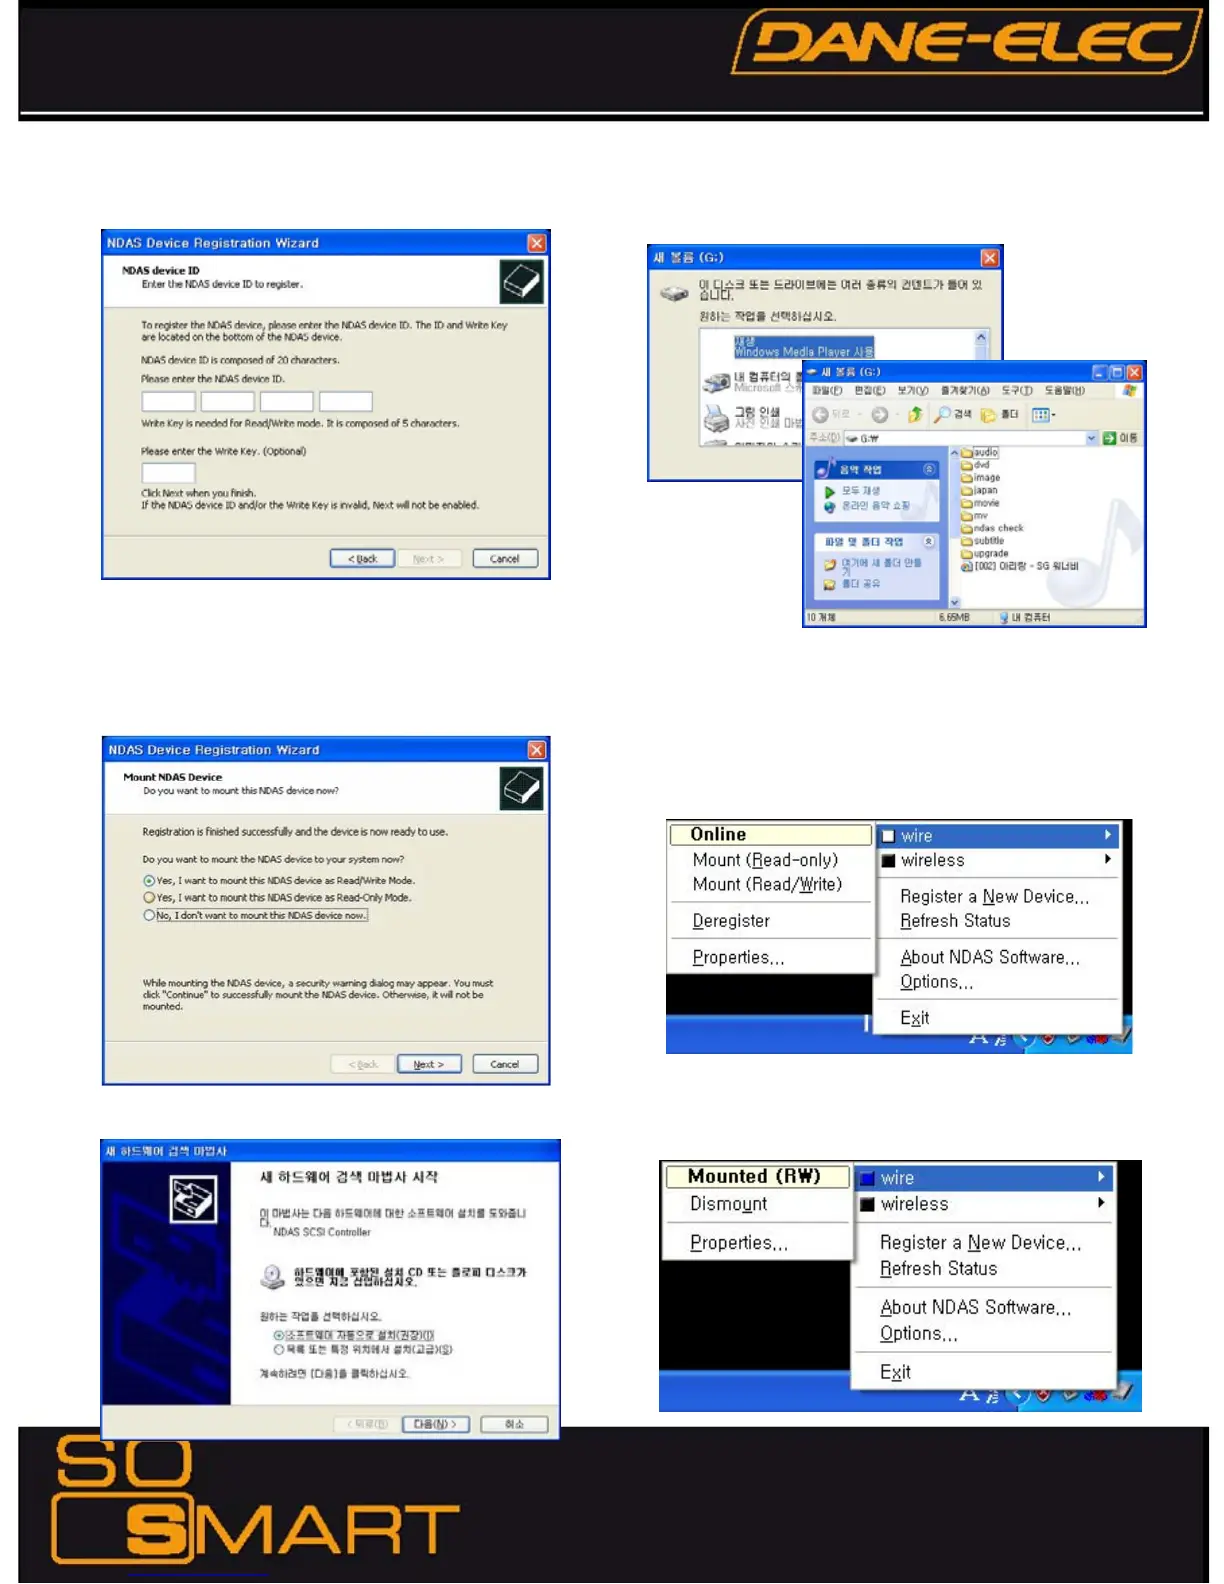
4) Enter NDAS ID and Write key, and click [Next].
5) If ID and key are correct, you will be asked the following after
searching for the NDAS device. Click first option and [Next].
6) Finish the installation of NDAS Controller by following the wizard.
7) After the installation, So Smart’s HDD is recognized.
3.44. Mount / Dismount
A. Mount
1) By clicking the NDAS icon in the bottom right icon tray, you can
confirm the registered NDAS device. You can select “wire” or
“wireless” to get it online. (e.g. wire is online (white) and wireless is
offline (black) in the figure below)
Then, select Mount (Read/Write).
2) When it is connected to NDAS device, the selected item is
indicated as “blue color” and “Mounted (RW)”.
Shortly after, the NDAS device will be accessed.
It may take a while to recognize So Smart as a hard disk
depending on your network system.
>> Caution <<
Backup NDAS ID and Write key. It will not be issued again.
Chapter 3: Basic Setup