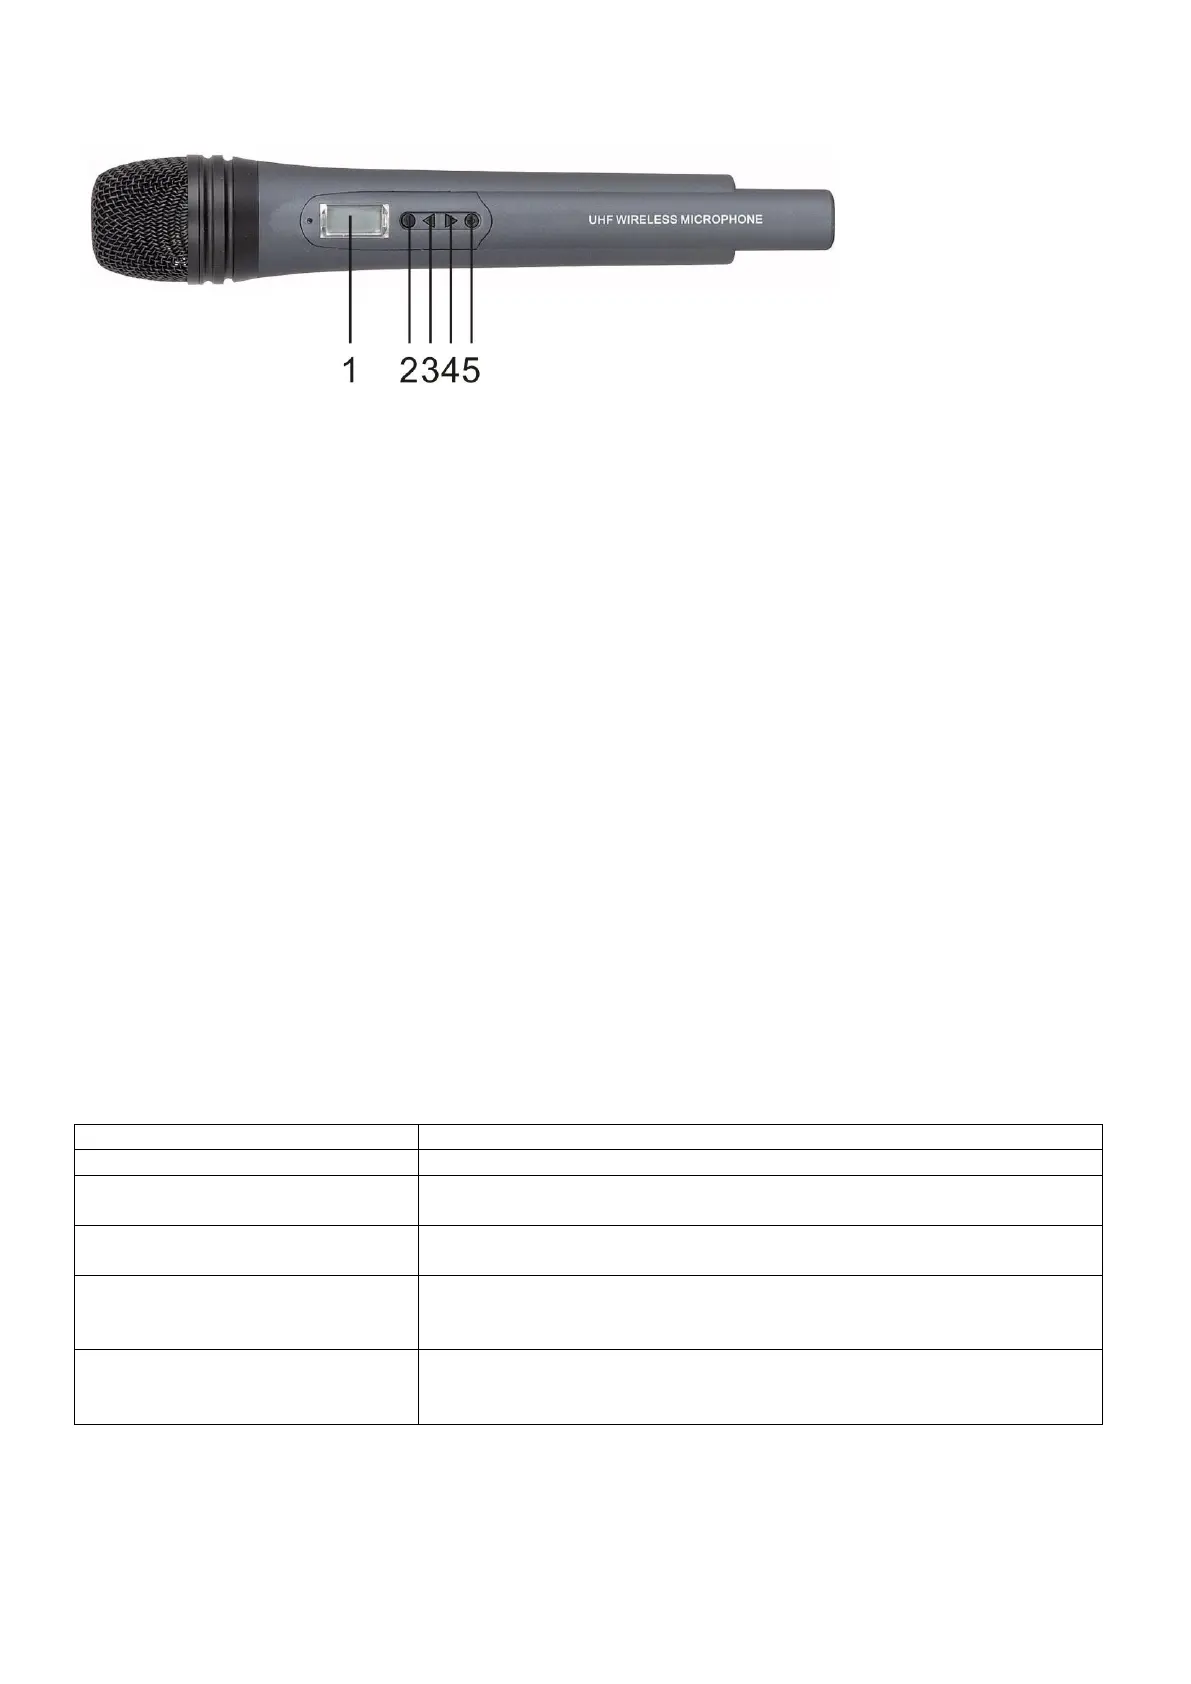
Microphone
1) LCD screen
2) SET-button; Press this button to scroll through the menu and/or confirm your settings.
3) UP
4) Down
5) ON / OFF
Insert / Replace Batteries
1. Slide the small cap on the back of the microphone down.
2. Insert two 1.5V batteries according the correct polarity. As soon as the batteries are installed well, the
LED
on the transmitter will light up.
3. If the batteries are low the display will show: BAT LO. Change the batteries with full ones.
Press the Power-button to start up the microphone.
Use the Set-button to scroll through the menus.
There are 4 menus: 1. DISPL. Choose between FREQU / CHANNL.
2. SENSIT. Range 0 / -30 dB in steps of 10dB.
3. TUNE. Change the frequency range 785.100 / 811.000 Mhz in steps of 0.025 Mhz.
4. LOC. Choose between LOC ON / LOC OFF.
You can change your settings by pressing the UP/DOWN-buttons. Be sure to store your desired setting by
pressing the SET-button.
When you are not in the Menu set up, you can switch between FREQ/CH by using the UP/DOWN buttons.
You can choose between 4 presets, these presets are programmable.
Digital Display is not lighted
The battery is dead or has not been placed correctly .
RF indicator is not lighted
1. Transmitter frequency is different from Receiver frequency.
2. Transmitter is out of working distance
AR indicator is not lighted
1. The mute button is turned on (in the bottom of the receiver)
2. The SQ is too high.
Have noise and radio noise
1. The sensitivity of the transmitter is too low
2. The audio output of the receiver is too low (in the back of the
receiver)
1. The sensitivity of the transmitter is too low
2. The audio output of the receiver is too low (in the back of the
receiver)