N Gauge Class 121 and 122
Lighting functions and DCC installation (Revised lighting control boards, 2018 onwards)
Class 121/122 N lighting and DCC guide V1.0
Your new model features improved DCC lighting function allowing separate control of front lamps,
rear lamps and light bar (if fitted). DC lighting function is unaffected by this change.
This information sheet describes the operation for DC & DCC operation.
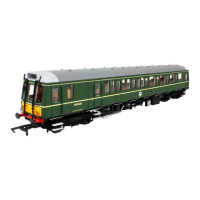
No 1. End is the non-luggage end (i.e. without exhausts).
DC operation:
The model operates in a traditional way: Front and rear lights which operate directionally. i.e. White
and red lamps change colour when the loco reverses direction. The interior lights are ON. Please
note that the brightness of the lights will vary depending on the speed setting of your controller.
Lights will not operate when the model is stationary.
DCC Operation:
If you are installing your own decoder please note the information in the ‘Installing your own
decoder’ section below.
Factory fitted DCC:
The loco address is 3. Lighting is arranged so that either ‘Light engine’ or Push/pull mode can be
chosen. Factory fitted DCC versions are pre-programmed to operate the lighting prototypically.
If you perform a factory reset, please reset the CVs listed in the ‘Decoder setup’ section below.
DCC Functions (Factory fitted DCC):
F0 – Light engine mode, Front and rear lights illuminate appropriately in the direction of travel
F1 – Hauling mode (No. 2 end facing train) No. 1 end lamps only illuminate (White forwards, red
reverse) No. 2 end lamps are off.
F3 – Hauling mode (No. 1 end facing train) No. 2 end lamps only illuminate (White forwards, red
reverse) No. 1 end lamps are off.
F4 – Passenger lighting control (If light bars are fitted).
Installing your own decoder:
Firstly, remove the DC blanking plate (the small PCB with switches fitted) and install the DCC decoder
of your choice. For full operation, we recommend a 6-function decoder (i.e. Dapol Imperium 21 pin,
imperium.dccsupplies.com
part number 113187) Please refer to the table below for function
operation with other types of decoder.
Decoder Setup:
No changes are required for the factory fitted version, but if you perform a decoder reset or install
your own decoder, then you will need to configure the CVs (please refer to your controller handbook
to regain correct operation. If you are installing an NMRA compatible 6 function decoder of your
choice, then these CVs can be used as a guide for programming, please check with your decoder
manual that the CVs are relevant for your decoder. Lighting allocation to decoder output is also
shown below for assistance in self-installing your decoder.
 Loading...