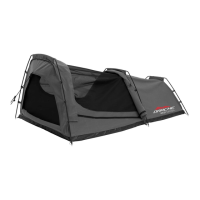
The Darche Kozi Series 270° Awning is a robust and versatile outdoor shelter designed for general camping in normal conditions. It is specifically engineered for attachment to vehicles, providing an extended shaded and sheltered area. The awning is a temporary structure, not intended for permanent installation or unattended use for extended periods.
Function Description
The primary function of the Darche Kozi Series 270° Awning is to provide a wide-reaching, self-supporting shelter that extends 270 degrees around the side and rear of a vehicle. This design maximizes the covered area, offering protection from sun and rain for various outdoor activities. It is designed for quick and relatively easy setup and pack down, making it suitable for touring and camping enthusiasts. The awning can also be enhanced with optional awning walls (sold separately) to create a fully enclosed and sheltered space.
Important Technical Specifications
The awning package includes the following components:
- 1 x 270° Awning with Transit Cover: The main awning unit, protected by a durable transit cover for storage and transport.
- 3 x L-Mounting brackets: These brackets are designed for universal fitment to most roof rack and roof bar systems, facilitating the attachment of the awning to the vehicle.
- 3 x Steel clamp plates: Additional plates for securing the awning to a roof rack system.
- 6 x M8 x 25mm bolt & nuts (Short bolts): Used for attaching the L-Mounting brackets to the awning's aluminum backing plate.
- 6 x M8 x 50mm bolt & nuts (Long bolts): Provided for various mounting configurations.
- 18 x Washers: For secure fastening of bolts and nuts.
- 8 x Guy ropes: Essential for anchoring and tensioning the awning, especially in windy conditions.
- 8 x Pegs: Used in conjunction with guy ropes to secure the awning to the ground.
- 1 x Tension strap: Used to secure the rear awning arm to the roof rack during setup.
The awning's construction incorporates materials selected for water resistance, including water repellent coatings and seam sealing. While designed to resist water, in very heavy weather conditions, seams and zippers may experience some leakage. Users can purchase additional waterproofing products from outdoor camping retailers to enhance water resistance.
Usage Features
Installation:
The awning is designed for a universal fit on most common roof rack and roof bar systems. It is recommended to consult the roof rack manufacturer for specific attachment requirements. Darche advises using an experienced after-market 4x4 Accessories fitter for mounting the awning to the vehicle.
- Attaching L-Mounting Brackets to Awning:
- Slide the supplied 4x M8 x 25mm (short bolts) into the grooves of the aluminum backing plate.
- Position the L-Mounting brackets onto the awning using these short bolts.
- Align the brackets to the desired position and tighten the bolts and nuts.
- Recheck the tightness of all nuts and bolts.
- Important Mounting Considerations:
- At the hinged end of the awning, the unsupported section should not exceed 250mm.
- At the awning end without a hinge, the unsupported section should not exceed 500mm.
- Frequent inspections of fixing connections are required, especially after prolonged travel on uneven, rough, or corrugated terrain.
- Attaching to Roof Rack:
- The 3 x L-Mounting brackets and 3 x steel plates are designed to attach to most roof rack and roof bar systems. Some roof racks may allow direct fitting without L-Mounting brackets.
- Darche explicitly states it takes no responsibility for the fitment of the awning to any vehicle or roof rack.
- After initial attachment, it is recommended to take a short drive and then recheck all fasteners and fittings to ensure the awning is secure.
Awning Set Up:
- Open/Unzip the Cover: Unzip the transit cover and fold it back over the awning body.
- Release Awning: Release the three hook and loop fasteners, allowing the canvas to drape.
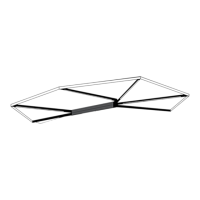
- Open and Secure: Extend the awning arms fully, wrapping them around the rear of the vehicle. Secure the rear awning arm to the roof rack using the tension strap. The awning is self-supporting during this initial setup phase.
- Pole Set Up:
- Undo the hook and loop fasteners supporting each leg.
- Carefully pivot each leg down to a vertical position.
- Adjust the leg height by unlocking and locking the twist lock mechanism to the desired height.
- Secure each rafter by anchoring and tensioning the guy ropes with pegs.
- Crucially, ensure all guy ropes are secured.
- Tip for rain: Lower the legs to create a downward slope and guy off between the rafters to form valleys for water run-off, preventing pooling.
Awning Pack Down:
- Undo Pegs and Guy Ropes: Undo all pegs and roll up each of the guy ropes.
- Retract Legs: Retract each of the legs, fold them, and stow them away using the hook and loop fasteners.
- Release Tension Strap: Release the rear tension strap.
- Retract Awning: Retract the awning back, ensuring the top rafters are stacked on top of the bottom rafter poles. The canvas should drape down in a triangular shape.
- Roll and Fold Canvas: Roll and fold the canvas, securing it using the hook and loop fasteners.
- Position and Zip Transit Cover: Position the transit cover over the awning and zip it up to complete the pack down.
- Tip for packing: A loose roll is better than a tight roll, as this allows the canvas to fold flat against the awning, making it easier to zip up the transit cover.
Using Optional Awning Walls:
A 270 Awning Wall (sold separately) can be attached using hook and loop fasteners on the wall sides and the top section of the wall to the awning. Joining four walls creates a fully sheltered area around the awning.
Maintenance Features
Care Instructions:
- Clean the awning with cold fresh water and a soft brush.
- Do not use soaps or detergents on the awning.
- Avoid exposing the awning to petrol, oils, or solvents.
- Ensure the awning is completely dry before storing to prevent mildew and water damage.
Storing:
- Correct storage is vital for the longevity of the awning.
- If the awning must be stowed wet, it is essential to unpack and dry it as soon as possible.
- Water damage, mildew damage, and incorrect storage are not covered under the general warranty.
Structural Integrity and Weather Resistance:
- The awning is designed for general camping in normal conditions.
- Always ensure all rafters are supported by leg poles and all guy ropes are anchored correctly.
- Re-adjusting guy ropes and pegs may be necessary to maintain structural integrity.
- This awning is a temporary shelter; do not leave it up for extended periods or unattended.
- To avoid personal injury or property damage, Darche recommends against erecting or using the awning in extreme weather conditions.
- While designed to resist water, heavy weather can lead to some leakage at seams and zippers. Waterproofing products can be purchased from outdoor camping retailers.