10
ONLY USE THE 20° WEST GUIDES WITH THIS RECIPE.
1. Start with ◼BLUE BELT. Press and hold the power button for 3 seconds to engage the
untimed SHAPE cycle.
2. Using left side of the sharpener, pull knife through sharpening guide. Staying on left side
(do not alternate), make 2 more slow strokes through left sharpening guide (3 strokes total).
3. Check for a burr.
TIP: See HOW TO FEEL FOR A BURR below.
4. If no burr is formed, repeat another 3 slow strokes on the left side. Continue this pattern
until a burr is formed along the entire length of blade.
5. Now repeat the same number of strokes on the right side as you did on the left so you
sharpen your blade evenly.
6. Click power button once to turn off.
7. Enter SHARPEN stage (click twice, quickly) and complete cycle with ◼BLUE BELT
(alternating sides).
8. Change to ◼GREY BELT and cycle through SHARPEN stage (click twice, quickly),
alternating sides.
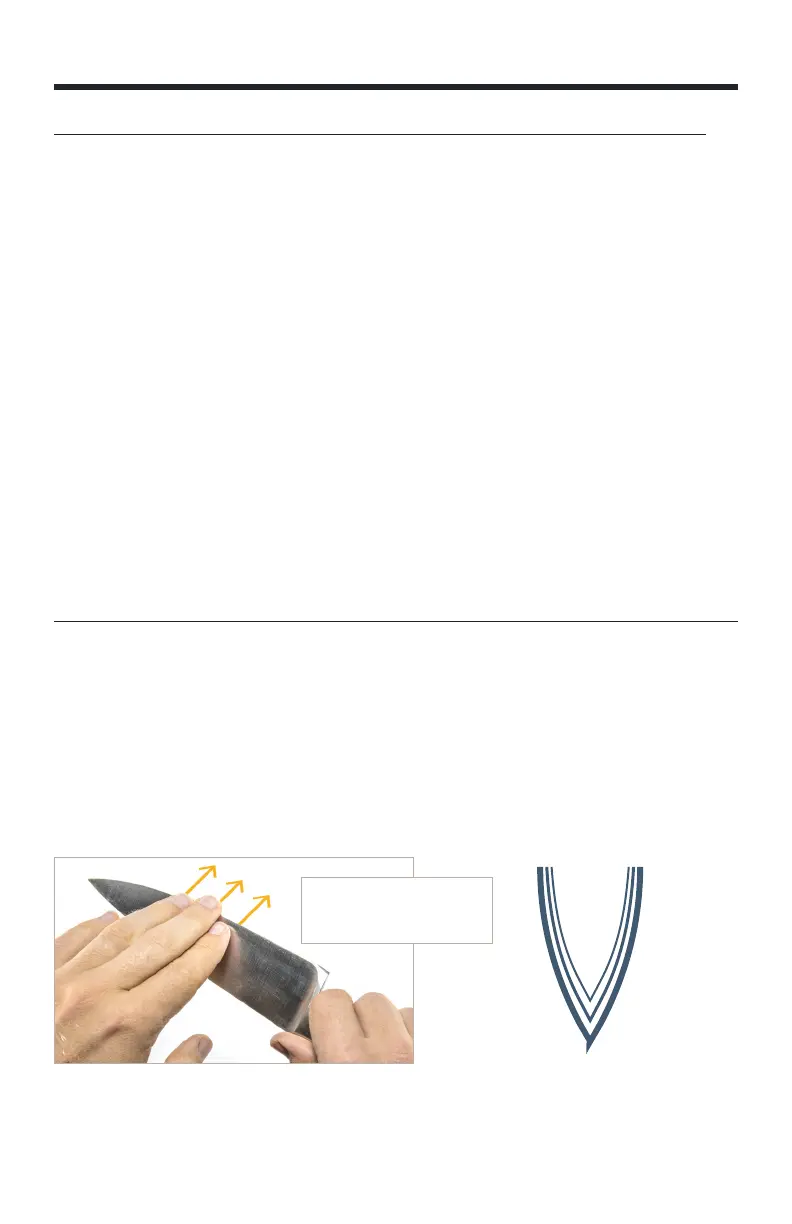
HOW TO FEEL FOR A BURR
A burr will form on the opposite side of the blade you are sharpening. A burr is a small,
rolled over bit of steel that forms as you sharpen. Using your fingers, brush across and away
from the knife edge. You are feeling for the material that has rolled over. You can feel a
slight raise right as your fingers come to the edge of the blade. If the edge feels smooth as
you brush your fingers off the edge, no burr has been raised. Be careful, exercise caution
when feeling for a burr.
Burr
Cutting
Edge
TIP: Check for a burr by
brushing fingers across and
away from the blade edge.
REPAIR AND RESTORE RECIPE