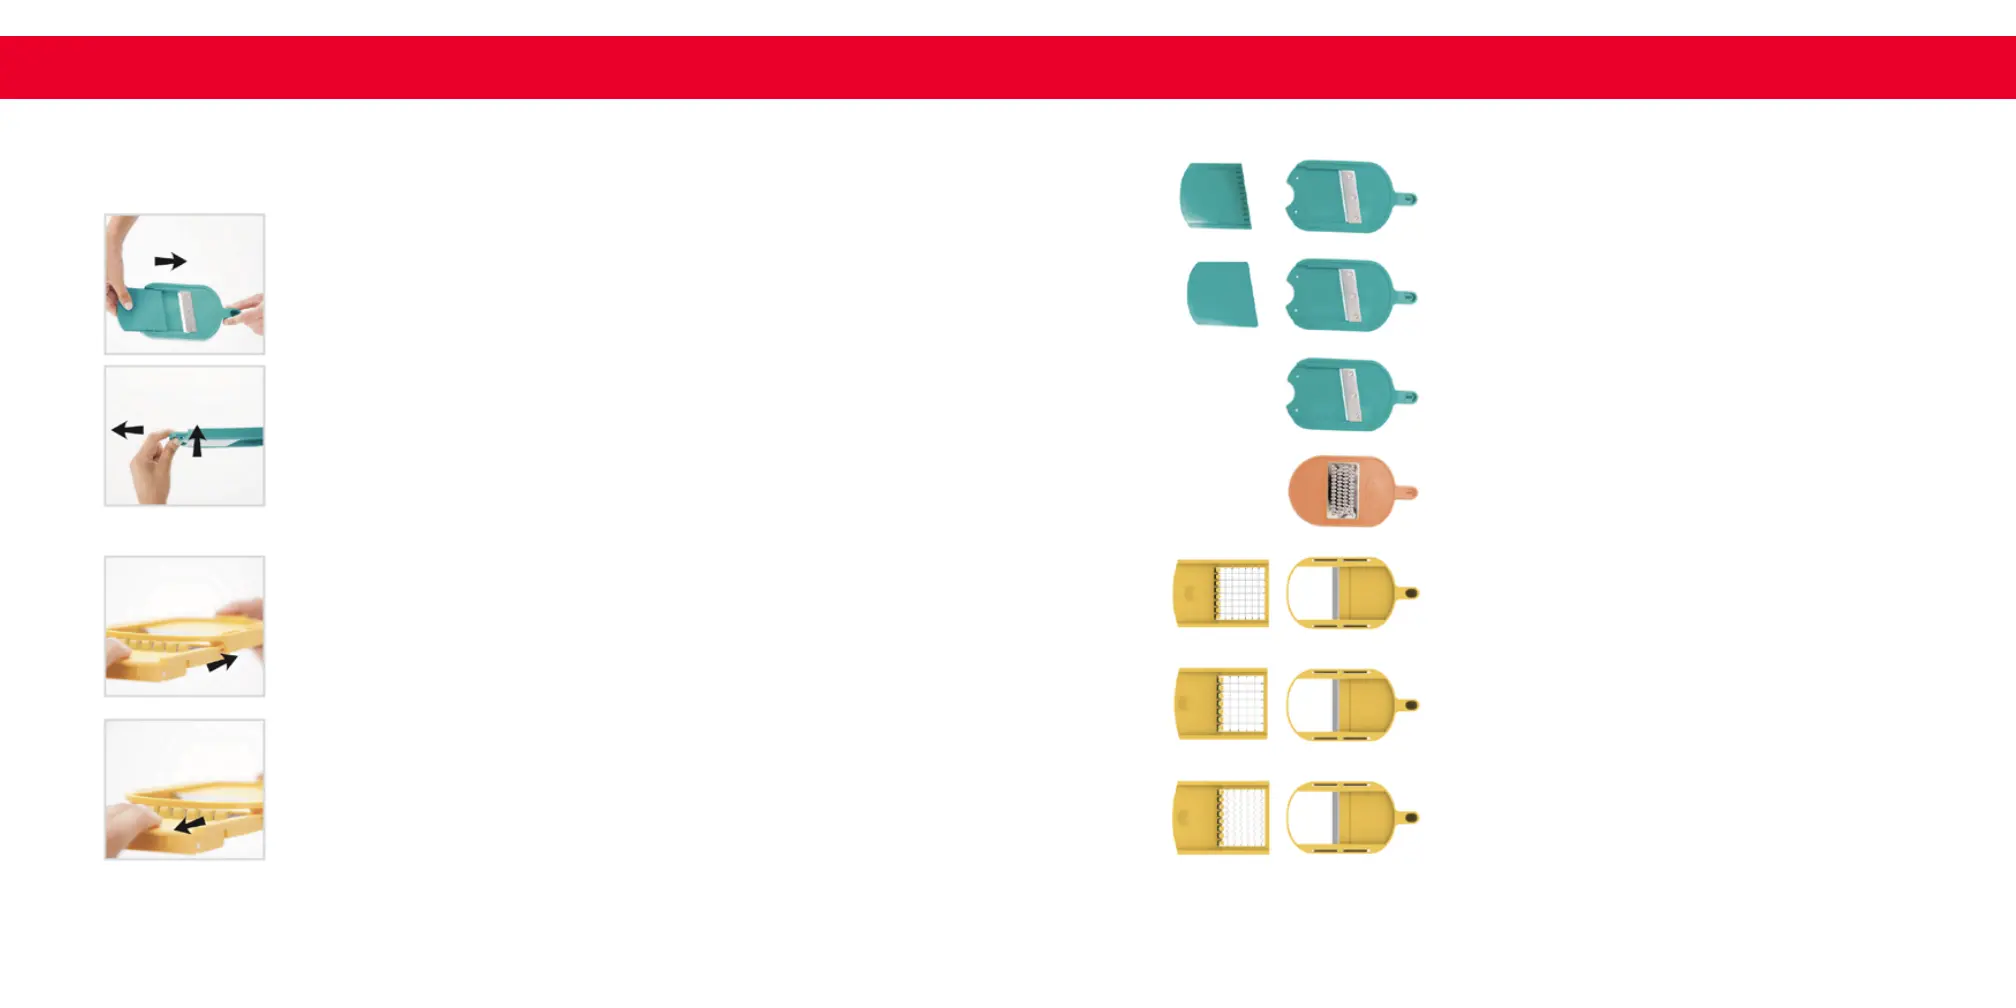
blade conguration chart ∙ 13 12 ∙ assembling blades and inserts
assembling blades and inserts BLADE CONFIGURATION CHART
Julienne/Slicer Disk
cube/large cube/wavy disk
shredder disk
When handling Blades and Inserts, be very careful as their blades are sharp and can cause injury.
To assemble the Julienne / Slicer Disk, select appropriate Insert
(see Blade Conguration Chart on page 13) and slide into
Julienne / Slicer Disk until the Insert locks into place. Now you
are ready to place the Disk onto the Processing Base.
To remove the Insert, carefully lift Blade Insert up and slide it off
of the Disk. For extra thick slices, do not use an Insert.
Slide Cube Insert into Disk by lining up the sides of the Cube
Insert with the slots under the Disk. The arrows on the Cube
Insert should be pointing outward (away from the Blade Disk).
TIP: If you are having difcult assembling the Cube Insert, turn
the Disk and Insert over so that the Blade is facing away from
you as it may be easier to see the slots on the underside of the
Disk.
To disassemble, slide Cube Insert outwards.
No assembly required. Simply place on Processing Base and
put the Lid on top.
Julienne – Slice potatoes, sweet potatoes,
carrots, celery, onion, and radish.
Thin Slice – Make potato chips and salads.
Slices potatoes, radishes, mushrooms, carrots,
cucumbers, fennel, nuts, and celery.
Extra Thick Slice - Slice carrots, eggplant, melon,
and beets. Make fruit salad.
Shred – Shred chocolate, hard cheeses, radishes,
carrots, turnips, and more.
Cube – Use for potatoes, carrots, onions, sweet
potatoes, and beets. Make breakfast hash and
cubing vegetables for soup.
Large Cube – Cube potatoes, carrots, onions,
sweet potatoes, and beets. Perfect for soups,
stews, broth, and stir fry.
Wavy – Prep potatoes and other softer veggies
for soups, crinkle fries, and fun salads.