
R
Ross StaffordAug 4, 2025
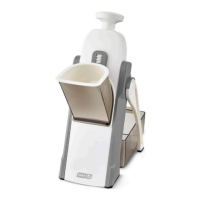
How to fix Dash DSM100 mandoline not slicing vegetables properly?
- EedwardkingAug 5, 2025
If your Dash Kitchen Appliances mandoline isn’t properly slicing vegetables: * Ensure that you have properly turned the Knob 360° so that the blade teeth are entirely exposed. * Ensure that the Main Stand of your mandoline is pushed all the way out. You will feel the Main Stand “click” into place.