7
8
9
10
11
H
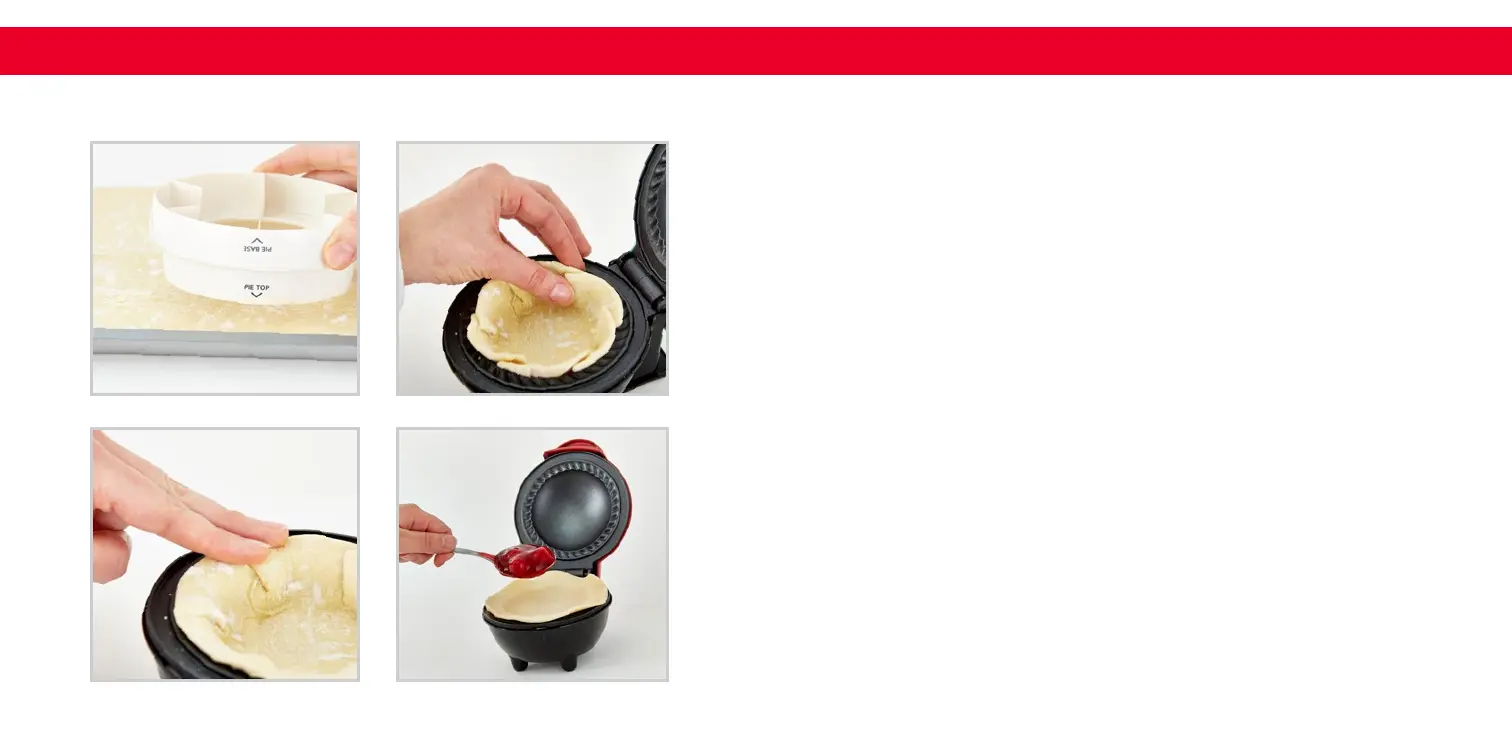
Place the Pie Top side of the Crust Cutter on another section of your
rolled-out dough (photo E). Press down to cut the dough.
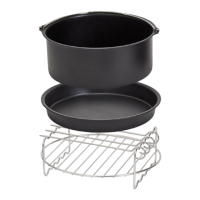
NOTE: If you ever misplace your Crust Cutter, the bottom diameter is
4.75” and the top diameter is 4.1”.
The Pie Base side of your Crust Cutter will cut out short sections in the
edge of your dough. These show where you will overlap the edge of
your crust in the lower Cooking Surface. Overlapping or “scalloping”
the edge in the lower Cooking Surface will help you mold the base of
your pie.
Place the larger circle of dough in the lower Cooking Surface of your
Mini Pie Maker (photo F).
Warning: Move quickly and be careful when placing the pie crust onto
the pre-heated Cooking Surface, as the surface will be hot.
“Scallop” or overlap the cut sections so that the pie base ts neatly
in the lower Cooking Surface. Press down gently on the edges of the
crust so that they lay against the top of the lower Cooking Surface
(photo G).
Add your desired llings (photo H).
NOTE: The approximate amount of lling necessary is ½ cup. For
denser llings, or meats and llings that tend to expand during the
cooking process, use less than ½ cup to avoid spillage.
using your mini pie maker
F
using your mini pie maker
E
G
∙ 14 ∙ ∙ 15 ∙