Tools and Materials Needed
Page 2 Standard and Industrial Anemometer
✦
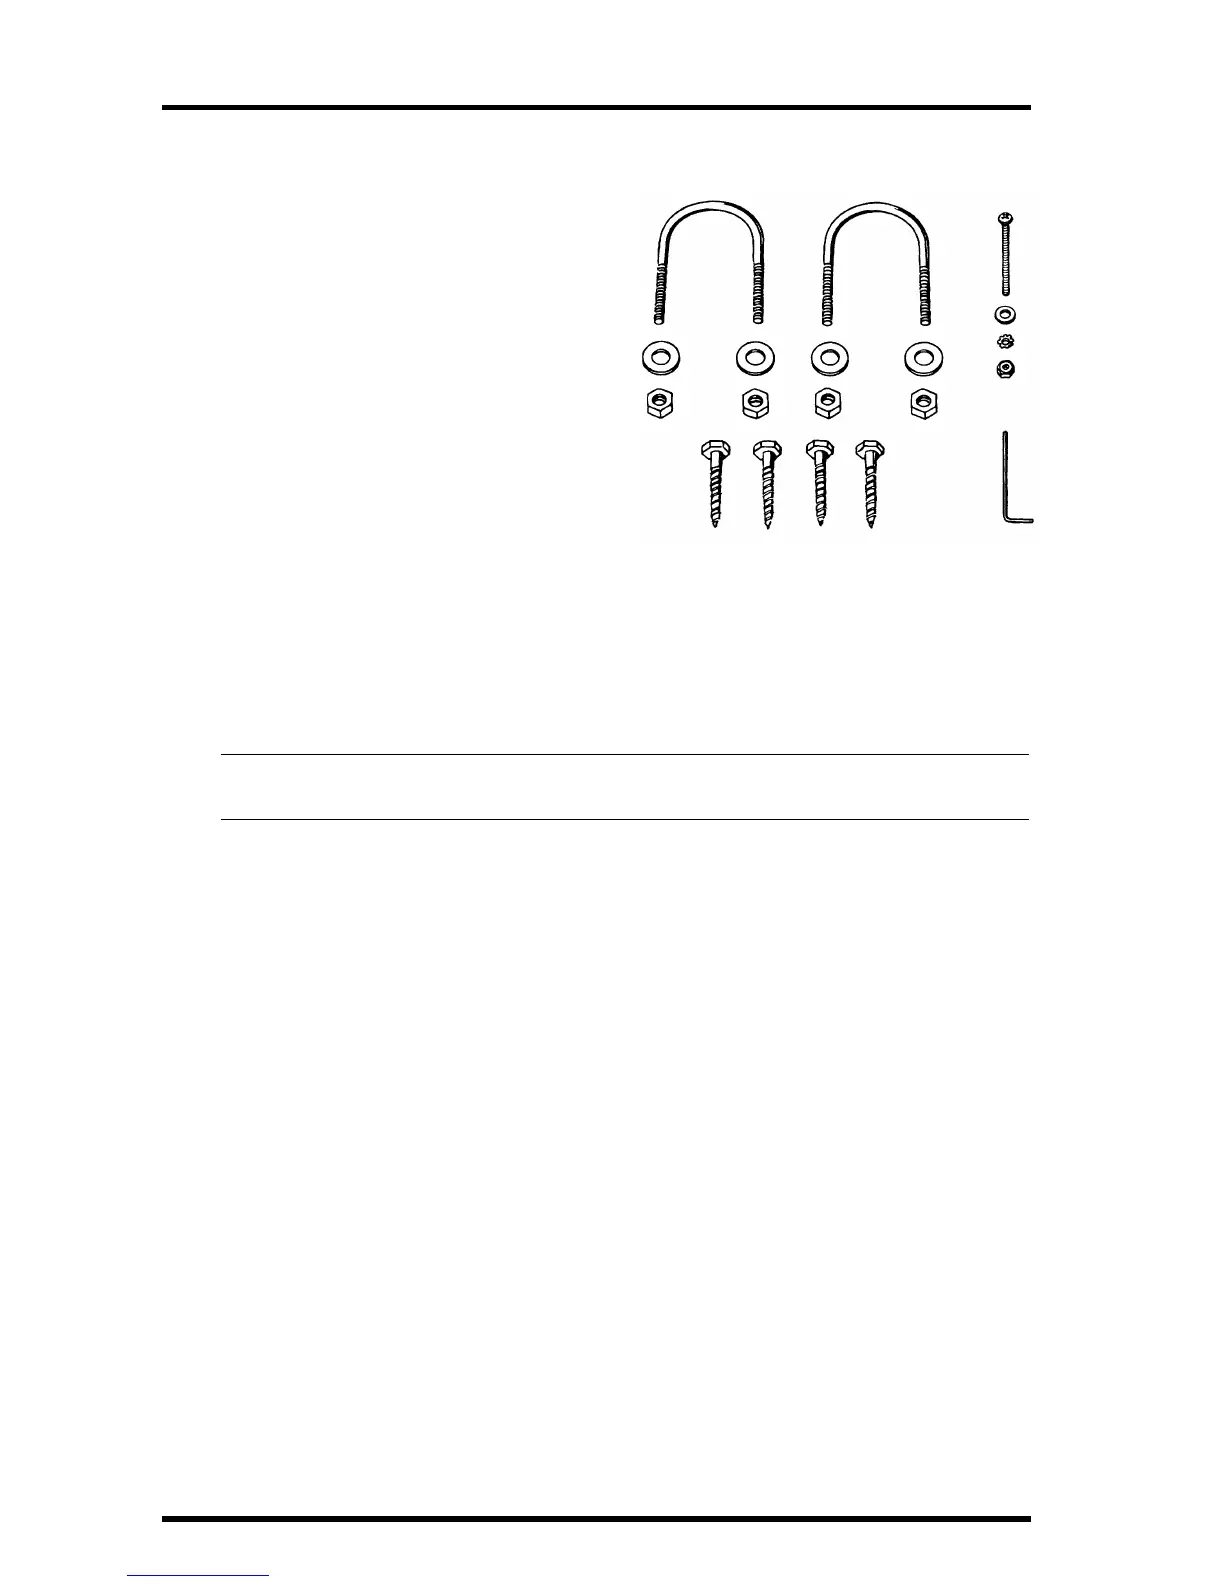
Installation Hardware Kit
✦
Two U-Bolts
✦
Four 1/4” Flat Washers
✦
Four 1/4” Hex Nuts
✦
Four 1/4” x 1 1/2” Lag
Screws
✦
One #4-40 x 1 1/4” Pan
Head Screw
✦
One #4 Flat Washer
✦
One #9 Lock Washer
✦
One #4-40 Hex Nut
✦
Allen Wrench
Tools and Materials Needed
You will need the following tools and materials to install your anemometer:
✦
Cable Clips or Weather-Resistant Cable Ties
Note:
Make sure the clips or ties you use to secure the anemometer cable have screw holes or other means
for mounting the cable. Do not use metal staples to secure the cables.
✦
Stainless Steel Hose Clamps
✦
Small Screwdrivers
✦
Adjustable Wrench
✦
Hand-Held Compass or Local Area Map
Testing the Anemometer
Before beginning your installation, follow the instructions below to test the ane-
mometer wind speed and wind direction functions.
1.
Connect the anemometer cable to the appropriate connector on your sensor
interface module (SIM) or junction box.
2.
Push the wind cups onto the smaller of the two stainless steel shafts at the
end of the arm.
3.
Spin the wind cups
gently
. You haven’t secured them yet, and if you spin
them too hard you may knock them off.
4.
Check the display on your weather station to make sure you are getting a
wind speed reading.
5.
Grab the larger of the two stainless steel shafts at the end of the arm with
your fingers and twist the shaft about 1/2 turn.