5
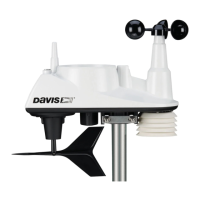
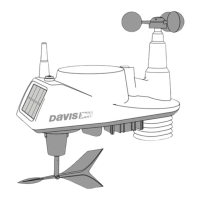
Connect the Weather Envoy
Prepare the Weather Envoy
• Connect the Weather Envoy to your local computer
• Install AC power source
• Install optional batteries
• Mount your Envoy
• Connect Envoy to WeatherLink software
• Set up the Envoy using WeatherLink software
Connect Weather Envoy to Local Computer
Note: When connecting the Ethernet cable from the Envoy to the router, it is important that the Envoy
has no power, either from the AC connector or batteries.
1. Connect one end of the Ethernet cable to the WeatherLinkIP data logger.
2. Locate a free Ethernet port on your broadband or DSL router and connect the cable to
the port.
Note: Be sure to connect the Ethernet cable BEFORE powering up the Envoy with the AC Adapter or
batteries.
3. Connect AC power adapter. Insert the power adapter plug into the power jack on the
end of the Envoy case. It’s next to the data logger output cable. Plug the adapter into
the electrical socket.
Note: An Envoy using a WeatherLinkIP data logger requires use of the AC-power adapter. Battery
power can be used for short-term backup power in the event of a power outage, but an Envoy
with WeatherLinkIP should use the AC-power adapter as its main source of power.
The Weather Envoy beeps two times, occurring within one second of each other. On
power-up, the IP data logger will negotiate its connection with the router.
4. Write down the Device ID and Key located on the side of the WeatherLinkIP data
logger for further use.
The Device ID (DID) and Key uniquely identify your data logger on the WeatherLink
Network (www.weatherlink.com). They are both required to create a login on
WeatherLink.com and are used to connect the WeatherLinkIP data logger to the
software.
Because WeatherLinkIP is continuously uploading current weather information to the
www.weatherlink.com, leave the WeatherLinkIP and Envoy connected to your router at
all times.
2