3
Set the Transmitter ID
Each wireless transmitter (such as a Vantage Pro2 sensor suite or a Sensor Transmitter)
must be set to a different one of eight transmitter IDs. Set the transmitter ID using the
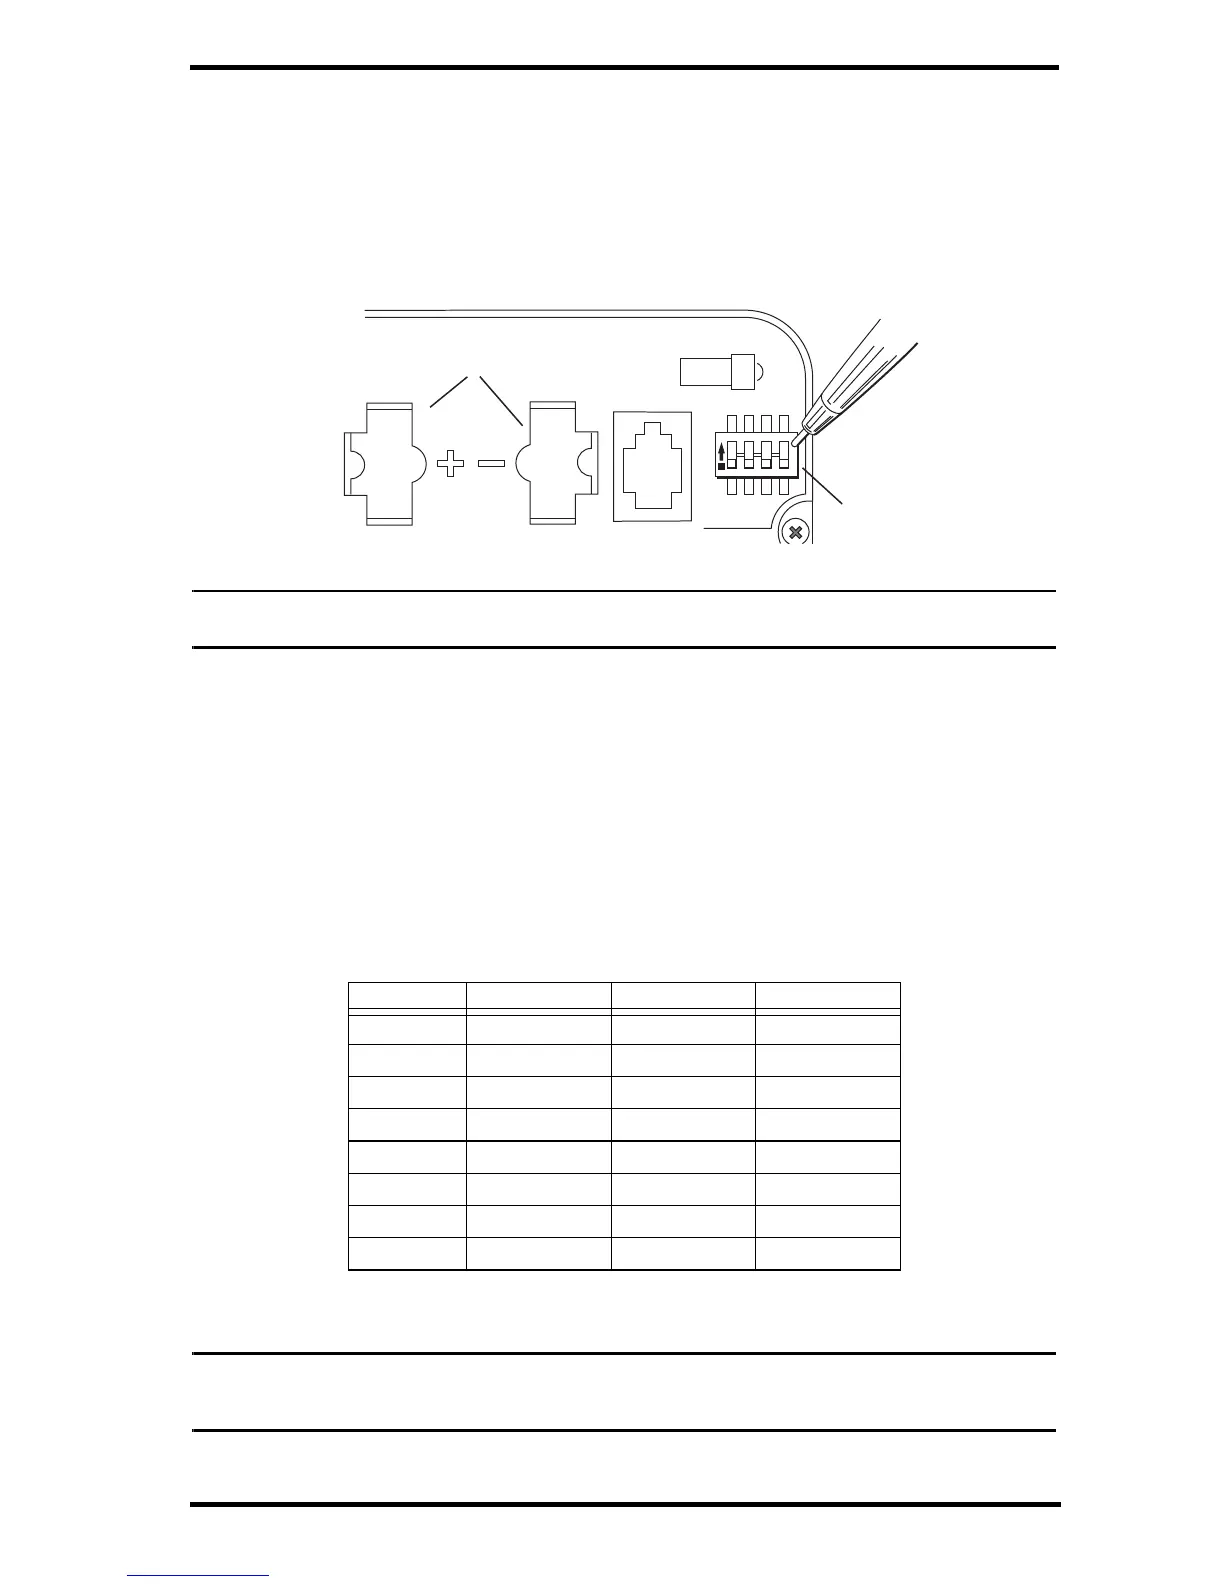
DIP switches inside the sensor interface.
DIP switches #1, 2 and 3 allow you to control the ID — the “channel” it will transmit on.
(D
IP switch #4 is used for transmission testing, not for transmitter ID.)
Note: The transmitter and your receiver (console, WeatherLink Live, Vantage Connect) communicate
with each other only when both are set to the same ID.
The factory default transmitter ID is ‘1’. Your Vantage Pro2console/receiver is factory-
set to find a Vantage Pro2 sensor suite on “channel” 1. Looking at the table below, you
can see that means all three DIP switches are in the OFF position when each transmitting
station leaves the factory, whether it is a sensor suite, a Sensor Transmitter, or another
kind of station.
In order for the receiver to “listen” to the Sensor T
ransmitter as well as the sensor suite,
you will need to set your Sensor Transmitter to a different ID number.
Referring to the table below, use a ballpoint pen or paper clip to toggle DIP switches #1,
2, and 3
to set the Sensor Transmitter to transmit on IDs 2, 3, 5, 6, 7, or 8. Make a note of
the channel so you can set your receiver to the same ID.
ID CODE SWITCH 1 SWITCH 2 SWITCH 3
#1 (default) off off off
#2 off off ON
#3 off ON off
#4 off ON ON
#5 ON off off
#6 ON off ON
#7 ON ON off
#8 ON ON ON
Make sure each wireless transmitter in your system is broadcasting on its own
transmitter ID.
Note: Make sure your receiver’s ID has been set up to “listen” to the transmitter. See “Using the Sensor
Transmitter with a WeatherLink Live” on page 7. See “Using the Sensor Transmitter with a
Vantage Pro2 Console” on page 7. Or see the User Guides for more information.
 Loading...