EasyManuals Logo

DayTronic 3000 series User Manual

DayTronic 3000 series
42 pages
To Next Page IconTo Next Page
To Previous Page IconTo Previous Page
Page #5 background imageLoading...
Page #5 background image
2
IMPORTANT: The unit is shipped with two spacer washers on the securing
screws of the rear-panel I/O Connector. When panel-mounting the unit, you
MUST REMOVE THESE WASHERS, so that the printed-circuit board may move for-
ward about 1/8" during Step f, below.
a. Remove the front
panel
(one small flat-head screw near each edge--
see Fig. 2).
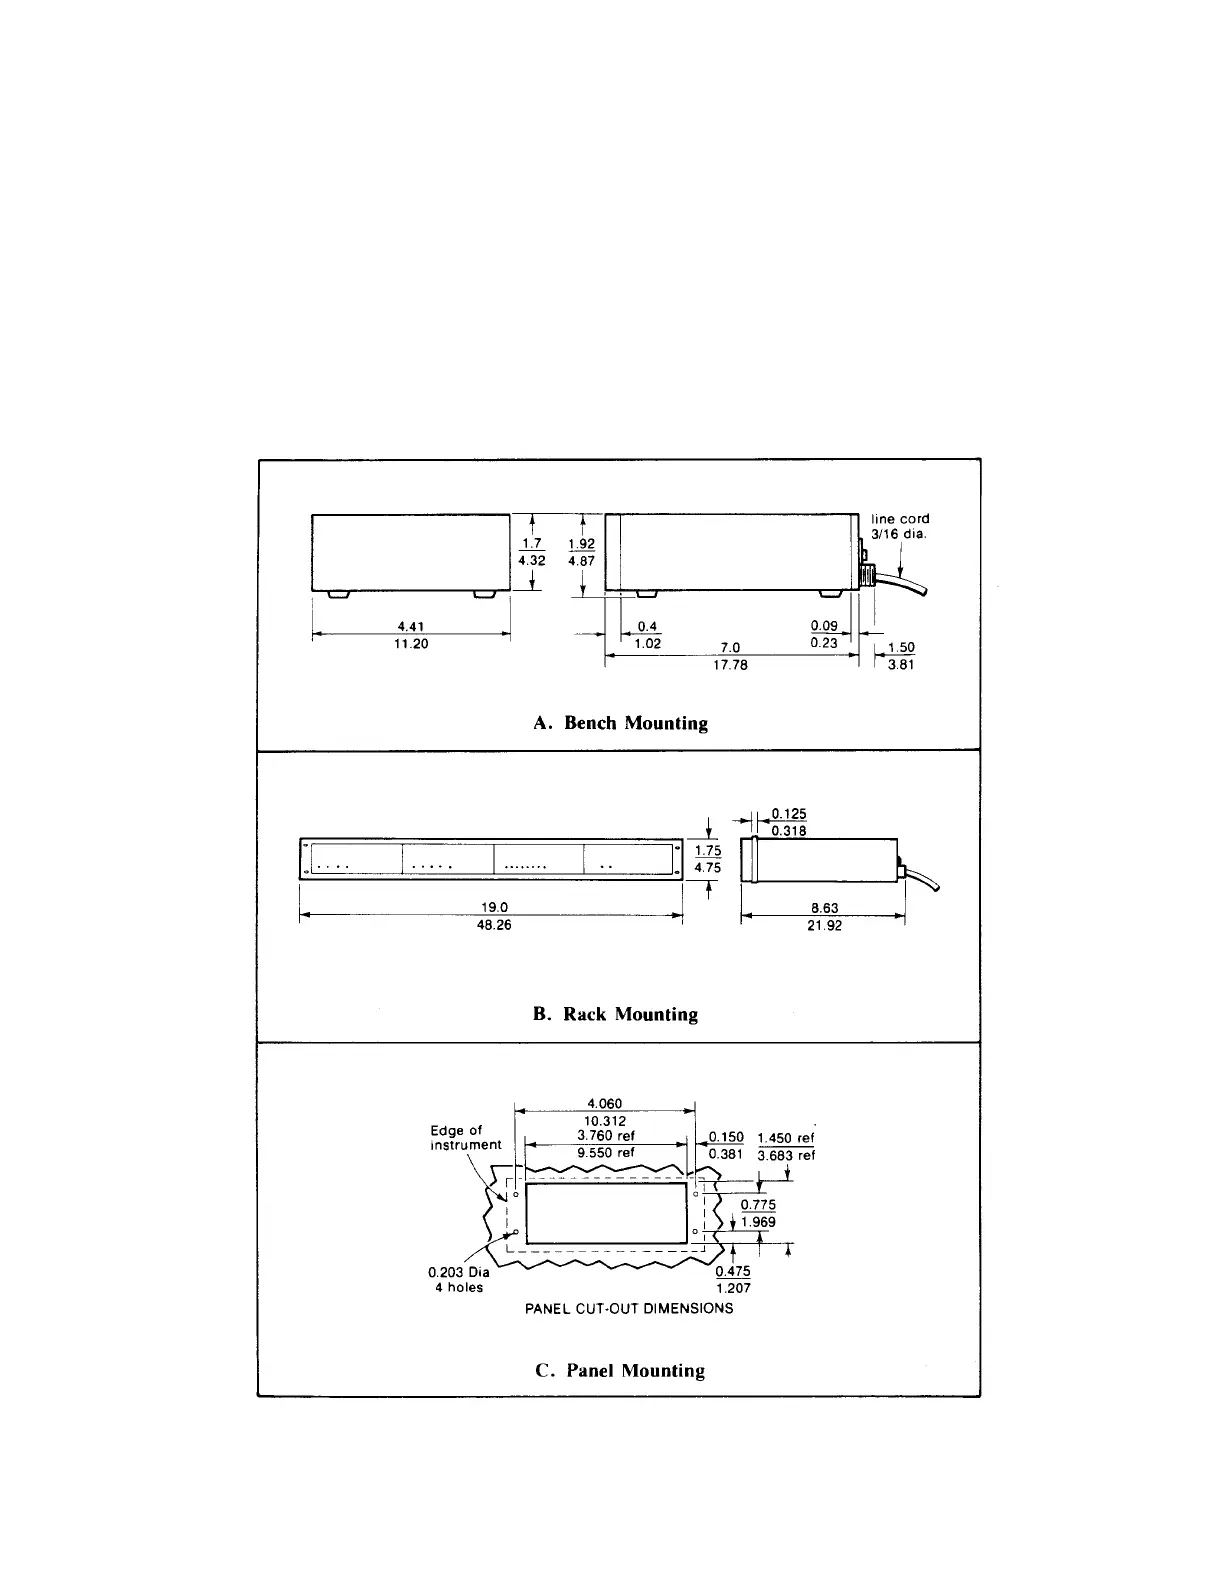
Fig. 1 Instrument Mounting Dimensions

Questions and Answers:

Question and Answer IconNeed help?

Do you have a question about the DayTronic 3000 series and is the answer not in the manual?

DayTronic 3000 series Specifications

General IconGeneral
BrandDayTronic
Model3000 series
CategoryAmplifier
LanguageEnglish