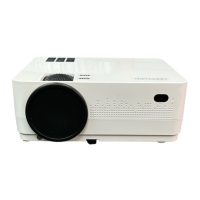
The DBPOWER L23 Mini LCD Video Projector is a versatile device designed for home entertainment and personal use, offering a range of features for an immersive viewing experience. It is important to note that this projector is not recommended for professional presentations such as PPT, Excel, or Word documents. For optimal clarity, it is advised to set your PC/laptop screen resolution to 1280x720. The projector is best suited for use in a totally dark environment to achieve the best picture quality, and it does not support Dolby Audio.
Function Description
The projector's primary function is to project video, images, music, and text onto a screen or flat surface. It supports various input sources, including USB drives, AV connections, and HDMI devices, making it compatible with a wide array of media players, computers, and gaming consoles. The device also boasts a screen mirroring function for both Android and iOS devices, allowing users to wirelessly display content from their smartphones or tablets.
Usage Features
Power On/Off: To power on or off the projector, simply press the dedicated power button located on the projector itself or on the remote control.
Multimedia Boot Screen: Upon powering on, the projector displays a multimedia boot screen within 10-20 seconds, providing options to select different media types such as AV, HDMI, Movie, Photo, Screen Mirroring, Music, and Text.
Optical Adjustments:
- Keystone Correction: If the projected image appears trapezoidal, the keystone correction knob on the projector's upper surface can be adjusted to make the image rectangular. This feature helps to correct distorted images when the projector is not perfectly aligned with the screen.
- Focus Adjustment: To sharpen the projected image, ensure the projector is horizontal to the screen and rotate the focus ring until the image is clear.
Connecting to Power: Connect the supplied power cord to the projector. The power indicator light will illuminate once the connection is established, indicating that the projector is ready for use.
Remote Control Functions: The remote control provides comprehensive control over the projector's features, including:
- Power On/Off
- Mute
- Source selection
- SoundBar Function
- Setup menu access
- Direction buttons for navigation
- Home button
- Menu button
- Return button
- Volume control (+/-)
- Insert a USB storage device into the USB port on the projector.
- From the Signal Sources menu, select "USB."
- The projector supports various multimedia file formats, including:
- Audio: MP3, WMA, OGG, AAC, MA4, FLAC, APE, WAV
- Picture: JPEG, BMP, PNG
- Video: MPEG1, MPEG2, FLV, MPEG4, RM, AVI/RMVB, MOV, MKV, DIVX, FVOB M-JPEG (note: only unsupported 640x480 resolution)
- Text: TXT
- Choose the desired content (Video, Music, Photo, or Text) from the multimedia screen.
- Select the file you wish to play and press the "Play/Pause" key on the remote control.
AV Video Connection:
- Use the supplied 3-in-1 AV cable to connect an AV device to the projector.
- Select "AV" from the Signal Sources menu.
- The projector supports NTSC/PAL video systems.
HDMI Connection:
- Connect computers or HDMI-compatible devices to the projector using an HDMI cable.
- Select "HDMI1" or "HDMI2" from the Signal Sources menu.
- The projector supports a wide range of resolutions, including 576P, 480P, 720P, 1080P, and various PC resolutions.
3.5mm Audio Connection:
- Connect headphones or external speakers to the projector using a 3.5mm audio jack.
- Please remember that Dolby sound is not supported.
Menu Settings: The projector offers a comprehensive menu system for customizing various settings:
- Picture Menu: Adjust Picture Mode (Standard, User, Dynamic, Soft), Color Temperature (Medium, Warm, Cool), Aspect Ratio (16:9, 4:3, Auto), Noise Reduction (Off, Low, Middle, High, Default), Screen (Off, On), Projection Direct (Front On, Rear On, Front Ceiling, Rear Ceiling), and HDMI Mode (Video, PC).
- Reduce Display (Zoom): This function allows you to adjust the size of the image from 75% to 100%. This feature is only valid when playing video content.
- Sound Menu: Configure Sound Mode (Standard, User, Dynamic, Soft), Balance, Auto Volume (Off, On), Volume, and BT Setting (Off, On).
- Bluetooth Mode: Turn Bluetooth on or off to search for and pair with nearby Bluetooth speakers or earphones. Press "OK" to pair or disconnect.
- Option Menu: Set OSD Language (English and 22 other languages), Restore Factory (Default), Blending (Off, On), OSD Duration (Off, On), Blue Screen (Off, On), Sleep Timer (Off, 10 min, 20 min, 30 min, 60 min, 90 min), and Software Update (USB).
- Sleep Timer: The projector can be set to enter standby mode automatically after a specified duration.
- Input Source Menu: Select the desired input source from AV, HDMI 1, HDMI 2, Screen Mirroring, VGA, or USB.
Screen Mirroring: The projector supports screen mirroring for both Android and iOS devices.
-
Android Screen Mirroring (Wireless - Recommended):
- Select "Android Screen" from the screen mirroring interface.
- Turn on WLAN on your Android device.
- Launch the Multi-screen / Wireless Display / Screen Mirroring / Smart View / Cast function on your Android device.
- Select "DBPOWER-XXXX" from the list of available devices.
- Note: Some Android devices may not support screen mirroring due to compatibility issues.
-
Android Screen Mirroring (Wired):
- Select "Android Screen" from the screen mirroring interface.
- On your Android device, enable Developer options and turn on USB debugging.
- Connect your Android device to the projector's OUT5V USB port using the original USB cable.
- When the "Allow USB Debugging" window appears, select "Always allow from this computer" and tap "OK" to begin screen mirroring.
- Tips: USB debugging steps may vary by device. Some Android devices may only transfer the display without audio due to protocol restrictions.
-
iOS Screen Mirroring (Wireless with Wi-Fi Router - Recommended):
- Connect the projector to a Wi-Fi router.
- Select "iOS Screen Mirroring" function.
- Connect your iOS device to the same Wi-Fi router.
- Turn on Screen Mirroring on your iOS device and find the projector for pairing.
-
iOS Screen Mirroring (Wireless without Wi-Fi Router):
- No need to connect the projector to a Wi-Fi router.
- Select "iOS Screen Mirroring" function.
- Turn on Wi-Fi on your iOS device and search for the projector's network name (e.g., DBPOWER-B09586).
- Select the projector and enter the password "12345678." Your iOS device will connect automatically.
- Turn on Screen Mirroring on your iOS device and find the projector for pairing.
-
iOS Screen Mirroring (Streaming with Wi-Fi Router):
- Turn on the projector and select "Screen Mirroring" as the input source to enter the iOS Screen Mirroring interface.
- Open 'Settings' on your iOS device and connect to the "LEISURE470-XXXXXX" Wi-Fi (password: 12345678).
- Open http://192.168.49.1 in your mobile browser. Tap Wi-Fi AP > Scan, select your router's Wi-Fi, enter the password, and tap 'Connect'.
- Your router's Wi-Fi will be displayed on the Screen Mirroring interface for iOS after a successful connection.
- Open 'Settings' on your iOS device, connect to the same router's Wi-Fi, and turn on Screen Mirroring to find the projector (LEISURE470-XXXXXX) for pairing.
- Tips: To connect to a different Wi-Fi router, repeat these steps.
-
iOS Screen Mirroring (Wired):
- Select "iOS Screen Mirroring" function.
- Connect your iOS device to the projector's OUT5V USB port using the original USB cable.
- When the "Trust this Computer?" window appears, tap "Trust" to start screen mirroring.
- Confirm "Trust" to begin screen mirroring.
System Setup (C.Setting):
- WiFi: Connect to a Wi-Fi router.
- Reset: Restore the Screen Mirroring function to its original system state.
- OTA: Online update for software.
- Mirror Setting: Adjust mirror mode/Airplay mode.
Projector Installation:
- The projector can be ceiling-mounted. Refer to the provided diagram for proper installation.
- Ensure the projector is not placed near heat sources to prevent overheating.
- For ceiling mounting, it is recommended to contact a professional installer. Use high-quality screws of sufficient length to prevent the projector from falling. The projector plate has specific slots for mounting.
Maintenance Features
Safety Precautions: Adhering to safety guidelines is crucial for the longevity and safe operation of the projector.
- Always read the user manual before use.
- Use only the supplied power cord with a properly earthed electrical socket.
- Ensure the power voltage matches the projector's specifications.
- Do not disassemble the projector, as this will void the warranty.
- Avoid looking directly into the lens when the projector is on, as it can cause eye damage.
- Do not block the air vents during use to prevent overheating.
- Keep the projector away from water and other liquids, as it is not waterproof.
- Avoid using the projector in wet or moist conditions to prevent electric shock.
- Unplug the appliance when not in use for extended periods.
- Use original packaging foam or anti-shock material when relocating the projector.
- Contact DBPOWER customer support for any issues.
- The projector comes with a 12-month warranty (excluding the frame, user manual, and packaging).
Remote Control Care:
- Do not submerge the remote control in water.
- Avoid exposing the remote control to outdoors, liquid, moisture, excessive heat, or fire.
- Do not mix old and new batteries.
- Remove batteries if the remote control will not be used for a long time to prevent leakage.
- Ensure the remote control is held perpendicular to the projector's IR remote sensor for correct functionality.