Do you have a question about the De Rosa DRM312 and is the answer not in the manual?
This document provides assembly instructions for the De Rosa DRM312 Drum Kit. It guides users through the setup process, from sorting parts to making final adjustments, ensuring a stable and playable instrument.
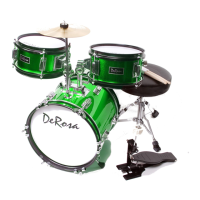
The De Rosa DRM312 Drum Kit is a musical instrument designed for percussion. It consists of several components that, when assembled, form a complete drum set capable of producing a range of percussive sounds. The primary function of the kit is to allow a drummer to create rhythmic patterns and musical accompaniment. Key components include the bass drum, tom-toms, snare drum, cymbal, and bass pedal, each contributing to the overall sound and playability of the kit. The assembly process is designed to be straightforward, enabling users to set up their drum kit for practice or performance.
The DRM312 Drum Kit offers several features that enhance its usability and performance:
The bass drum is the foundation of the drum kit, and its proper assembly is crucial for stability and sound. The instructions detail how to attach the bass drum heads and rims using lug bolts, plastic washers, and clasps. The drum key is used to tighten these components, ensuring the drum head is taut. A key usage feature here is the emphasis on even tensioning across all lug bolts, which is achieved by tapping the drum head and listening for pitch variations. A higher pitch indicates a tighter lug bolt. This method allows for fine-tuning the drum's sound.
Once the bass drum heads are secured, the bass drum spurs are inserted into their mounts. These spurs are adjustable, allowing the bass drum shell to be elevated approximately 1½ inches off the floor. This elevation is critical for stability and proper resonance. The spurs are then tightened to prevent the drum from rocking during play, ensuring a consistent and reliable performance.
The tom-toms are mounted using a tom-tom arm, which is inserted into a tom-tom mount. A key usage feature is the flexibility in positioning the tom-toms. The wing nut on the tom-tom arm is initially tightened loosely, allowing the drummer to decide the exact resting position of the tom-toms. The tom-tom extension arm can be placed on either the right or left side, accommodating different playing styles and ergonomic preferences. Once the desired position is achieved, all wing nuts are tightened securely, ensuring the tom-toms remain stable during vigorous drumming. This adjustability allows drummers to customize their setup for optimal reach and comfort.
The cymbal arm is inserted into the cymbal mount, and its position is initially set loosely. The cymbal itself is mounted using a specific sequence of felt washers and a metal washer, secured with a wing nut. This layered mounting system protects the cymbal and allows it to vibrate freely, producing its intended sound. The felt washers cushion the cymbal, preventing damage and reducing unwanted overtones. The wing nut on the cymbal mount is tightened securely once the cymbal is in its desired position, ensuring it remains stable during play. The ability to adjust the cymbal's height and angle is a crucial usage feature, allowing drummers to integrate it seamlessly into their playing style.
Similar to the tom-toms, the snare drum is mounted using a tom-tom arm and extension arm. The initial loose tightening of the wing nut allows for precise positioning of the snare drum. The extension arm can be placed on either side, offering flexibility in setup. Once the snare drum is in its desired position, all wing nuts are tightened securely. The snare drum is a central component of any drum kit, and its stable and accessible placement is vital for effective drumming. This adjustable mounting system ensures that drummers can achieve their preferred ergonomic setup.
The bass pedal is a critical component for controlling the bass drum. It clamps onto the bass drum rim, and its mallet is aligned to strike the bass drum head squarely. The wing nut on the clamp is loosened to attach the pedal and then tightened securely once the mallet is properly positioned. This ensures that every strike is consistent and effective. The precise alignment of the mallet is a key usage feature, as it directly impacts the sound and responsiveness of the bass drum.
The drum seat, or throne, is essential for drummer comfort and posture. It consists of a seat top and a seat stand. The seat stand features tripod legs that are pulled out until stable, then secured with wing nuts. The seat height is adjustable by loosening wing nuts on the neck of the stand, setting it to the desired height, and then tightening securely. Finally, the seat top is placed onto the neck of the stand and tightened. A comfortable and stable seat is a crucial usage feature, as it allows drummers to maintain proper posture and endurance during long playing sessions.
After initial assembly, the kit allows for final adjustments to suit the drummer's individual needs. This involves having the drummer sit on the seat and check if their feet can comfortably reach the bass pedal and if their hands can reach the tom-toms and cymbal without strain. Any necessary adjustments to the position of the drums, cymbal, or pedal can then be made. This customization ensures that the drum kit is ergonomically optimized for the specific drummer, enhancing playability and comfort.
While the document primarily focuses on assembly, some aspects imply maintenance practices:
The process of tightening lug bolts and checking drum head tension by tapping and listening for pitch variations is a form of ongoing maintenance. Regularly checking and adjusting drum head tension ensures optimal sound quality and extends the life of the drum heads. Over-tightening or uneven tension can damage the heads or the drum shell, so careful adjustment is a key maintenance consideration.
The repeated instruction to "tighten securely" for wing nuts and clamps across various components (tom-tom arms, cymbal mounts, bass pedal) highlights the importance of keeping all parts firmly in place. Loose components can lead to rattling, instability, and potential damage during play. Regularly checking and re-tightening these fasteners is a simple yet effective maintenance practice to ensure the kit remains stable and performs optimally.
The suggestion to place the drum kit on a small area rug if assembling on hardwood or tile floors is a maintenance tip for both the drum kit and the floor. The rug protects the floor from scratches and provides a stable, non-slip surface for the drum kit, preventing components from shifting during play. This also helps to absorb vibrations, potentially improving the drum's resonance and reducing noise transmission.
The instruction to "open the box carefully" implies a general approach to handling the components with care. Avoiding rough handling during assembly and disassembly helps prevent scratches, dents, or other damage to the drum shells and hardware, contributing to the longevity and aesthetic appeal of the kit.
In summary, the De Rosa DRM312 Drum Kit is designed for ease of assembly and customizable playability, with built-in features that allow for fine-tuning and stability. While explicit maintenance instructions are limited, the assembly process itself incorporates practices that contribute to the kit's upkeep and performance over time.
| Pads | 12 |
|---|---|
| Velocity Sensitivity | Yes |
| Sequencer | Yes |
| Type | Drum Machine |
| Outputs | Stereo |