24
4 INSTALLATION AND ASSEMBLY
4.1 For a satisfactory installation of the product is important to:
• Ensure that the facility complies with current regulations and then dene the full project of the automatic opening;
• Ensure that throughout the course of the gate, while opening and closing, there are no friction points;
• Ensure that there is no danger of derailment and that there are not risks that it goes out of the guides;
• Make sure the gate is in equilibrium: it must not move if it stays in any position;
• Ensure that the mounting area of the motor allows the release and a manual operation easier and safer;
• Ensure that the mounting positions of the various devices are protected from impacts and the surfaces are sufciently robust;
• Do not allow the automation parts are immersed in water or other liquids.
WARNING: If a deadman control is used for the movement of the door, this must be positioned in direct view of the part to be moved.
4.2 Dened and satised these prerequisites, proceed to the assembly:
If the support surface is already available, the gear motor must be directly secured to the surface using the supplied support base,
securing it to the ground with, for example, expansion or chemical dowels.
Alternatively, foundation base ART. 460 (not supplied) must be used as follows:
• Dig a hole suited to the type of ground using the quotas indicated in Fig. 3 as a reference;
• Prepare a suitably number of raceways for electrical wires;
The raceways prepared for electrical wires must be long enough to protrude inside the motor casing (Fig. 9) and must divide unit
and motor (A) power wires from the encoder and various connected accessory wires (B), to ensure correct wire insulation.
• Position the foundation base;
• Cast the concrete and, before its starts to harden, move the foundation plate to the quotas indicated in Fig. 4 being careful that it is
parallel to the door and perfectly level. Wait until the concrete fully hardens;
• Secure the adjustable support base as illustrated. Next position the gear motor on the base and secure it with the 3 screws supplied
in Fig. 5 (apply the protection caps to the heads of the M10 screws).
If the rack is already installed, place the LIVI 3/24 pinion 1-2 mm away to prevent the weight of the door from resting on the gear
motor. To do this, adjust the height of the LIVI 3/24 using the adjustable support base (FIG. 5) and then rmly tighten the lock nuts.
Alternatively, proceed as follows:
• Release the gear motor and fully open the door;
• Rest the rst part of the rack on the door being careful that the beginning of the rack matches the beginning of the door. Secure the
rack to the door with adequate means maintaining a 1-2 mm gap from the pinion (Fig. 6);
• Cut off the excess part of the rack;
• Lastly, manually move the door various times and make sure the alignment and 1-2 mm distance between the rack and pinion is met
for the entire length;
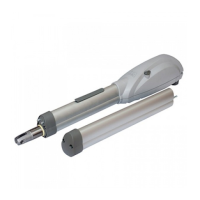
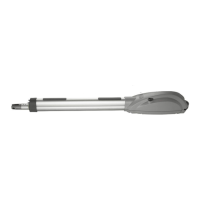
4.3 How to unlock the operator
Once you open the lock on the handle (protected by a plastic cover), the lever must be turned in the direction shown in Fig 7, at this
point the operator is unlocked and the gate, in the absence of other obstacles is free in his movements. The reverse process, turn the
lever until it stops and closing of the lock (remember to protect the lock with the proper cover), keeps LIVI 3/24 in working condition.
4.4 Limit-switches
Adjustment of the limit-switches
Some LIVI 3/24 models provides a limit-switch whose intervention must be adjusted for each installation. DEA System provides two limit
switches cams (Fig. 8) that are installed on the rack of the gate and subsequently regulated in such a way as to ensure the functionality
and safety distances in opening and closing of the gate.
Keep in mind that when the limit switches trigger, the door will move to another 2-3 cm, and it’s therefore suggested to x the end of
stroke brackets at a sufcient distance from the mechanical stops.
 Loading...