13
07
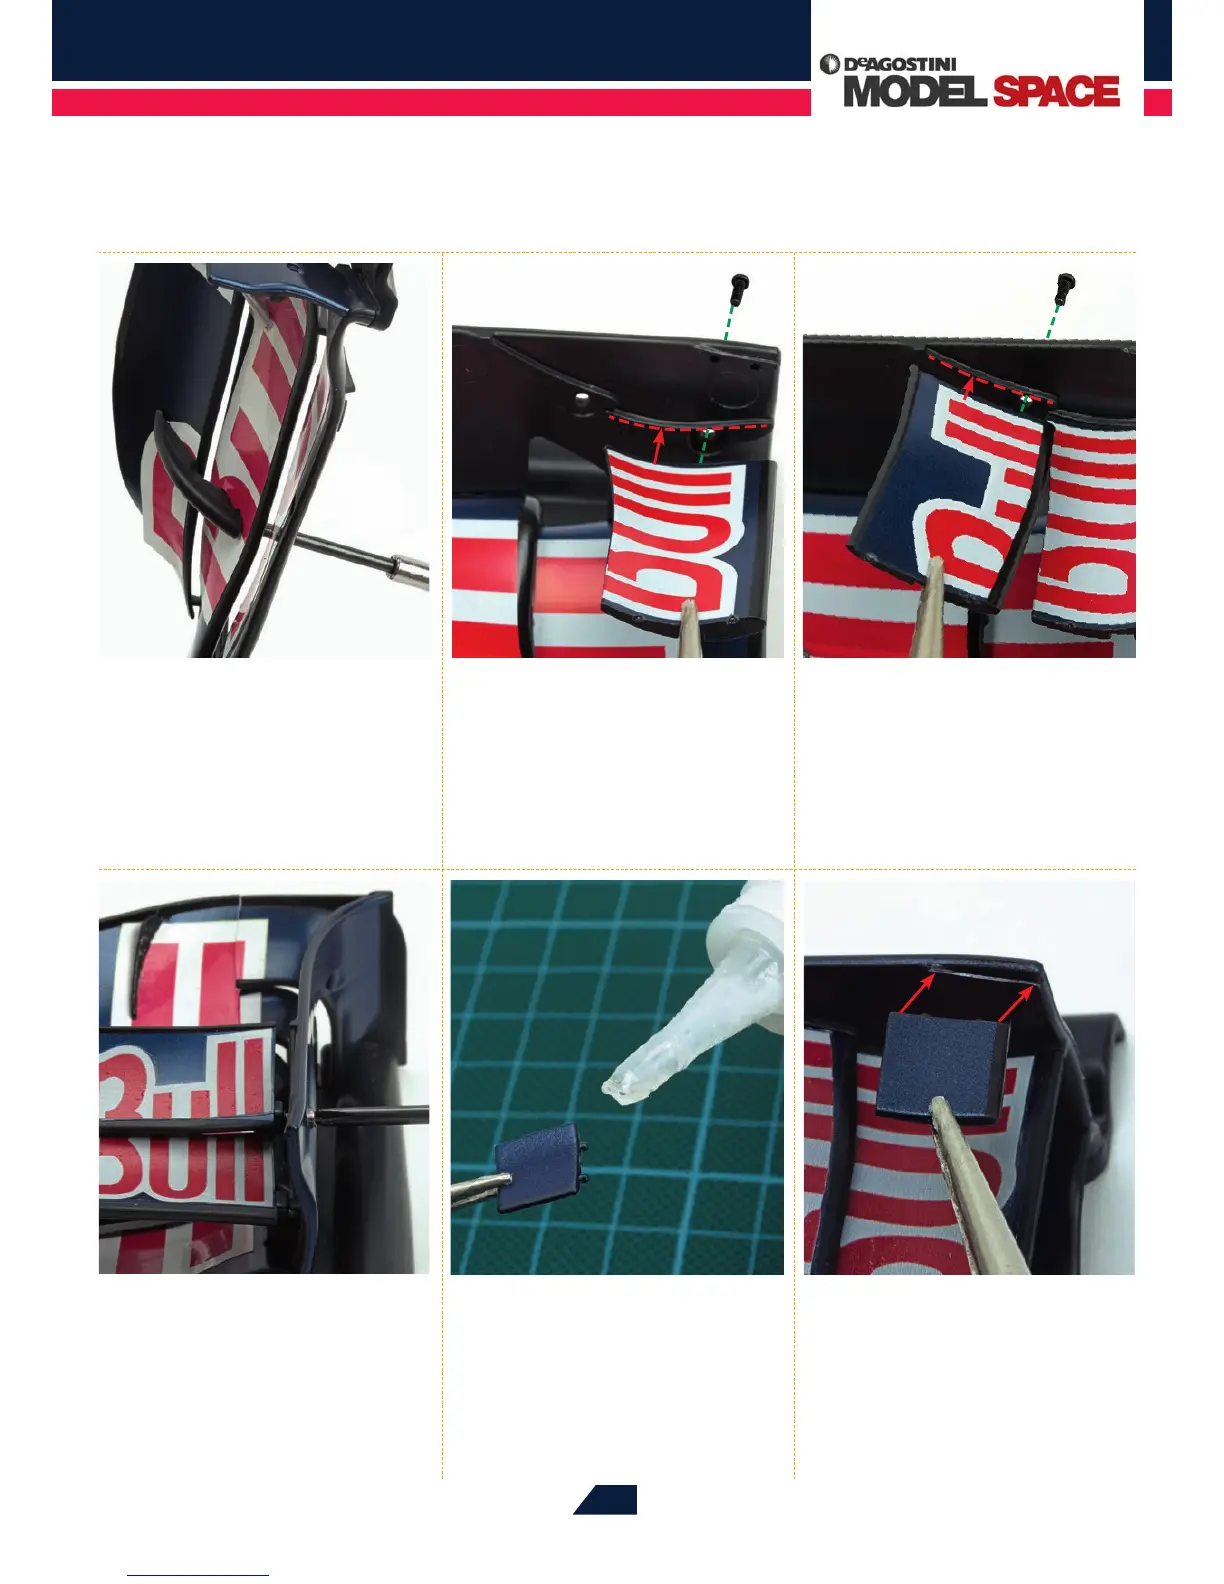
Fit a 1.4 x 4mm screw into the
hole on the underside of the
wing and screw into the hole in the
supports to secure them in place.
10
Tighten both screws placed in
Steps 08 and 09 to secure the
upper aps in place. Repeat Steps 08 to
10 for the right upper aps and the right
endplate.
11
The following steps detail the
installation of the two small upper
ns supplied with Stage 1. Using needle
nose pliers, grip one of the two ns, as
shown, and apply superglue to the pegs
and edge of the n.
12
Position the n so that its upper
edge is aligned to the inside of
the endplate (see arrows), pushing the
pegs into the holes. Press it in until it is
ush with the endplate. Repeat Steps 11
and 12 for the other endplate.
08
Take the rst left upper ap and
position on the inside of the left
endplate (red dashed line). Take a 1.4 x
4mm screw and place through the hole
to hold the the upper ap in place, as
shown (green dashed line).
09
Position the second upper ap
behind the previous one (red
dotted line). Take another 1.4 x 4mm
screw and place through the hole to hold
the ap in place (green dashed line).