Do you have a question about the Deagostini R2-D2 and is the answer not in the manual?
Distinguishes between button-top and flat-top 18650 batteries, noting button-top are required for R2-D2.
Lists critical specifications for 18650 lithium-ion batteries including type, voltage, terminals, protection, and capacity.
Step-by-step guide for testing battery voltage and charging them to full capacity using the provided tester/charger.
Instructions on how to open R2-D2's battery compartment and correctly insert the six prepared batteries.
Details connecting the mains adaptor and turning on the power switch to activate R2-D2's battery system.
Explains the visual and auditory cues R2-D2 displays during startup and readiness indication.
Describes activation and status for Patrol mode (sensors) and Arm control (extend/retract).
Details controls for Lightsaber, Wi-Fi pairing/connection, and switching between connection modes.
Explains the use of the power button for short press (on/off) and long press (force shutdown).
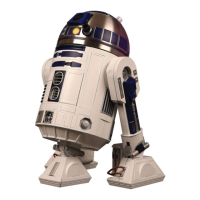
This document serves as a startup guide for building and operating your own R2-D2 unit. It provides essential information regarding battery selection, installation, charging, and initial power-up procedures, along with an overview of the R2-D2's front panel controls.
The R2-D2 unit is a buildable, interactive droid that can be controlled through its front panel buttons or a dedicated mobile application. It is designed to operate in various modes, including a "Patrol mode" where it can sense and react to its environment. The droid is powered by six rechargeable 18650 lithium-ion batteries, which users must purchase separately. These batteries are charged using an included tester/charger and USB lead, or directly through the R2-D2's external charging socket once installed. The R2-D2 features internal protection circuitry to manage battery drainage.
Before operating your R2-D2, it is crucial to carefully follow the step-by-step instructions for battery preparation and installation. The R2-D2 requires six identical 18650 lithium-ion batteries, all from the same batch and manufacturer, to ensure optimal performance and prevent damage to other cells or the protection circuitry. These batteries must be of the "button-top" type, as "flat-top" batteries will not make proper contact within the battery box. It is also important to avoid "protected" batteries, as the R2-D2 has its own protection circuit. The recommended battery capacity is between 2600-2800mAh, though capacities of 2000mAh or over are acceptable. Higher capacity batteries will provide longer standby and operating times but will take longer to charge.
The included single-cell tester/charger unit is vital for preparing the batteries. Before inserting any batteries into the R2-D2's battery box, each of the six batteries must be individually tested and fully charged using this unit. The tester/charger will display the battery's voltage and indicate when charging has started (a flashing last digit) and when it is complete ("FUL"). If a new cell shows a voltage of 3.3V or less (or "LO"), or if it doesn't charge after about 30 minutes, it is likely "bad" and should be discarded. This initial testing and charging process ensures that all batteries are in optimum condition, maximizing the performance of the entire battery pack.
Once the batteries are prepared, they are installed into the R2-D2's battery box. The battery box is accessed by undoing screws on an access panel, sliding it forward and down, and then unscrewing the battery box cover. The batteries are inserted noting that the positive terminals of the "button-top" batteries go at the end without a spring, and the positive terminals alternate at opposite ends in pairs. After installing the batteries, the battery box cover and access panel are refitted and screwed back into place.
To activate the battery and enable the R2-D2 to turn on, a specific protection procedure must be followed: plug the mains adaptor into R2-D2 and then into the mains, turn it on for a couple of seconds, then turn it off and unplug both ends. Without this procedure, the R2-D2 will not power on. This activation step needs to be repeated whenever batteries are removed and replaced.
The R2-D2 is controlled via buttons on its front panel. These buttons allow for various functions:
When the main power switch under R2-D2's body is turned on (after the battery activation procedure), the droid will perform a startup sequence: its front red light will come on, it will jerk forward, its head will rotate left and right then center, its front status display will turn purple, and its rear status display will go green or yellow, followed by a noise indicating readiness. It is important to ensure R2-D2 has sufficient space to move during this sequence.
For advanced operations, users need to install a special free app available on Google Play ("Build Your Own R2-D2" by De Agostini Publishing Italia S.p.A.) or the App Store ("R2-D2 droid control").
The R2-D2's battery pack can be recharged as a whole using its external charging socket. Once the initial testing and charging of individual cells are complete, there is no need for further special maintenance for routine recharges. If R2-D2 is turned on when connected to the mains for charging, its front red/blue status light will change color and flash to indicate the charge level.
The included tester/charger should be kept safely in case batteries need to be replaced in the future. If new batteries are installed, the entire installation process, including individual testing and charging, must be repeated. When disposing of 18650 batteries, it is important to do so safely, following recycling regulations.
| Category | Robotics |
|---|---|
| Manufacturer | DeAgostini |
| Power Source | Battery |
| Assembly Required | Yes |
| Material | Metal and Plastic |