390
03
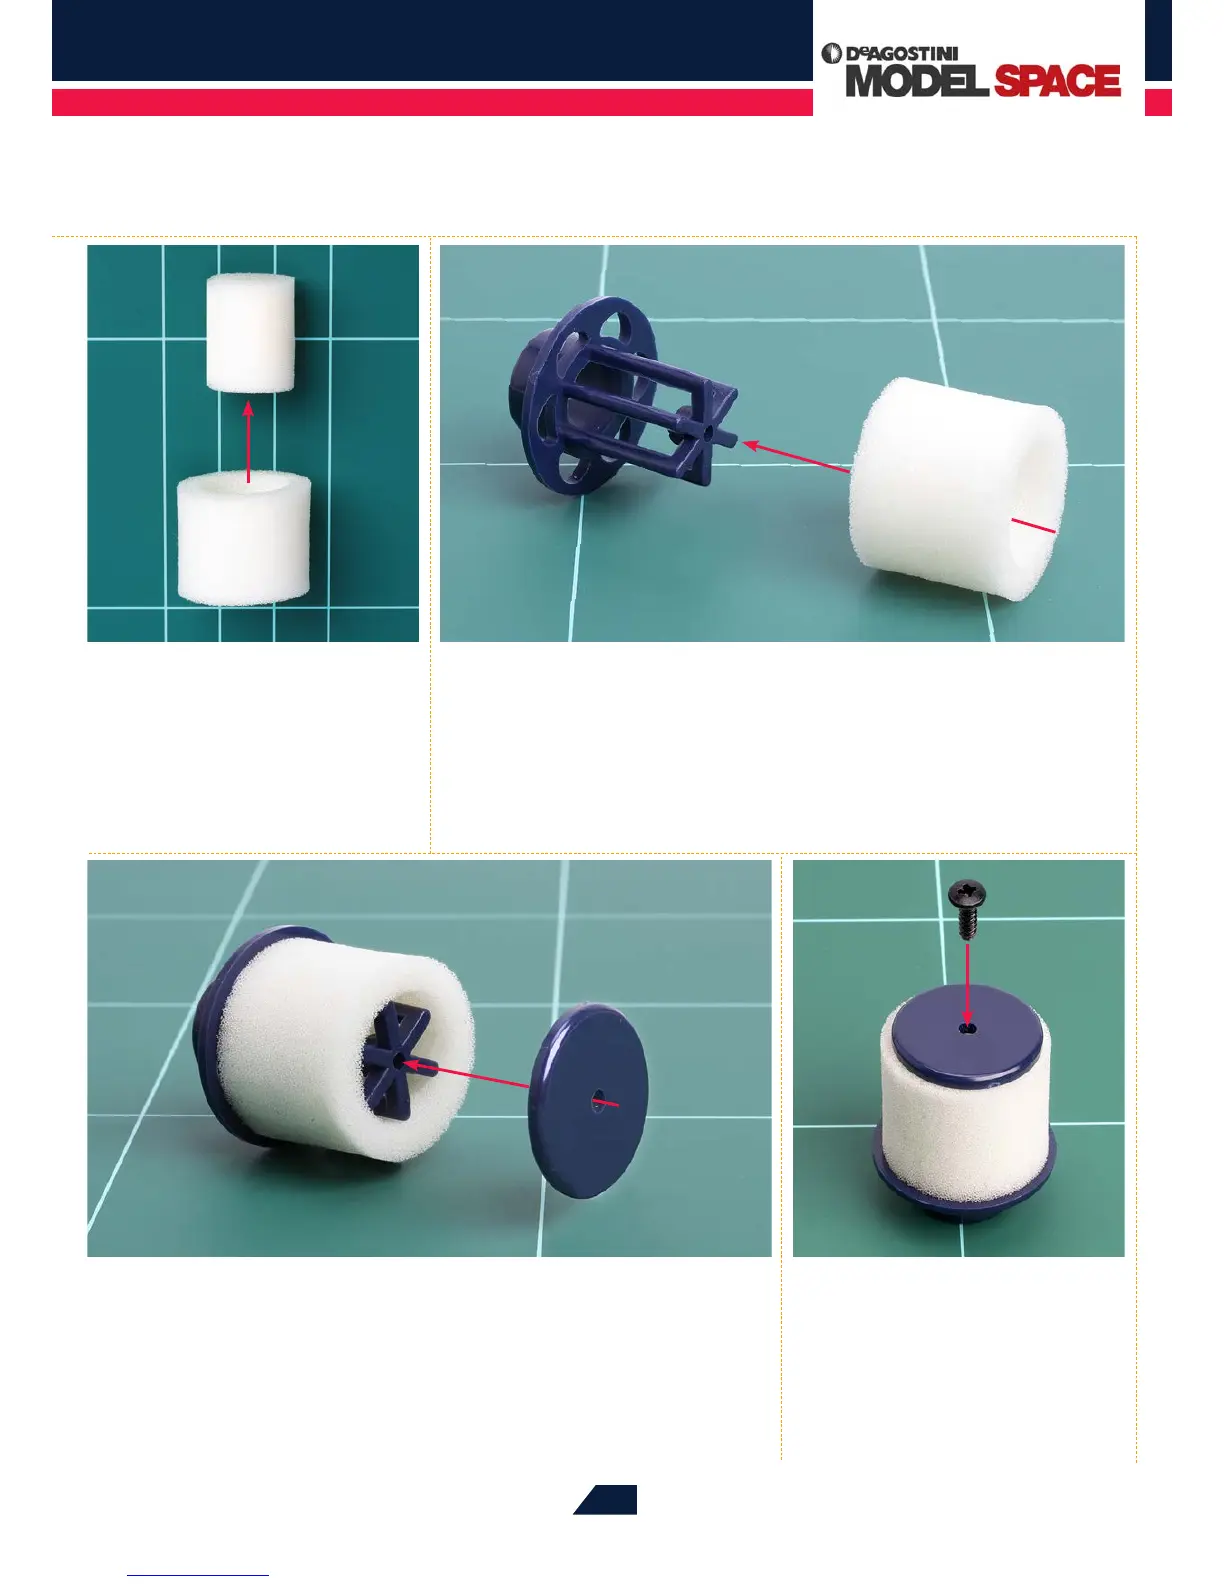
Next, t the air lter cap onto the end of the star-shaped projection, aligning the
holes as indicated by the red arrow. Then stand the lter on its base, as shown
in Step 04.
04
With the lter assembly facing
upwards, set the 2.6 x 8mm
dome-headed screw into the central
hole in the cap.
01
Remove and discard the central
section of the air lter element.
02
Though not essential, it‘s a good idea to work some air lter oil into the element
at this stage, as it will make the lter more eective (see page 375). Then push the
element over the star-shaped projection on the air lter base, as shown by the red arrow,
until it butts up against the circular rim.