ASSEMBLING ROBI’S EYES
10
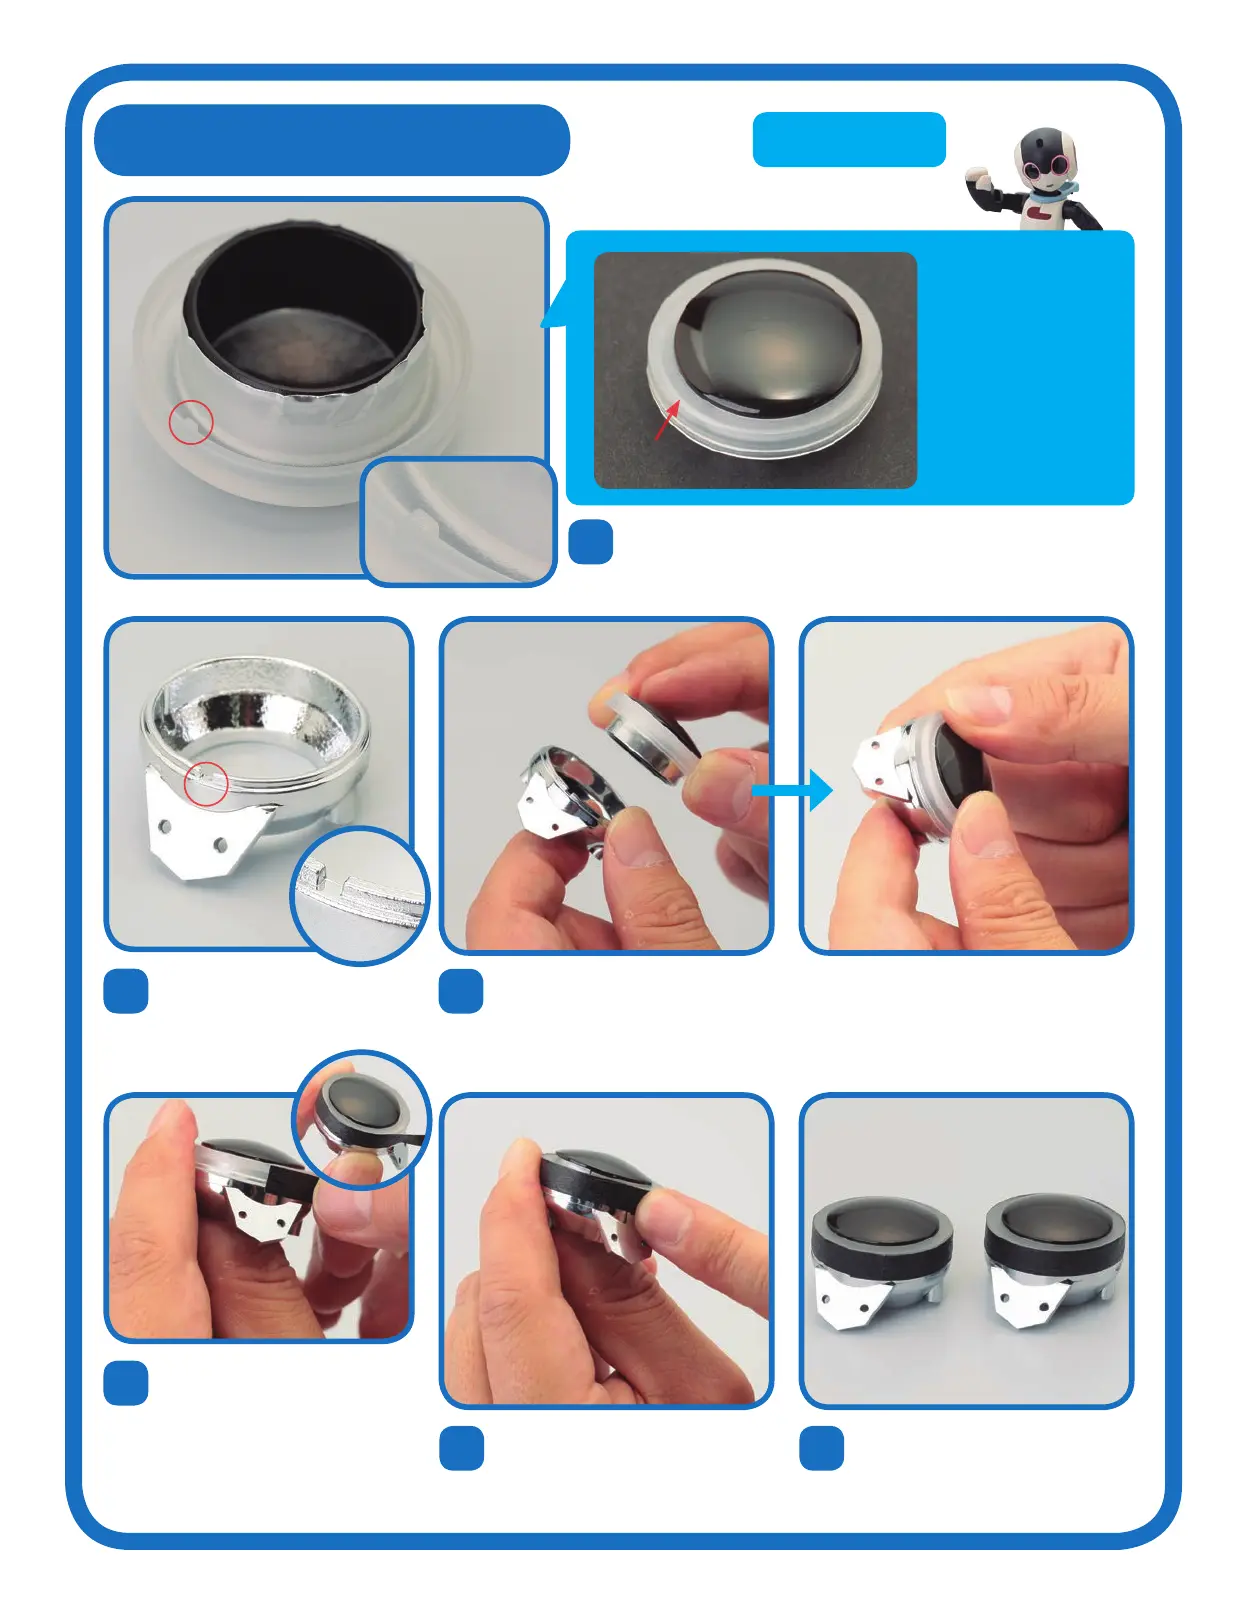
Take either of the silver eye
sockets and look for a small notch
in the silver rim, above the two
screw holes.
12
Holdin the eye in place, take
one strip of black tape and start
wrappin it around the ede of
the white border, peelin away
the backin paper as you o.
Make sure that the tape does not
overlap the front of the eye.
1413
There is more than enouh tape to
o round once, so continue wrappin
when you reach the startin point
– it is not necessary to cut the tape.
Repeat Steps 9-13 for the second
eye and eye socket. You will see
that there is no dierence between
the left and riht eyes.
11
Insert the eye into the socket, so that the projection circled in Step 9 fits
into the notch in the rim and the parts fit toether snuly.
Right head frame
9
TIP!
If you have diculty
findin the projection
indicated in the photo on
the left, turn the eye
over. You will see that the
white border is slihtly
wider on one side, and
narrower on the other.
The projection is situated
directly below the widest
point of the white border.
Lay either of the eyes assembled in Stae 1 face down on your
worktop. Find the sinle small projection on the outer ede of
the white border.
Location of
the projection
08
 Loading...